Operation Manual
73 Pages
Preview
Page 1
®
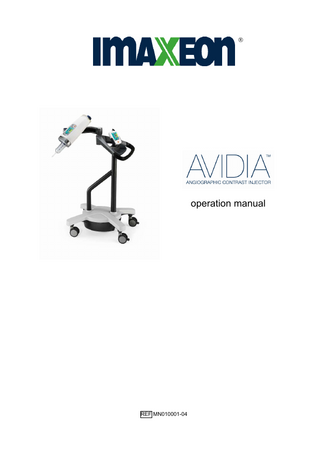
operation manual
REF MN010001-04
CONTENTS
1
INTRODUCTION ... 6
1.1
Certifications... 6
1.2
Trademarks ... 6
1.3
Disclaimers ... 6
1.4
External Connection and Modifications Disclaimer ... 6
1.5
Imaxeon Contact Information... 7
2
ABOUT THIS MANUAL ... 8
2.1
Purpose ... 8
2.2
Important Safety Notice ... 8
2.3
How to Read this Manual... 8
2.4
Symbols Used Throughout this Manual... 8
3
WARNINGS & CAUTIONS ... 10
3.1
Intended Use ... 10
3.2
Contraindications ... 10
3.3
Restricted Sale... 10
3.4
SYRINGE- Warnings and Cautions... 11
3.5
INJECTOR- Warnings and Cautions... 12
3.6
Operator Service Procedures... 16
4
GENERAL INFORMATION... 17
4.1
Injection Duration ... 17
4.2
How the Injector is designed... 17
4.3
Pressure Limiting ... 18
5
INJECTOR BASICS ... 21
5.1
Other Accessories... 22
6
COMMON SYSTEM FEATURES... 23
6.1
Monitor Symbols ... 23
6.2
Power-On Indicator ... 24
6.3
State Indicator... 25
7
QUICK START GUIDE... 26
REF MN010001-04
Avidia Operation Manual
Page 2 of 73
CONTENTS
7.1
Syringe Filling... 27
7.2
Arming & Injecting... 31
7.3
End of Injection Status... 33
7.4
Refill Injection ... 34
7.5
Repeat Injection... 34
7.6
Syringe Removal ... 35
8
DETAILED OPERATION DESCRIPTION... 36
8.1
Setup Fill - Manual and Auto Fill... 37
8.2
Purging and Manual Drawback ... 38
8.3
Flow Setup ... 39
8.4
Scan Delay ... 41
8.5
Multi-Phase Flow Setup ... 42
8.6
Injection Protocols ... 43
8.7
Injection Occlusion (Pressure stalled or Overpressure) & Overspeed ... 44
9
OPTIONS... 45
9.1
Beep Volume... 46
10
CONNECTIONS AND ACCESSORIES ... 47
10.1
External Panel Connector... 47
10.2
ISI/COMM... 48
10.3
Power Inlet ... 48
10.4
Fuse Replacement... 48
10.5
Start Button... 49
10.6
Potential Equalization Connection (PEC) ... 49
10.7
Location of Injector Head Connectors ... 49
10.8
Battery Maintenance and Replacement ... 50
10.9
Authorised Accessories ... 52
11
MAINTENANCE, CLEANING AND INSTALLATION ... 53
11.1
Maintenance... 53
11.2
Daily Inspections ... 54
11.3
Cleaning ... 57
REF MN010001-04
Avidia Operation Manual
Page 3 of 73
CONTENTS
11.4
Operator Checkout Procedures ... 60
11.5
Assembly of the Injector... 61
12
TROUBLE-SHOOTING ... 64
12.1
Fault Finding Guide... 64
12.2
Error Messages... 65
12.3
Calling Service... 65
13
SPECIFICATIONS... 66
13.1
Approvals ... 66
13.2
Functional ... 67
13.3
Controls... 67
13.4
Indicators ... 67
13.5
Mechanical ... 68
13.6
Electrical... 68
13.7
Environmental... 68
13.8
External Interfaces ... 69
13.9
Connectors... 69
13.10
Protection Against Electrical Shock ... 69
13.11
Electrical leakage ... 69
13.12
Operating ... 69
13.13
Ground Continuity ... 69
13.14
Pin-outs ... 70
13.15
Mode of Operation ... 71
13.16
Over and Under Infusion Protection ... 71
14
WARRANTY CONDITIONS ... 71
15
INDEX ... 72
REF MN010001-04
Avidia Operation Manual
Page 4 of 73
CONTENTS
©2005, 2006, Imaxeon Pty Ltd. All rights reserved. Reproduction of this operation manual is strictly prohibited without express written consent of Imaxeon Pty Ltd. For more information about Imaxeon products and services, please visit www.imaxeon.com
REF MN010001-04
Avidia Operation Manual
Page 5 of 73
1
Introduction
Thank you for purchasing the IMAXEON® Avidia™ Angiographic Contrast Injector. Read this manual and follow the safety precautions closely so you will be able to use the injector and all of its features properly and safely. Record below the model number, serial number and your IMAXEON representative’s telephone number.
Model No
Serial No:
IMAXEON Service Representative Telephone No:
For the latest support information, visit our website: http://www.imaxeon.com/
1.1
Certifications
This injector is equipped to operate at 110 – 240 Vac, 50/60 Hz, and is designed to comply with EN 60601-1 (safety) and EN 60601-1-2 (EMC/Emissions) 2nd edition standards. IMAXEON Pty Ltd is ISO 13485:2003 certified.
1.2
Trademarks
IMAXEON Pty Ltd is a subsidiary of MEDRAD Inc. MEDRAD is a federally registered trademark of MEDRAD Inc. USA. Avidia and FluiDot are trademarks of MEDRAD Inc. Used by permission of MEDRAD, Inc.
1.3
Disclaimers
This manual describes the use, operation and preventive maintenance needs of the Avidia Angiographic Contrast Injector, herein referred to as “the injector”. Qualified and trained personnel should only use the injector. Use by unqualified and untrained personnel could result in patient or personal injury and property damage. IMAXEON reserves the right to modify the specifications and features described herein, or discontinue manufacture of the product described at any time without prior notice or obligation. Please contact your authorised Imaxeon representative for the most current information.
1.4
External Connection and Modifications Disclaimer
IMAXEON disclaims liability for any modifications or interfaces with other equipment, which are not in conformity with the specifications and information contained within this manual. Such unauthorised action could jeopardize injector operation, safety, or reliability. Accessory equipment connected to the injector through the interface connections must also be certified according to the requirements of EN 60601-1. Furthermore, the combined configuration of the injector with attached accessory equipment must comply with system standard EN 60601-1-1. To obtain on-site consulting or consulting references, contact IMAXEON Service, or your local service representative. IMAXEON will make available on request any circuit diagrams, component parts lists, or other information, which will assist appropriately qualified technical personnel to repair the injector to a level deemed by Imaxeon to be field repairable. Contact IMAXEON Service, or your local service representative for further information.
REF MN010001-04
Avidia Operation Manual
Page 6 of 73
Introduction
1.5
Imaxeon Contact Information
IMAXEON Pty. Ltd. Unit 1, 38-46 South St, Rydalmere, NSW, 2116 Australia Phone: +61 2 8845 4999 Fax: +61 2 8845 4998 www.imaxeon.com [email protected] MEDRAD Europe B.V. Postbus 205 6190 AE Beek The Netherlands Phone: +31 (0)43-358 5600 Fax: +31 (0)43-365 6598 Nihon MEDRAD K.K. Central Shin-Osaka Bldg., 9F 4-5-36, Miyshara Yodogawa-ku Osaka, 532-0003 Japan Phone: +81 6 6350 0680 Fax: +81 6 6398 0670 Medrad Medizinische Systeme GmbH Industriestraße 3 97332 Volkach Deutschland Tel.: +49-9381-803-680 Fax: +49-9381-803-685 MEDRAD Asia Pte. Ltd. 200 Jalan Sultan #09-01 Textile Centre Singapore 199018 Phone: +65 6 292 5357 Fax: +65 6 292 7276
REF MN010001-04
Avidia Operation Manual
Page 7 of 73
2
About This Manual
2.1
Purpose
This manual is a user’s reference operating guide for the Avidia Angiographic Contrast Injector.
2.2
Important Safety Notice
The information in this manual is intended for medical personnel with adequate training and experience in angiographic studies. Any attempt to operate or repair a medical device such as the injector without adequate training may result in personal injury, property damage or patient injury.
2.3
How to Read this Manual
READ this manual thoroughly before operating the injector and keep the manual available in the area where the injector will be used. This manual contains important information about the safe operation of the injector. IMAXEON urges the operators of the injector to read this manual carefully, become familiar with the injector functions it describes, and follow its recommended procedures.
2.4
Symbols Used Throughout this Manual Warnings advise of circumstances that could result in injury or death to the patient or operator. Read and understand all warnings before operating the injector. Consult accompanying documents/text. The symbol is located throughout this manual and on the injector labelling as required. Warning, biological hazard Electrical Shock Hazard Cautions advise of circumstances that could result in damage to the injector. Read and understand all cautions before operating the injector. Caution, hot surface. Do not dispose in municipal waste, in accordance with the DIRECTIVE 2002/96/EC OF THE EUROPEAN PARLIAMENT AND OF THE COUNCIL on waste electrical and electronic equipment (WEEE). Identifies the terminal which provides a connection between the injector and the equipotential busbar of the electrical installation. The symbol is located on the Base power panel Identifies switch position for disconnection from line power. The symbol is located adjacent to the power switch on the Base power panel.
I
Identifies switch position for connection to line power. The symbol is located adjacent to the power switch on the Base power panel. Identifies that line power is connected. The symbol is located on the Power head user display and on the Small Monitor display Identifies that system is running on batteries. The symbol is located on the Power Head user display and on the Small Monitor display.
REF MN010001-04
Avidia Operation Manual
Page 8 of 73
About This Manual
Identifies type CF medical equipment complying with EN 60601-1 standards. The symbol is located on the Base power panel. CLASS 1
Indicates the system is Class 1 medical equipment as defined by EN60601-1 standards. The symbol is located on the Base power panel.
CB1
Identifies circuit breaker one. The symbol is located on the Base power panel.
CB2
Identifies circuit breaker two. The symbol is located on the Base power panel. Identifies protective earth. The symbol is located within the Base unit.
Identifies rotation direction on the manual knob for manually moving the injector piston. Anti-clockwise is forward movement. The symbol is located on the rear of the Manual Control Knob on the injector Power Head unit.
Identifies location for connection of the START switch - either a handswitch or footswitch can be connected. The symbol is located on the Base power panel.
Identifies the ARM button- located on the injector head
Identifies the POWER on/off button- located on the injector power head
Identifies the START button- located on the small monitor
In the interests of continually improving product quality, the specifications and illustrations in this manual may change at the discretion of the manufacturer
REF MN010001-04
Avidia Operation Manual
Page 9 of 73
3
Warnings & Cautions
WARNING Warnings advise of circumstances that could result in injury or death to the patient or operator. Read and understand all warnings before operating the injector.
CAUTION Cautions advise of circumstances that could result in damage to the injector. Read and understand all cautions before operating the injector.
3.1
Intended Use
The injector is intended to be used specifically for the purposes of injecting contrast agents and common flushing solutions into humans for angiographic diagnostic procedures. DO NOT attempt to use the injector for any other purpose.
3.2
Contraindications
This device is not to be used for drug infusion, chemotherapy, or any other use for which the device is not indicated.
3.3
Restricted Sale
Imaxeon company policy restricts this device to sale to, or on the order of, a physician.
WARNING DISCONNECT THE PATIENT IMMEDIATELY FROM THE INJECTION IF A SYSTEM MALFUNCTION OCCURS: Turn the injector off and immediately disconnect the injector from the patient. DO NOT reconnect until the injector has been powered up, armed and a test injection performed to verify that the injector malfunction has been resolved. If a fault message is repeatedly displayed, and/or the injector is not operating as customary, DO NOT use the injector until the condition causing the message display can be identified and corrected. Contact IMAXEON Service, or your local service representative for assistance.
REF MN010001-04
Avidia Operation Manual
Page 10 of 73
Warnings & Cautions
3.4
SYRINGE- Warnings and Cautions WARNINGS •
CORRECTLY LOAD THE SYRINGE. Improper loading may cause an under volume delivery, air embolization or personal injury. See Section 7.1.3 for correct loading procedures
•
FILLED SYRINGES, WHICH ARE STORED, CAN PROMOTE BACTERIAL GROWTH. Imaxeon syringes are intended to be filled, and then used immediately. Discard all filled syringes, in particular when removed from the injector for some period of time.
•
MINIMIZE THE LENGTH OF THE FLUID PATH FROM THE SYRINGE TO THE PATIENT. The connection of additional infusion systems/ accessories to the central fluid path from the injector to the patient increases resistance to flow. This could cause under flow rates, under volumes, or stall conditions which could possibly cause the procedure to be repeated.
•
USE EXTREME CARE WHEN SELECTING FLOW RATES to avoid the unintentional programming of an inappropriate high rate injection. Always check settings before arming and injecting; high flow rate injections may cause patient injury.
•
AIR EMBOLIZATION CAN CAUSE PATIENT INJURY OR DEATH, DO NOT CONNECT A PATIENT TO THE INJECTOR UNTIL ALL TRAPPED AIR HAS BEEN CLEARED FROM THE SYRINGE, CONNECTOR TUBING AND CATHETER. Operator vigilance and care, coupled with a set procedure is essential to the avoidance of air embolism. See Section 7.1.3 for loading procedures and use of FluiDot indicators.
•
REFILLING A SYRINGE INCREASES THE RISK OF BIOLOGICAL CONTAMINATION. Do Not Use Disposable Items On More Than One Patient. Discard disposable items after each use.
•
PATIENT INFECTION MAY RESULT FROM THE USE OF NON-STERILE COMPONENTS, do not remove plunger to fill the syringe. Maintain sterility of all disposable components.
CAUTIONS •
THE SYRINGE AND PRESSURE JACKET MAY BE DAMAGED IF HIT WITH TOOLS WHILE ATTEMPTING TO ELIMINATE AIR. Only use the palm of hand to gently hit the syringe or pressure jacket to dislodge air bubbles.
•
ENSURE PRESSURE SETTINGS ARE LOWER THAN CATHETER AND CONNECTOR RATINGS. Should an occlusion occur, disposable components with a lower pressure rating may be subjected to pressure beyond their capability, resulting in failure.
•
THE SYRINGE HEAT MAINTAINER INCORPORATES A FAILURE INDICATOR LIGHT, IF INDICATOR LIGHT IS LIT WHILE ON THE SYRINGE, REMOVE THE HEAT MAINTAINER. This indicates that the syringe heater is overheating and should not be used.
REF MN010001-04
Avidia Operation Manual
Page 11 of 73
Warnings & Cautions
3.5
INJECTOR- Warnings and Cautions
WARNINGS •
PATIENT INJURY COULD OCCUR IF THE ON SCREEN MANUAL FILL CONTROLS OR MANUAL KNOB ARE USED WHEN THE PATIENT IS CONNECTED. This could cause injury to the patient by delivery of contrast or blood extraction and may require the procedure to be repeated.
•
A POSSIBLE EXPLOSION RISK EXISTS IF THE INJECTOR IS USED IN THE PRESENCE OF FLAMMABLE ANAESTHETICS.
•
REGULAR MAINTENANCE SHOULD BE PERFORMED. To ensure that the injector stays properly calibrated and that all primary and backup systems are functioning properly, YEARLY SAFETY CHECKING IS RECOMMENDED. Contact your local Imaxeon Service Representative for further information.
•
ELECTROMAGNETIC INTERFERENCE. The injector must be installed in a suitable EMC environment according to the following:
•
Portable and mobile RF communications equipment can affect Medical Electrical Equipment.
•
To maintain compliance with IEC 60601-1-2 EMC compatibility requirements, do not substitute cables or connectors not recommended by the manufacturer as emissions or decreased immunity to interference may result causing erratic operation.
•
PLUG THE INJECTOR DIRECTLY INTO PROPERLY GROUNDED AC POWER OUTLET. Do not use an extension power cord or adapter. Since the injector power cord supplies a safety ground to the injector during charging, using an extension cord will compromise the ground quality and the injector could become unsafe.
•
PROTECTIVE EARTH CONDUCTOR. Should the integrity of the external protective conductor in the installation or its arrangement be in doubt, the injector must be operated from the internal power source
•
CONNECTION TO OTHER EQUIPMENT. Injectors bearing the CE mark and having accessory equipment connected to the interface connectors must be certified according to the IEC 60601-1 standard. Furthermore, all configurations of injectors with attached accessory equipment must comply with system standard IEC 60601-1-1. Anyone who connects additional equipment to the signal input or output part configures a medical system and is therefore responsible that the system complies with requirements of the system standard EN 60601-1-1. To obtain on-site consulting or consulting references, contact local Imaxeon Service Representative.
•
A BIOLOGICAL HAZARD MAY RESULT IF FLUIDS, IN PARTICULAR BLOOD OR BODILY FLUIDS, TO COME INTO CONTACT WITH THE INJECTOR. Fluid ingress could also adversely affect the function of the injection. Clean the injector immediately, according to the procedure described in 11.3.
REF MN010001-04
Avidia Operation Manual
Page 12 of 73
Warnings & Cautions
CAUTIONS •
REMOVAL OF COVERS MAY ALLOW ACCESS TO DANGEROUS VOLTAGES. Contact your local Imaxeon Service Representative for correct maintenance procedures, do not remove any covers or disassemble the injector in any way. Inspect the injector periodically for loose or frayed cables, loose covers, signs of cracks, dents or loose hardware. Refer all injector servicing to authorised Imaxeon service representatives.
•
SHOCK HAZARD when cleaning. In order to avoid shock and prevent damage to the injector, always disconnect the injector from line power before cleaning. Ensure that the injector is completely dry before reconnecting to line power.
•
LINE VOLTAGE HAZARD. To avoid dangerous voltages, do not remove the IEC connector (base cable) while line power is applied to the injector. Always disconnect the injector from line power before removing the IEC power connector.
•
DO NOT POSITION THE INJECTOR PEDESTAL BY PULLING ON THE INJECTOR HEAD, DISPLAY OR CABLING. Possible injury can occur if the injector head or stand falls on the patient or technician. Move the injector by grasping the handle and pulling or pushing the pedestal into place. Do not use the arm to lift the injector.
•
PINCH HAZARD. Do not grasp any pivot points. Position the injector head by grasping the head alone.
•
OPERATOR INJURY MAY RESULT IF EXCESSIVE WEIGHT IS APPLIED TO THE DEVICE. Do not place heavy objects or lean on the arm, injector head, or handles.
•
OPERATOR INJURY MAY RESULT FROM BOTTLES FALLING FROM TRAY. Do not place bottles on top of tray. Ensure that the bottles are placed in the recesses provided.
•
OPERATOR INJURY MAY RESULT DURING THE TRANSPORT OF THE INJECTOR. Care should be used when transporting the injector. Ensure that the arm is properly secured in the locked position.
•
OPERATOR OR PATIENT INJURY MAY RESULT FROM INADVERTENT MOVEMENT OF THE ARM OR INJECTOR HEAD. Periodically examine the articulating arm for signs of swaying and drooping. If any of these signs are evident, do not use the injector. Contact your local Imaxeon Service Representative for assistance.
•
FOR CORRECT OPERATION, use only accessories and options provided by Imaxeon, which are designed specifically for the injector. Other accessories or options may cause equipment damage.
•
IMPROPER OR CARELESS CLEANING METHODS MAY RESULT IN EQUIPMENT DAMAGE. When cleaning any outside surface of the injector, avoid allowing any water or cleaning solutions to leak inside system components.
•
STALL CONDITIONS CAN OCCUR when a low flow rate is selected in conjunction with a lowpressure limit. Check the fluid path for a blockage. If no blockage exists in the fluid path, adjustments may be made to the flow rate or pressure limit according to physician’s orders.
•
ELECTRICAL DAMAGE COULD OCCUR DUE TO CONDENSATION if the injector is brought indoors from extreme outside temperatures and immediately used. Allow the injector to stabilize at room temperature before use.
REF MN010001-04
Avidia Operation Manual
Page 13 of 73
Warnings & Cautions
•
CONNECT TO CORRECT LINE VOLTAGE AND FREQUENCY. Before applying line power, check the voltage and frequency range marked on the serial number tag on the base of the injector. The injector may be damaged when line power is outside the stated voltage range. Verify that the injector has the proper cord set for the plug style.
•
PROVIDE SUFFICIENT CLEARANCE AROUND THE INJECTOR. This may cause the injector to overheat and shut down. Installation clearance should be a minimum of 10cm.
•
THIS DEVICE CONTAINS MATERIALS THAT ARE POTENTIALLY HAZARDOUS TO THE ENVIRONMENT. In accordance with the DIRECTIVE 2002/96/EC OF THE EUROPEAN PARLIAMENT AND OF THE COUNCIL on waste electrical and electronic equipment (WEEE), the Avidia system and accessories should not be disposed as unsorted municipal waste. Contact your Imaxeon Service Representative for disposal details.
•
REMOVE POWER WHEN DISCONNECTING OR RECONNECTING HEAD CABLE. Disconnecting the head cable from the injector pedestal when line power is applied may cause equipment damage.
•
BATTERY PACK DISPOSAL. The injector contains lead acid batteries housed in a custom pack. Please dispose of this pack within environmental pollution guidelines depending on your local regulations.
•
INJECTOR MAY DISARM OR FAIL TO OPERATE WHEN EXPOSED TO HIGH MAGNETIC FIELDS. Do not use radio transmitters, cellular phones or devices generating electrostatic discharge in the vicinity of the injector.
•
CLOSE INJECTOR SYRINGE HOLDER BEFORE MOVING THE PISTON. The piston or the motor drive mechanism could be damaged if it collides with the syringe holder or any other object when in motion.
•
THE SYRINGE HEAT MAINTAINER MAY BE HOT WHEN IN OPERATION. Avoid holding the heat maintainer when in operation.
•
THE BASE COVER MAY BE DAMAGED BY IMPACT. This may also damage the components in the base. Avoid stepping on the base cover.
•
MOVING THE INJECTOR MAY CAUSE RISK OF CATHETER PULL-OUT DURING INJECTION. When injecting, lock the wheel castors, and prevent the injector head from moving. When moving the injector again, ensure the castors are unlocked, to avoid the injector tipping over.
REF MN010001-04
Avidia Operation Manual
Page 14 of 73
Warnings & Cautions
WARNING TRANSPORTATION OF THE INJECTOR The injector can topple over if moved on surfaces at angles greater than 10º to the horizontal with the power head oriented at the point of furthest extension. Always fold the injector head in-board as far as possible towards the bridge handle to assist with stability during transportation The arm incorporates a locking mechanism which automatically locks closed when the arm is rotated towards the handle. Secure the injector head in this position before transportation or changing the battery pack. See the illustration, and Lock and Unlock instructions below. Lock the castors before moving the injector head to prevent the injector from moving. TO LOCK: 1. Position the injector head nose down as shown in the illustration 2. Locate the small knurled button under the arm pivot point on the handle assembly 3. Pull the button down and gently move the arm towards the front of the injector 4. The arm will be free to rotate and should be carefully pulled so that the injector head does not collide with the Small Monitor. As the injector head approaches the locked position, note that the button will click into place to lock the arm. TO UNLOCK: 1. Pull down on the button whilst moving the arm away from the locked position. 2. Continue to move the arm until the button retracts into the normal use position
REF MN010001-04
Avidia Operation Manual
Page 15 of 73
Warnings & Cautions
3.6
Operator Service Procedures
The operator can perform the following procedures, described in this manual. 1) Injector Assembly
Section 11.5
2) Maintenance Checks
Section 11.1
3) Cleaning
Section 11.3
4) Fuse Replacement
Section 10.4
5) Pressure Jacket Inspection and Replacement
Sections 11.2.1 and 11.2.2
6) Battery Replacement
Section 10.8.2
7) Operator Checkout Procedure
Section 11.4
To ensure patient, operator safety, all other service operations should be performed by qualified IMAXEON service personnel.
REF MN010001-04
Avidia Operation Manual
Page 16 of 73
4
General Information
In order for contrast media to flow through the disposable system (connector tubing, stopcock, and catheter), the pressure in the syringe must exceed the resistance of the disposable system. Pressure in the syringe is generated by the force driving the syringe plunger. This pressure decreases over the entire length of the disposable system. As the fluid flows out the end of the catheter, there will be virtually no pressure. Pressure will be essentially zero at the open (unrestricted) end of the catheter because there is no resistance to fluid flow. Pressure is related to the amount of force, which the injector head must apply to the syringe in order for fluid to flow at the selected rate. To achieve a selected Flow Rate, the pressure exerted by the plunger must be great enough to overcome the resistance of the disposable system. Flow rates are expressed in terms of mL/s. Pressure developed by the injector is measured relative to the atmosphere pressure outside of the syringe or connector tubing. The pressure developed by the injector is expressed in terms of “Gauge Pressure” or “PSIG” which is the “Absolute Pressure” or “PSIA” minus the atmospheric pressure. Hereafter, pressure displayed as psi refers to gauge pressure. The default pressure display is psi (this can be changed to kPa in the Option settings, Section 9). See the table at the end of this section for conversion factors.
4.1
Injection Duration
Injection duration is the length of time that the injector will require to perform the programmed protocol from the moment the start switch is depressed until the unit stops injecting. Duration is calculated by dividing the selected volume by the selected flow rate: 50ml volume 20mL/s flow rate
=
2.5s duration
The duration of a multi-phasic injection will be calculated by the injector and displayed on the screen. Injection duration is displayed on the control panel in seconds, minutes or hours depending on the selected flow scale. Selecting a rise or fall time extends the total time of the injection. The added time will be ½ of the rise/fall time. For instance, a 30 mL injection at 10 mL/sec will take 3 seconds without rise time. If a rise time of 1 second is added, ½ second is added to the total time. Now the injection will take 3.5 seconds.
4.2
How the Injector is designed
The injection system is a flow-controlled system. This means that the flow rate that is selected on the control panel is the flow rate at which the injector will deliver contrast for the duration of the injection. The only time that actual flow rates will differ from programmed flow rates is when the flow rate cannot be delivered through the selected disposables. When this occurs, the injector will automatically limit the maximum pressure to the programmed value and the resultant (lower) flow rate will be delivered. A warning message will also be displayed. The injector still injects and delivers the total volume. However, the delivered flow rate will be lower and thus, the injection duration will be longer.
REF MN010001-04
Avidia Operation Manual
Page 17 of 73
General Information
4.3
Pressure Limiting
Pressure Limit is the maximum pressure which the injector will develop. The amount of force which the injector head develops will not exceed the pressure limit 8270 kPa (1200 psi) for a 150mL syringe. Pressure limit is user-programmable from 2068 kPa (300 psi) to 8270 kPa (1200 psi) in 10 kPa increments or 1 psi increments. The injector controls delivered flow rate, at the set flow rate, whilst fluid pressure remains below a user defined maximum Set Pressure. An additional control comes into action when overpressure is likely to occur. See Section 4.3.2 for details. To change the pressure scale units, refer Section 9. 4.3.1 The Purpose of Pressure Limiting The primary purpose of pressure limiting is to protect the disposable system. It is possible to select a flow rate that is high enough to generate more pressure than the disposable system is capable of handling. However, pressure limit can be programmed over a range of 2068 to 8270 kPa (300 to 1200 psi). Regardless of the parameters selected on the control panel, the catheter gauge chosen, or the choice of other disposable components, under steady state conditions the injector will not develop more pressure than the programmed pressure limit. To minimise the potential of pressure limiting and the resultant problems, use only Imaxeon disposable products and kits. These disposable systems are designed specifically to maximise the performance of the total injection system and give consistent and reliable results. WARNING Always check the pressure and flow limitations of any disposables to be used with this injector. The system will remind you of the need to check before an injection can proceed. You are urged to visually check the packaging of disposables for a pressure and flow rate limit and adjust the injector limits to be below the limits marked on the packaging. 4.3.2
How to recognise when a Pressure Limit condition occurs
When pressure limiting occurs, the most obvious indicator is the extended injection duration. This can result in lower opacification and images that give the appearance of being “washed out”. A message is displayed on the screen when pressure limiting is reached. Therefore, if procedure images are lighter than normal (which could mean a lower flow rate was delivered than selected), pressure limiting may be occurring. Check for a pressure limit condition by comparing the actual injection duration with a calculated value (volume/flow rate). If the actual duration exceeds the calculated value, pressure limiting may have occurred. If this occurs, check the fluid path for a blockage. If no blockage exists in the fluid path, the operator may increase the flow rate setting or increase the pressure limit setting and re-arm the system. If the flow rate or pressure limit is to be increased, re-check physician’s orders.
REF MN010001-04
Avidia Operation Manual
Page 18 of 73
General Information
4.3.3 Pressure Control In order to control flow rate under abnormal conditions, the Avidia regulates syringe pressure. When the fluid path is very restrictive, the required flow rate may be difficult to achieve without exceeding the set maximum syringe pressure. Exceeding the maximum pressure is not desirable as the disposables used in the fluid path are at risk of failing. The much safer alternative is to reduce flow rate, whilst not exceeding the maximum syringe pressure even for a short period of time. This is managed by the injector as follows. Internally, the injector continuously monitors the delivered pressure and detects when the rate of change of pressure suddenly increases, which is an early indication of overpressure. 1 To protect the patient, the internal system Control Pressure, for monitoring and control purposes, is derived from the user-selected Set Pressure 2 using the following equation: Control Pressure = Set Pressure – 12.5% x Set Pressure In the event of a partial blockage, the pre-existing syringe pressure tends to generate a small pressure peak before the injector begins the flow reduction process. For example, if the user-selected Set Pressure is set to 600psi (a typical maximum pressure limitation for smaller catheters), and a sudden pressure increase is detected, the Control Pressure would be applied by the injector: Control Pressure = (600 – 0.125x600) psi = 525psi With this control in place, the pressure peak never exceeds the Set Pressure:
Set Pressure
Pressure
Control Pressure
Fast rate of pressure change detected.
Time
In the event of a sudden blockage, with a very rapid pressure rise (which can occur at high flow rates), the injector will go into overpressure, and stop without entering the flow reduction process. In this situation, the pressure can exceed the Set Pressure for very short periods of time, insufficient to damage disposable sets.
1
Overpressure may occur due to a small blockage in the disposable set, an external restriction in the fluid path, or the selection of an excessive flow rate for the disposable set size.
2
The Set Pressure is the maxmium fluid pressure that should be developed at the tip of the syringe in normal use.
REF MN010001-04
Avidia Operation Manual
Page 19 of 73
General Information
4.3.4
Pressure Scale Conversion Chart for the Injector
Psi
150
300
450
600
750
900
1050
1200
ATU (Bar)
10.2
20.4
30.6
40.8
51.0
61.2
71.4
81.6
kPa
1030
2065
3100
4135
5170
6200
7235
8270
kg/cm
10.5
21.0
31.5
42.0
52.5
63.0
73.5
84.0
Conversion Factors 1 psi = 6.893 kPa Example: Example:
REF MN010001-04
150 psi x 6.893 = 1030 kPa 1 psi = 0.0703 kg/cm 300 psi x .0703 = 21 kg/cm
Avidia Operation Manual
Page 20 of 73