informed
HF 440 Priming Procedures
Priming Procedures
7 Pages
Preview
Page 1
Priming Procedure
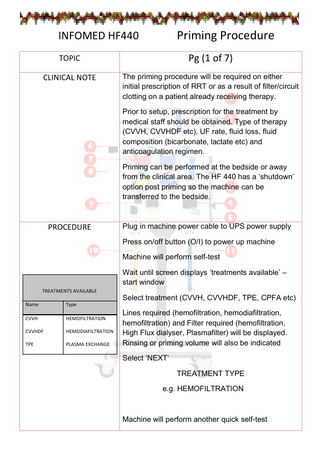
INFOMED HF440 TOPIC
Pg (1 of 7)
CLINICAL NOTE
The priming procedure will be required on either initial prescription of RRT or as a result of filter/circuit clotting on a patient already receiving therapy. Prior to setup, prescription for the treatment by medical staff should be obtained. Type of therapy (CVVH, CVVHDF etc), UF rate, fluid loss, fluid composition (bicarbonate, lactate etc) and anticoagulation regimen. Priming can be performed at the bedside or away from the clinical area. The HF 440 has a ‘shutdown’ option post priming so the machine can be transferred to the bedside.
PROCEDURE
Plug in machine power cable to UPS power supply Press on/off button (O/I) to power up machine Machine will perform self-test Wait until screen displays ‘treatments available’ – start window
TREATMENTS AVAILABLE
Select treatment (CVVH, CVVHDF, TPE, CPFA etc) Name
Type
CVVH
HEMOFILTRATION
CVVHDF
HEMODIAFILTRATION
TPE
PLASMA EXCHANGE
Lines required (hemofiltration, hemodiafiltration, hemofiltration) and Filter required (hemofiltration, High Flux dialyser, Plasmafilter) will be displayed. Rinsing or priming volume will also be indicated Select ‘NEXT’ TREATMENT TYPE e.g. HEMOFILTRATION
Machine will perform another quick self-test
INFOMED HF440 TOPIC
Priming Procedure Pg (2 of 7)
* model displayed has CPFA option
Place hemofilter/dialyser in holder on side of the machine
Open kit (HF, HDF) on a clean flat surface All lines (arterial, venous, replacement, dialysate, ultrafiltrate) are attached to a plastic backing plate
Identify cut-outs for roller pumps in the plastic backing plate Attach backing plate and circuit over roller pumps Identify roller pump segments on the circuit for blood pump, waste pump, predilution/dialysate pump and replacement pump
Open pump doors (lift up latch) Load the 4 plastic pump segments making sure segment fits across middle of rollers Close pump doors (pull down latch) – this will now hold plastic backing plate and circuit to the machine
INFOMED HF440 TOPIC
Priming Procedure Pg (3 of 7)
ON SCREEN display has 4 screen tabs (venous, purification, arterial and heater)
Venous – connect venous pressure sensor (V), insert line into air detect sensor and clamp. Connect venous line to filter. Make sure connections are tight, not cross threaded.
Purification – Attach ultrafiltrate connecter to haemofilter, connect UF pressure sensor. Insert blood leak detector chamber into sensor and connect UF line to waste bottle / bag. In CVVH mode ensure unused luer lock port on haemofilter is tight.
Arterial – Connect arterial end to haemofilter. Ensure all connections are tight.
Connect prefilter (P) and arterial (A) pressure sensors Push line onto sensor before tightening clockwise
INFOMED HF440 TOPIC
Priming Procedure Pg (4 of 7)
Attach fluids line to multiflow extension and connect to replacement/dialysate bags x 2. Normal saline (2 x 1 litre bags) are recommended by the membrane manufacturers as the priming solution.
Heater bag comes as a separate item. Place bag against heater plate gently, as described below.
Make sure there are no creases or kinks in bag or circuit. Fit top of heater bag to 3 locating pins on the heater plate and 2 bottom locating pins on the bottom of the heater plate.
INFOMED HF440 TOPIC
Priming Procedure pg (5 of 7)
The main fluid pathway between the main fluid roller pump (bottom right – blue) and the replacement /dialysate roller pump (top right – blue) has a luer connection for connection to heater bag if used Open this luer connection
The upper end closer to the bifurcation to the venous chamber and the predilution/dialysate pump can now be attached to the top of the heater bag
The lower end, closer to the main fluids pump, can now be attached to the bottom connection of the heater bag
INFOMED HF440
Priming Procedure Pg (6 of 7)
TOPIC
Once the circuit is fully attached, ensure all clamps are open and connections are tight. In addition, ensure priming solution bag tabs are broken to allow free flow of fluid into the circuit Press “start” to begin the priming procedure
Priming is semi automated, when circuit and haemofilter are filled with priming solution (approx. 8 mins), you will be prompted to adjust the level in the venous bubble chamber. Follow on-screen instructions and press validate (√ ) Priming will then continue for a further 2 mins
Once priming is complete, the following screen will be displayed There are 5 options “Shutdown” – if the machine requires movement to the clinical area or repositioning, this option may be selected. Selecting shutdown will prompt the user to turn off the machine using the on/off button on the rear of the machine (I/O). Do not turn off the machine by turning off mains power or removing AC cord. When machine is in the correct position for treatment and re-attached to UPS power, the machine may be turned on again. After initial selftest the machine will display this screen again for treatment.
INFOMED HF440 TOPIC
Priming Procedure pg (7 of 7)
“Additional rinsing” – Selecting this option will initiate further rinsing of the circuit and haemofilter. This option may be required to remove any residual air bubbles in the circuit. “Treatment” – Selecting treatment will instigate the treatment screen. Blood flow, UF, Dialysate and circuit pressures can now be set prior to attachment to vascular access. “Bubble trap” – Selecting this option allows the readjustment of the fluid level in the venous chamber. “Change container” – allows adjustment of the scale settings (weight) for both ‘waste full’ and ‘substitution empty’.
* Another way to adjust the blood/fluid level in the venous chamber is to attach a syringe via a 3-way tap to the chamber so that alteration can be made during the course of the treatment without interruption to blood flow or treatment. Connect a 3-way tap to the top of the venous chamber port with clamp Attach 20mL syringe to one port of the 3-way tap Attach male/female dead end cap to other port of 3-way tap and reconnect to priming line (this line joins to blood leak detector and is only used during priming phase.) Dead end cap prevents any blood from the venous chamber entering the blood leak detector (see picture).