Quick Reference Instructions
20 Pages
Preview
Page 1
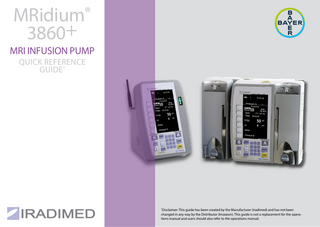
MRidium® 3860+ MRI INFUSION PUMP QUICK REFERENCE GUIDE*
Disclaimer: This guide has been created by the Manufacturer (Iradimed) and has not been changed in any way by the Distributor (Imaxeon). This guide is not a replacement for the operations manual and users should also refer to the operations manual. *
INITIAL SETUP 1.1| Selecting the Proper IV Set a. Select the 1056-50 IV Set when infusing from a bag or bottle fluid source (18mL).
b. Select the 1057-50 IV Set when infusing from a syringe fluid source (15mL).
c. Select the 1058-50 IV Set as an extension or adapter for current IV Infusions (4mL).
2
INITIAL SETUP 1.2 | Proper Flow Clamp Positioning for Priming the IV Set 1
3
2
Ready to Prime
Pull Through
Push In
Flow Closed
Flow Open
Post Prime When priming, DO NOT STRETCH the Silicon Segment of the IV Set as this can cause freeflow issues during infusions.
3
INITIAL SETUP 1.3 | Power ON the Pump Press the ( I ) button as shown to power on the pump.
1.4 | Open the Door “Push Down” on the Purple Button, “Pull Out” on the Handle.
Purple Button
Handle
Door Pin
Note: Contact your biomed department if the door pin does not look as shown.
4
3
INITIAL SETUP 1.5 | Loading the IV Set a. Insert the round Disk on the IV set into the “Disk Slot” on top of the pump. b. Tilt up and insert the top of the Black Flow Clamp into the pump, then push to insert as shown. The clamp will click when secured. DO NOT Push the Black Flow Clamp which triggers a Check Door Alarm and may cause possible Freeflow.
c. Secure tubing inside Bubble Detector d. Firmly CLOSE THE DOOR Ensure Door Handle is FULLY Latched, Open All Clamps, Vent Caps. No fluid flow should be in the drip chamber of the IV set or bubbles in a syringe. If fluid flow is present, clamp the IV tubing and repeat steps 1.2 on page 3.
5
BEFORE PROGRAMMING CHANNELS A OR B 2.1 | Selecting Infusion Type: Drug Libraries A or B Use Library A for Channel A, and Library B for Channel B
Startup Screen a. Press the softkey next to New Patient (Drug Library A)
b. Press the softkey next to Dose Rate Calc. A
or
or
Press the softkey next to New Patient (Drug Library B)
6
Menu Screen
5
Press the softkey next to Dose Rate Calc. B
5
PROGRAMMING CHANNEL A 2.2 | Selecting Medication: Drug Library A a. Press the UP or DOWN arrow keys to scroll through listed medications. Press ENTER when the proper medication is highlighted. b. Primary is highlighted, press ENTER again. Program entries with Numeric Keypad such as: - Dose; ENTER - Weight (kg); ENTER - VTBI; ENTER c. Push Start A will appear when programmed correctly. d. To start infusion, press the Start/Stop A Button.
7
PROGRAMMING CHANNEL B 2.3 | Selecting Medication: Drug Library B a. Press the MENU button. b. Press Dose Rate Cal. B (Reference 2.1) c. Press the UP or DOWN arrow keys to scroll through listed medication. Press ENTER when the proper medication is highlighted. d. Primary is highlighted, press ENTER again. Program entries with Numeric Keypad such as: - Dose; ENTER - Weight (kg); ENTER - VTBI; ENTER e. Push Start B icon will appear when programmed correctly. f. To start infusion, press the Start/Stop B Button.
8
PROGRAMMING BASIC INFUSIONS 3.1 | Rate Mode: Channel A a. Press the softkey by “New Patient- Rate Mode” on Main Menu Screen.
(as shown in step 2.1)
b. Press the softkey by RATE on the screen - Program RATE number using the Numeric Keypad - Press the ENTER Key c. Press VTBI Softkey - Program the VTBI using the Numeric Keypad - Press the ENTER key Ready to Start will appear at bottom of the screen.
d. Press the Start/Stop A Button to start infusion.
9
PROGRAMMING BASIC INFUSIONS 3.2 | Rate Mode: Channel B a. Press the softkey by “New Patient- Rate Mode” on Main Menu Screen.
(as shown in step 2.1)
b. Press the Channel B softkey - Program RATE number using the Numeric Keypad - Press the ENTER Key c. Press VTBI Softkey - Program the VTBI using the Numeric Keypad - Press the ENTER key Ready to Start will appear at bottom of the screen.
d. Press the Start/Stop B Button to start infusion.
10
TITRATING BASIC INFUSIONS 3.3 | Rate Mode: Channel A or B During Infusion In Progress a. Press the softkey by Channel A or B at the bottom of the screen. b. Press Rate softkey - Program RATE number using the Numeric Keypad - Press the ENTER Key OR c. Press VTBI Softkey - Program the VTBI using the Numeric Keypad - Press the ENTER key
11
PROGRAMMING A BOLUS 4 | Proper Dose Error Reduction System (DERS) Bolus Programming* a. To program a bolus, press Bolus Softkey A/B or press Menu Button. b. From Menu screen, press Softkey by Bolus A or Bolus B. c. Press Dose Softkey. d. Program dose using Numeric Keypad e. PRESS the TIME button, program time using Numeric Keypad. - Enter the infusion time of 6 seconds (0.1 minutes) to 99 minutes. f. Press ENTER to Start Bolus. Note: Primary infusion will resume following completion of bolus. *Bolus option ONLY available if enabled by facility pharmacy.
12
KVO (KEEP VEIN OPEN) 5 | Resuming Infusion During KVO a. Press Start/Stop A or B (depending on channel in use) to return to running screen. b. Press the VTBI Softkey. c. Program new VTBI using Numeric Keypad d. Press ENTER Ready to Start will appear at bottom of the screen.
e. Press Start/Stop A or B Button to resume infusion.
13
ALARM MESSAGES First, Review ALARM Messages, then Press the ALARM SILENCE button before proceeding.
6.1| Check Door Alarm a. If Door is OPEN - Pull BLACK FLOW CLAMP, Press ALARM SILENCE. - Set BLACK FLOW CLAMP to Pull Through Position and Reload. b. If Door is CLOSED, verify Door Handle is FULLY Latched. - Press in on Door Handle, DO NOT push down on Purple Button. - Press ALARM SILENCE. c. If Door is CLOSED and FULLY Latched, Check Door Pin Condition. - If Door Pin damaged or missing, remove pump from use. - Contact facility Biomedical Department for repair.
14
PROGRAMMING CHANNEL A 6.2| PT Occlusion Alarm Alarm will sound if occlusion between the pump and patient occurs. Check between the pump and patient to assure that All Clamps have been Opened and fluid flow is permitted.
6.3| Inlet Occlusion Alarm Alarm will sound if an occlusion has been detected between the fluid source and the pump. Check between the IV fluids and the pump to assure that all Clamps/ Vents are Opened and no tubing is Kinked or Restricted.
Vent Clamp
6.4| Bubble Detected Alarm Alarm will sound if an air bubble is in the IV Set. Open the pump door, remove the set, follow the facility’s protocol on removing air. Re-install IV set by repeating Steps 1.5 and secure tubing through Bubble Detector.
15
ALERT MESSAGES 7.1| Rate Too High Visual Message
Resolution
During Bolus Setup: Check “Time” settings and adjust as necessary. Typically the “Time value needs to be reviewed and increased if appropriate.
7.2| Rate Too Low Visual Message
Resolution
During Bolus Setup: Check “Time” settings and adjust as necessary. Typically the “Time value needs to be reviewed and decreased if appropriate.
If ALARMS persist or other technical issues not mentioned in this guide, Remove Pump from use and contact your facility’s Biomedical Department and/or your Bayer Radiology Service Team engineer.
16
ALWAYS BE AWARE OF THE FLOW CLAMP POSITION
1
Open Tubing
Ready to Prime
2
Partially Clamped
Push In
3
Clamped Tubing
Pull Through
17
NOTES _____________________________________________________ _____________________________________________________ _____________________________________________________ _____________________________________________________ _____________________________________________________ _____________________________________________________ _____________________________________________________ _____________________________________________________ _____________________________________________________ 18
NOTES _____________________________________________________ _____________________________________________________ _____________________________________________________ _____________________________________________________ _____________________________________________________ _____________________________________________________ _____________________________________________________ _____________________________________________________ _____________________________________________________ 19
Full product technical specifications are available from your Bayer MRI Business manager. Refer to MRidium1138 Operation Manual for further instruction. Information subject to change. ©
IRadimed Corporation 2020 - All rights reserved
Bayer Australia Ltd 875 Pacific Highway, Pymble NSW 2073, Australia
More information on radiologysolutions.bayer.com
Authorised Australian Representative Imaxeon Pty Ltd Rydalmere Metro Centre Unit 1, 38-46 South St Rydalmere NSW 2116 Australia Phone: + 612 8845 4999 Fax: + 612 8845 4936 Customer Service: 1800 633 723
PP-IRA-AU-0001-1 Date of preparation: May 2020
1025 Willa Springs Drive, Winter Springs, FL 32708 | (407) 677-8022