User Manual
16 Pages
Preview
Page 1
Human Care Australia Pty Ltd ABN 74 070 279 364 A member of The Human Care Group
Sales, Service & Rental Hotline 1300 132 736 (Local Call - Australia Only) Tel: +61 3 8773 1111 Fax: +61 3 9773 4008 Email: [email protected] Web: www.humancaregroup.com EC
REP
Human Care Group - Human Care HC AB Årstaängsvägen 21C, S-117 43 Stockholm, SWEDEN
Your Authorised Human Care Distributor is:
Protean 3
Head Office, Showroom & Service Centre: Unit 9, 271 Wells Road, Chelsea Heights, Victoria 3196 AUSTRALIA
~ Warranty ~
Human Care beds are designed & manufactured to provide many years of safe operation and use, when operated in accordance with these instructions.
This warranty covers parts and labour on the bed structure and standard Human Care accessories only. Consequential and other costs such as transportation to and from the repair base are not covered. Any service or other work, or interference with the bed, its components or operations, other than that by currently authorized Human Care service personnel, may invalidate this Warranty. The intended lifetime of the bed is 10 years.
32
Human Care Australia Pty Ltd - A MEMBER OF THE HUMAN CARE GROUP. Protean 3 (P3AU2) user manual July 2014 This manual may not be reproduced in part, or in whole, without the written permission of the publisher.
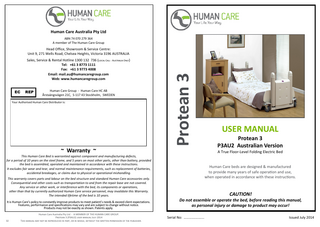
Protean 3 P3AU2 Australian Version A True Floor-Level Folding Electric Bed
This Human Care Bed is warrantied against component and manufacturing defects, for a period of 10 years on the steel frame, and 5 years on most other parts, other than battery, provided the bed is assembled, operated and maintained in accordance with these instructions. It excludes fair wear and tear, and normal maintenance requirements, such as replacement of batteries, accidental breakages, or claims due to physical or operational mishandling.
It is Human Care’s policy to constantly improve products to meet patient’s needs & exceed client expectations. Features, performance and specifications may vary and are subject to change without notice. Products may not be exactly as shown. Patents apply.
USER MANUAL
CAUTION! Do not assemble or operate the bed, before reading this manual, as personal injury or damage to product may occur! Human Care Australia Pty Ltd - A MEMBER OF THE HUMAN CARE GROUP. Protean 3 (P3AU2) user manual July 2014 Issued July 2014 This manual may not be reproduced in part, or in whole, without the written permission of the publisher.
Serial No: ………….……...
FOREWORD Human Care would like to thank you for the confidence that you have placed in us and our products, in deciding to purchase this Protean 3 bed. We are sure that your investment in this high quality and durable product will provide you with many years of excellent, costeffective service. Each bed has been tested for safety and functionality, and has left the factory in perfect condition. This User Manual informs you, as the operator, and your users, about all product features, complete assembly and all operating functions necessary to ensure ease of operation, and safe handling of this bed in its normal and expected environment. You should therefore also regard this User Manual, as a practical reference book, to be kept near the bed and readily available at all times, for anyone involved in its use or operation. We wish you and those using the bed, every success in looking after your patients, residents or guests in a safe, comfortable and multifunctional bed. Human Care Australia
NOTES ……………………………………………………..…………………...……………… ……………………………………………………..…………………...……………… ……………………………………………………..…………………...……………… ……………………………………………………..…………………...……………… ……………………………………………………..…………………...……………… ……………………………………………………..…………………...……………… ……………………………………………………..…………………...……………… ……………………………………………………..…………………...………………
Human Care Australia Pty Ltd ABN 74 070 279 364 A member of The Human Care Group
……………………………………………………..…………………...………………
Head Office, Showroom & Service Centre: Unit 9, 271 Wells Road, Chelsea Heights, Victoria 3196 AUSTRALIA Sales & Service Hotline 1300 132 736 (Local call Australia Only) T: +61 3 8773 1111 F: +61 3 9773 4008 E: [email protected] W: www.humancaregroup.com
2
Human Care Australia Pty Ltd - A MEMBER OF THE HUMAN CARE GROUP. Protean 3 (P3AU2) user manual July 2014 This manual may not be reproduced in part, or in whole, without the written permission of the publisher.
Human Care Australia Pty Ltd - A MEMBER OF THE HUMAN CARE GROUP. Protean 3 (P3AU2) user manual July 2014 This manual may not be reproduced in part, or in whole, without the written permission of the publisher.
31
CONTENTS
BED LABEL
Human Care Australia
Sample Only
P3AU2
138 kg / 304¼ lb
1. 2. 3. 4. 5. 6. 7. 8. 9. 10. 11. 12. 13. 14. 15. 16. 17. 18. 19. 20.
Foreword, Company Information ... 2 Contents, Important Advice ... 3 General Information, Compliance Details, Definitions ... 4 Technical Specifications ... 5 Safety Advice ... 6 - 7 Production Description ... 8 Standard Features, Battery Back Up, Optional Accessories ... 9 - 10 Bed Assembly (Bed Base, Mattress Platform, Cables) ... 11-14 Extending the Bed ... 15-17 Operating the Bed - Handset Control & Functions ... 18 CPR & Intubation, Castors & Brakes, Moving the Bed ... 19 Putting the Bed into Service ... 20 Folding the Bed, Cleaning ... 21-22 Troubleshooting, Bed Serial Number ... 23 Inspection, Care and Maintenance Check List ... 24 Application Environments, Guidance & Manufacturer’s Declarations ... 25-28 Symbols ... 29 Bed Label ... 30 Notes ... 31 Warranty, Company Contact Details, Authorised Representatives ... 32 DO NOT USE FORKLIFTS OR MECHANICAL HANDLING EQUIPMENT TO LIFT THIS BED UNLESS IT IS IN ITS ORIGINAL CARTON!
ALWAYS ENSURE THAT … The bed is clear from over-bed or bedside tables, Qualified Personnel only, attend to bed or other furniture which could impede free www.humancaregroup.com
maintenance. Do Not open or tamper with any part of the bed, as this may be dangerous and invalidate the warranty. All locking bolts, pins, screws and circlips are fully in place, engaged and correctly tightened before use, and are regularly checked to be secure, by qualified maintenance personnel. The battery is plugged into the control box. The bed is not placed against walls that have power-outlets, window sills or timber rails.
movement of the bed. The mattress platform is at least 200mm (8“) clear of the floor, before moving the bed. Moving the bed is done safely. Proper footwear should be worn, and care should be taken to avoid running over other people’s toes! Self-help and IV poles are lowered or removed, if moving under low doorways, near equipment or low lights. All brakes are unlocked, before moving the bed.
ALWAYS ENSURE THAT USERS, PATIENTS, Before using Bed Controls, ensure all Bed Panels can move freely, and the Head and Foot Boards RESIDENTS AND GUESTS KNOW TO… NEVER SIT ON BED EDGES, when backrest is are in place. Check that nothing is below the mattress base, being raised; damage may occur. Never place feet on castor support frames backrest, kneebreak or castor outrigger when (outrigger), at any time. Check that all cables and cords are clear of obstructions, that may interfere with bed movement. Bed movement may cut cords and cables if they are caught in the movement.
the bed is operating. Do not lower the bed to minimum height, if feet, slippers, or any other object is under the mattress base.
THIS BED GOES DOWN TO THE FLOOR! DO NOT PUT ANYTHING UNDERNEATH IT, AT ANY TIME! 30
Human Care Australia Pty Ltd - A MEMBER OF THE HUMAN CARE GROUP. Protean 3 (P3AU2) user manual July 2014 This manual may not be reproduced in part, or in whole, without the written permission of the publisher.
Human Care Australia Pty Ltd - A MEMBER OF THE HUMAN CARE GROUP. Protean 3 (P3AU2) user manual July 2014 This manual may not be reproduced in part, or in whole, without the written permission of the publisher.
3
GENERAL INFORMATION
SYMBOLS
The Protean 3 bed, (“the ‘bed”), is Instructions for the operator: manufactured in different models for Please pay attention to your obligations, as different regions. Variations exist to provide the operator, in order to ensure the for differences in power supply and plugs. permanently safe operation of this medical This User Manual has been issued to cover product, minimising risks to the patient, user the Australian version and its accessories. and/or third parties. It is possible that certain functions or features may be described, which may not be Any piece of technical equipment, electrical applicable to your model. If there are any or otherwise, can prove hazardous, if not properly operated and maintained in questions, please check your original order. accordance with its User Manual. It is This User Manual contains recommended that you are informed of all safety advice which must be followed. operations and perform regular maintenance All those involved with the bed on equipment. must acquaint themselves with Definitions: the contents of this User Manual and follow all Operator (e.g.: clinic, hospital, hospital of the Safety Advice provided. management, nursing home), is every natural The “Protean 3 - A True, Floor-Level, Folding, or legal person with property rights over the Electric Bed”, and its mechanical and bed (including when subject to hiring, rental electrical adjustment devices, is categorised or lease arrangements). by the IEC and ISO as a: Responsibility for the safe operation Class 1 Medical Product. of this bed lies with the operator. This bed has been tested and complies with
Used in the User Manual, Bed Labels & Packaging
all requirements of Standards Australia User (specialist medical staff, nurses, standards: AS/NZS 3200.1.0:1998 doctors, attendants and care staff) are AS/NZS 3200.2.38:1997 persons who, on the basis of their training, AS/NZS 3200.2.38:2007 experience or thorough instruction, are This bed complies with all requirements of entitled to operate the bed on their own the IEC/ISO International Standards: responsibility or to carry out work on it, or IEC 60601-1 Ed 3.1 : 2012-08 who have received instruction in the handling IEC 60601-2-38:2007 of this bed. Furthermore, they are able to IEC 60601-2-52:2009 recognize and avoid possible hazards as well EN1970 as assess the clinical condition of the Thus earning CE compliance. patients. The Protean 3 bed is registered with the Patient, Resident or Guest Australian Therapeutic Goods Administration In this manual, a patient is described as any (ARTG:125223). person being ill, infirm, disabled, in need of care, or otherwise occupying this bed.
Minimum Patient Age It is recommended that this bed is only used with adults, and children over fourteen (14) years of age.
4
Each time the bed is allocated, it is recommended that the patient is instructed in all the functions that are important for him/her, by the operator or user.
Human Care Australia Pty Ltd - A MEMBER OF THE HUMAN CARE GROUP. Protean 3 (P3AU2) user manual July 2014 This manual may not be reproduced in part, or in whole, without the written permission of the publisher.
Authorised Representative in the European Community Catalogue Number Caution - Consult Accompanying Documents Caution - Pinch Point - Take Care of Hand Placement/Position Class 2 Electrical Protection - Double Insulation Conformity with the essential health and safety requirements of the European Directives Consult - Instructions For Use Date of Manufacture Heat Limitation Humidity Limitation Manufacturer Maximum User Weight Not for General Waste Product should be kept dry Safe Working Load Serial Number Type B - Equipment Providing Protection against Electric Shock
Human Care Australia Pty Ltd - A MEMBER OF THE HUMAN CARE GROUP. Protean 3 (P3AU2) user manual July 2014 This manual may not be reproduced in part, or in whole, without the written permission of the publisher.
29
RECOMMENDED SEPARATION DISTANCES between portable and mobile RF communications equipment and the Protean 3 - P3AU2 Medical Bed The Protean 3 - P3AU2 Medical Bed is intended for use in an electromagnetic environment in which radiated RF disturbances are controlled. The customer or the user of the Protean 3 - P3AU2 Medical Bed can help prevent electromagnetic interference by maintaining a minimum distance between portable and mobile RF communications equipment (transmitters) and the Protean 3 - P3AU2 Medical Bed as recommended below, according to the maximum output power of the communications equipment.
Separation Distance according to frequency of transmitter (m) Rated Maximum Output of transmitter (W)
150 kHz to 80 MHz
d [
3,5 ] P V1
80 MHz to 800 MHz
d [
3,5 ] P E1
800 MHz to 2,5 GHz
d [
7 ] P E1
TECHNICAL SPECIFICATIONS Nominal Specifications (mm/inch - kg/lb) Mattress Platform Length (Standard) *
2000 mm / 78¾”
Mattress Platform Length (with Extension Kit) *
2175 mm / 85½”
Overall Bed Length (Standard-Extended) * Mattress Platform Width
900 mm / 35½”
Overall Bed Width
925 mm / 36½”
Mattress Platform Height Adjustment Range
NOTE 1 At 80 MHz and 800 MHz, the separation distance for the higher frequency range applies. NOTE 2 These guidelines may not apply in all situations. Electromagnetic propagation is affected by absorption and reflection from structures, objects and people.
28
Human Care Australia Pty Ltd - A MEMBER OF THE HUMAN CARE GROUP. Protean 3 (P3AU2) user manual July 2014 This manual may not be reproduced in part, or in whole, without the written permission of the publisher.
99 mm / 4” - 799 mm / 31½”
Bed Base Weight
84 kg / 185 ¼ lb
Mattress Platform Weight
54 kg / 119 lb
Overall Weight of Bed **
138 kg / 304 ¼ lb
Bed Operating Output Voltage
Max. 24 volts DC
Power Input Voltage / Frequency Audible Acoustic Energy Duty Cycle-Operating Time Electrical Protection Classification
0.01 0.12 0.40 0.40 0.1 0.37 1.26 1.26 1 1.17 4.00 4.00 10 3.69 12.65 12.65 100 11.67 40.00 40.00 For transmitters rated at a maximum output, power not listed above the recommended separation distance (d) in metres (m) can be estimated using the equation applicable to the frequency of the transmitter, where P is the maximum output power rating of the transmitter in watts (W), according to the transmitter manufacturer.
2325 mm - 2500 mm / 91½” - 98½”
IP Rating
220 - 240 volts, 50Hz < 65dB 10% max. 2 min operation / 18 min rest. Class 2 - Double Insulation IPX4
Mains Power Amps
Max 2 Amps
Mattress Platform Panel Angles: Backrest Thigh Knee Calf Trendelenburg / Reverse Trendelenburg
70° 45° 110° 25° 18°
Safe Working Loads (SWL) - Maximum Operating Loads Mattress Base & Bed
250 kg / 550 lb
Backrest Corner Edge or Side
25 kg / 55 lb
Maximum User Weight (MUW)
185 kg / 407 lb
*
Beds are shipped normally in standard length (sleeping space of 2000 mm / 78¾” x 900mm / 35½”), But can be extended to 2175 mm / 85½”) with the addition of an Optional Extension Kit and Bolster. ** Not including accessory weight. All measurements are subject to commercial manufacturing tolerances. (E & OE) The BED SERIAL NUMBER is located on a silver label, on the side of the top beam, under the backrest panel at the head end of the bed, on the same side as the green castor. This number is required when requesting service, spare parts or ordering additional accessories.
Record this number in the space provided, on the Front Cover and on the Check List (page 24). Human Care Australia Pty Ltd - A MEMBER OF THE HUMAN CARE GROUP. Protean 3 (P3AU2) user manual July 2014 This manual may not be reproduced in part, or in whole, without the written permission of the publisher.
5
GUIDANCE AND MANUFACTURER´S DECLARATION Electromagnetic Immunity
SAFETY ADVICE At the time of leaving the factory, this bed represents quality in design, technology and innovation. The most important objective of this safety advice is to prevent injury.
Pay attention to your obligations in order to ensure the permanently safe operation of this medical product to minimise all risks to the patient, user and/or third parties.
Safety Symbol If the bed is in long-term use, it is important after In this manual the adjacent safety warning symbol a reasonable period of time, to test all of the is shown as: functions and to check for functional and visual damage (see pages 18 & 24). 1. A Warning of Injury to Persons This safety symbol warns about the hazard of Regular preventative maintenance is the electrical voltage and other significant hazards. Operator’s responsibility. (See page 24 for the There is danger to life and health. Inspection, Care & Maintenance Check List). 2. A Warning about General Hazards This safety symbol warns about possible damage to property, including the bed and the surrounding environment, which may void the warranty. There is danger to property.
When a patient’s condition could lead to patient entrapment, the mattress platform must be left in the flat position.
6
Compliance Level
Electromagnetic Environment Guidance Portable and mobile RF communications equipment should be used no closer to any part of the Protean 3 - P3AU2 Medical Bed, including cables, than the recommended separation distance calculated from the equation applicable to the frequency of the transmitter. Recommended separation distance
Conducted RF
3 Vrms
IEC 61000-4-6
150kHz - 80 MHz
Radiated RF
3 V/m
IEC 61000-4-3
80 MHz - 2,5 GHz
3V
d [
3,5 ] P V1
d [
3,5 ] P E1
3 V/m
d [
Each time before using the bed, check that it is in perfect working order. (see page 20).
7 ] P E1
80 MHz to 800 MHz
800 MHz to 2,5 GHz a
Field strengths from fixed RF transmitters, as determined by an electromagnetic site survey, should be less than the compliance level in each frequency range.
If any damage or a malfunction is suspected, immediately unplug the bed from the mains supply, mark the bed clearly as being “OUT OF ORDER” and take it out of service. Report to the operator immediately.
Make sure that there are no obstacles (eg: bedside lockers, chairs, hoists, wall mounted fixtures, or equipment etc.) which could impede This applies in particular to using the electrical any adjusting or movement of the bed. drives and side rails (if fitted). Human Care strongly advises against the use of side rails as they are known to cause death & injury. INCOMPATIBLE SIDE RAILS CAN CREATE HAZARDS.
IEC 60601 Test Level
Make sure that stand-in or temporary staff are sufficiently well instructed in the safe operation of the bed.
Safety Advice for the Operator: With the aid of this manual, which must be handed over together with the bed, you must ensure that every user is instructed in the safe operation of the bed before it is put into service for the first time. Draw every user’s attention to the possible hazards that can arise if the bed is not used properly.
Immunity Test
Only allow this bed to be used by persons who have been instructed in its safe operation.
3. General Warning This safety symbol is also a generally useful tip. If Safety Advice for the User you follow it, you will find it easier to handle the Make sure that the operator instructs you in the bed. This tip is provided for your better safe operation of this bed. understanding. This safety symbol does not replace all the written safety advice. You are instructed to read the safety advice and follow it precisely.
The Protean 3 - P3AU2 Medical Bed is intended for use in the electromagnetic environment specified below. The customer or the user of the Protean 3 - P3AU2 Medical Bed should insure that it is used in such an environment.
THIS BED GOES DOWN TO THE FLOOR! DO NOT PUT ANYTHING UNDERNEATH IT, AT ANY TIME!
This bed is intended for indoor use only!
Human Care Australia Pty Ltd - A MEMBER OF THE HUMAN CARE GROUP. Protean 3 (P3AU2) user manual July 2014 This manual may not be reproduced in part, or in whole, without the written permission of the publisher.
b
d is the recommended separation distance in metres (m). b P is the maximum output power rating of the transmitter in watts (W) according to the transmitter manufacturer. a
Field strengths from fixed transmitters, such as base stations for radio (cellular/cordless) telephones and land mobile radios, amateur radio, AM and FM radio broadcast and TV broadcast cannot be predicted theoretically with accuracy. To assess the electromagnetic environment due to fixed RF transmitters, an electromagnetic site survey should be considered. If the measured field strength in the location in which the Protean 3 - P3AU2 Medical Bed is used exceeds the applicable RF compliance level above, the Protean 3 - P3AU2 Medical Bed should be observed to verify normal operation. If abnormal performance is observed, additional measures may be necessary, such as re orienting or relocating the Protean 3 - P3AU2 Medical Bed.
b
Over the frequency range 150 kHz to 80 MHz, field strengths should be less than 3 V/m. NOTE 1 At 80 MHz and 800 MHz, the higher frequency range applies. NOTE 2 These guidelines may not apply in all situations. Electromagnetic propagation is affected by absorption and reflection from structures, objects and people. NOTE 3 Interference may occur in the vicinity of equipment marked with the following symbol: Human Care Australia Pty Ltd - A MEMBER OF THE HUMAN CARE GROUP. Protean 3 (P3AU2) user manual July 2014 This manual may not be reproduced in part, or in whole, without the written permission of the publisher.
27
GUIDANCE AND MANUFACTURER´S DECLARATION Electromagnetic Immunity The Protean 3 - P3AU2 Medical Bed is intended for use in the electromagnetic environment specified below. The customer or the user of the Protean 3 - P3AU2 Medical Bed should insure that it is used in such an environment.
Immunity Test Electrostatic Discharge (ESD) IEC 61000-4-2 Electrostatic Transient / Burst IEC 61000-4-4 Surge IEC 61000-4-5
Voltage Dips, Short Interruptions And Voltage Variations On Power Supply Input Lines IEC 61000-4-11
Power Frequency (50/60 Hz) Magnetic Field IEC 61000-4-8 NOTE: 26
IEC 60601 Test Level
Compliance Level
Electromagnetic Environment Guidance
± 6 kV Contact
± 6 kV Contact
± 8 kV Air
± 8 kV Air
Floors should be wood, concrete or ceramic tile. If floors are covered with synthetic material, the relative humidity should be at least 30%.
± 2 kV Power Supply Lines
± 2 kV Power Supply Lines Mains power quality should be
± 1 kV Input/Output Lines ± 1 kV Differential Mode
± 1 kV hospital environment. Input/Output Lines ± 1 kV Differential Mode Mains power quality should be
± 2 kV Common Mode < 5 % UT (>95 % dip in UT) for 0,5 cycle
± 2 kV Common Mode < 5 % UT (>95 % dip in UT) for 0,5 cycle
40 % UT (60 % dip in UT) for 5 cycles
40 % UT (60 % dip in UT) for 5 cycles
70 % UT (30 % dip in UT) for 25 cycles
70 % UT (30 % dip in UT) for 25 cycles
< 5 % UT (>95 % dip in UT) for 5 sec
< 5 % UT (>95 % dip in UT) for 5 sec
3 A/m
that of a typical commercial or
3 A/m
that of a typical commercial or hospital environment.
Mains power quality should be that of a typical commercial or hospital environment. If the user of the Protean 3 P3AU2 Medical Bed requires continued operation during power mains interruptions, it is recommended that the Protean 3m - P3AU2 Medical Bed be powered from an uninterruptible power supply or a battery. Power frequency magnetic fields should be at levels characteristic of a typical location in a typical commercial or hospital environment.
UT is the a. c. mains voltage prior to application of the test level.
Human Care Australia Pty Ltd - A MEMBER OF THE HUMAN CARE GROUP. Protean 3 (P3AU2) user manual July 2014 This manual may not be reproduced in part, or in whole, without the written permission of the publisher.
SAFETY ADVICE
Always ensure that the mattress platform has travelled to its lowest position before leaving To maintain safe function of the bed and any an ‘at risk’ patient in the bed unattended. In external components, attention to cord and cable this way, you greatly reduce the risk of patient placement is extremely important. injury as a result of falling out of bed. Route the mains cable in such a way that when If a patients’ condition contains a risk of operating the bed it cannot get pulled, be cut, entrapment, then the mattress platform or be driven over, or be damaged by any should always be left in a flat position. moving parts. Take care with the use of side rails. If the side When using external electrical equipment, such rails are raised, there is a risk of limbs getting as patient hoists/lifts, reading lamps etc., make trapped or crushed on adjusting the backrest sure that the electrical cables cannot get or kneebreak. Human Care strongly caught in, or get damaged by, parts of the bed. recommends against the use of side rails. When not is use, stow the handset in such a Do not pour liquids on any part of the bed end way that it cannot inadvertently fall onto the panels or close to parts containing electrical floor; and make sure that the cable cannot get componentry, which could damage the damaged by moving parts of the bed. electronics. Before moving the bed, it is important to raise the mattress platform to at least 200mm (8”) Checks and Inspections above floor level, then unplug it from the At regular intervals, carry out a visual mains power supply. Stow the mains cable inspection of the mains cable to check for safely on the head end pedestal, to ensure that mechanical damage (e.g. scuffing, bare wires, it cannot trail on the floor. kinks, pressure points etc.). The mains power plug must be removed Regular checks of the strain relief of the mains to electrically isolate the bed. cable should be made to ensure that the To safeguard the patient, screws are tight and secure.
Cables and Cord Safety
and particularly children... Always inform the patient about safe operation of the bed’s controls. If the patient is unable to operate the bed safely or free themselves from potentially dangerous positions, they could be placed at risk through inadvertent adjustment of the electrical functions. It is recommended that children are never left unsupervised in a room with the bed. Place the handset beyond reach of children or ‘at risk’ patients, to prevent inadvertently initiating power adjustments of the bed. Use the Handset LOCKOUT key to lock movements (page 18). The handset can be placed out of reach, at the foot end. Any adjustments may then only be carried out by or in the presence of a person instructed in the proper operation of the bed.
Weekly checks should be performed...
whenever the cable has been subjected to any mechanical load (e.g. it has been driven over by the bed itself [or by an equipment trolley], or it has become bent, stretched or violently pulled, due to the bed being pulled away while still plugged into the wall socket). whenever the bed has been moved or relocated before plugging it back into the mains. where the bed is in constant operation.
Six-Monthly Maintenance Inspections are recommended... Refer to the Inspection, Care & Maintenance Check List on page 24
Human Care Australia Pty Ltd - A MEMBER OF THE HUMAN CARE GROUP. Protean 3 (P3AU2) user manual July 2014 This manual may not be reproduced in part, or in whole, without the written permission of the publisher.
7
PRODUCT DESCRIPTION
APPLICATION ENVIRONMENTS
Designated Use
Structural Design
This product (Protean 3 - P3AU2 Medical Bed) is applicable to:
This bed is designed for use in hospitals, aged care, and long-term care facilities, for the purpose of providing comfort and quality care for any person being ill, frail, disabled, or in need of special care (see Application Environments on page 25). The Safe Working Load (SWL) of this bed is 250kg (550lb). Allowances must be made for the mattress, bedding, accessories and visitors or carers sitting on, or putting extra weight on, the bed, when considering maximum patient weight or Maximum User Weight (MUW).
Mattress Platform: The mattress platform is a four panel design, divided into a back rest, a seat section and a double panel kneebreak. The mattress base can be horizontally adjusted in height. The bed can be adjusted to head-low (Trendelenburg) or feet-low (Reverse Trendelenburg ) positions.
Hospital/medical facility, acute and medical supervision Acute care provided in a hospital or other medical facility where medical supervision and monitoring is required and ME EQUIPMENT used in medical procedures is often provided to help maintain or improve the condition of the patient.
MUV = 185 Kg
SWL = 250 Kg
APPLICATION ENVIRONMENT 3 Medical area, Long Term Care Long-term care in a medical area where medical supervision is required and monitoring is provided if necessary and ME EQUIPMENT used in medical procedures may be provided to help maintain or improve the condition of the patient.
Chassis: The chassis is constructed of welded steel. It features four individually locking castors that include: 3 red Brake Castors and 1 (usually) green Directional Lock Castor.
Electrical Adjustment System: The Maximum User Weight (MUW) of this bed is 185kg (407lb). It is not recommended to use this The electric adjustment system comprises: bed for patients that weigh over 185kg (407lb). 1. The Handset for patient control of the bed’s Human Care has other suitable beds with Safe positions. It is a ‘remote-control’ attached via Working Loads up to 450kg (1000lb). a curly cord, to the bed’s control box; This bed may only be operated by persons who have consisting of a robust, easy-care, wash-down received instruction in its safe operation. plastic casing with a membrane keypad. The bed may only be operated under the 2. Actuators for adjusting and controlling the conditions of duty described in this manual. backrest, kneebreak and the bed heights. ANY OTHER USE SHALL BE REGARDED AS NONCOMPLIANT WITH SAFE, LEGAL AND CORRECT USAGE 3. AND MAY INVALIDATE WARRANTY.
Disposal Incorrect disposal of this equipment and its component parts, particularly batteries and other electrical parts, may produce substances that are hazardous to the environment. Dispose of in accordance with all applicable national and local regulations. EU WEEE and RoHS Directives require this product not to be disposed of in general 4. waste. Construction Materials The bed is built mostly from steel, or stainless steel. The surfaces have been finished with an electro-coated powdercoating. The removable head and foot boards are laminated timber. The head and foot end pedestal 5. covers of the bed are ABS plastic. The bed also comprises electrical componentry and cables. All the surfaces are non-harmful, upon coming into contact with the skin. 8
APPLICATION ENVIRONMENT 2
The Linak Control Box Unit and Battery Backup are located underneath the Head End Cover. They contain a low-voltage, safe 24V transformer. The electric motors/actuators, the battery backup and the handset (24V) are connected to the Control Box and Junction Boxes via dust and moisture-proof plugs and cords/cables. Battery Backup allows for off-mains emergency operation for up to 15 minutes under a normal load (see page 9 ). To ensure long battery life, the bed should be connected to mains power, at all possible times. Do not exceed the duty cycle (see page 5). Electrical protection of wiring and cords will differ between Class 1 (Earthed) and Class 2 (Double Insulation) Beds.
Human Care Australia Pty Ltd - A MEMBER OF THE HUMAN CARE GROUP. Protean 3 (P3AU2) user manual July 2014 This manual may not be reproduced in part, or in whole, without the written permission of the publisher.
Note: This includes use in nursing homes, rehabilitation and geriatric facilities.
APPLICATION ENVIRONMENT 4 Domestic Care: Ergonomic requirements are normative Care provided in a domestic area and ME EQUIPMENT is used to alleviate or compensate for an injury, disability or disease. NOTE :This excludes use in all other application environments (e.g. nursing homes, rehabilitation and geriatric facilities) when a medical bed is purely designed for application environment 4.
GUIDANCE AND MANUFACTURER’S DECLARATION Electromagnetic Emissions The Protean 3 (P3AU2) Medical Bed is intended for use in the electromagnetic environment specified below. The customer or the user of the Protean 3 (P3AU2) Medical Bed should ensure that it is used in such an environment. Electromagnetic Emissions Test Compliance Environment Guidance RF Emissions Group 1 CISPR 11 RF Emissions Class B CISPR 11 Harmonic Emissions Class A IEC 61000-3-2 Voltage Fluctuations / Flicker Emissions IEC 61000-3-3
Complies
The Protean 3 (P3AU2) Medical Bed uses RF energy only for its internal function. Therefore, its RF emissions are very low and are not likely to cause any interference in nearby electronic equipment. The Protean 3 (P3AU2) Medical Bed is suitable for use in all establishments, including domestic establishments and those directly connected to the public low-voltage power supply network that supplies buildings used for domestic purposes.
Human Care Australia Pty Ltd - A MEMBER OF THE HUMAN CARE GROUP. Protean 3 (P3AU2) user manual July 2014 This manual may not be reproduced in part, or in whole, without the written permission of the publisher.
25
STANDARD FEATURES
INSPECTION, CARE AND MAINTENANCE CHECK LIST User inspections should be carried out every 6 months, for the life of the bed. Care should be taken when performing maintenance.
Bed Serial Number: …………..…………...
Check for Damage/Cleanliness Confirm Secure Perform Adjustment/Cleaning
OK
Check See pages 9-10 for all parts & page 18 for all functions
Faults Action Cleaning Parts to Order
VISUAL CHECK of the Electrical Components Cables - Plugs (Clips)
No cracks/breaks, Correct routing No hanging cables
Actuators (4) Control Box Unit Battery Back-Up Unit
No cracks/breaks/dents/corrosion Securely fitted
Handset
Casing/membrane faceplate intact Handset ‘blue lockout key’ intact
Handset The Handset permits patients to control and adjust their own bed, to different positions, to suit their changing comfort levels throughout their stay in bed. (See page 18 for full explanation of keypad functions). Backrest The backrest is a large mattress panel that raises from a supine position to an upright position, convenient for sitting, which allows a patient to enjoy the flexibility of changing to multiple positions for comfort and health.
VISUAL CHECK of the Mechanical Components Nuts/Bolts, Screws/Pins, Lanyards/Clips, Hinges/Mounts/Bushes-component fixing points
Wear/damage, tighten & secure Clean & free
Chassis (Bed Base) - Bed Extension End Covers
No cracks/dents No paintwork flaked/corroded Clean & securely fitted
Castors & Tyres
Swivel independently Test brakes/directional locking Clean & tightly secured
Mattress Platform Panels - Bed Extension Head & Foot Boards Mattress Retainers Side Rail Brackets
No cracks/dents No paintwork flaked/corroded Bracket/retainer screws are tight Clean & securely fitted
Accessories e.g. Mattress, Rails, Poles (See pages 9-10 for complete list)
Intact, clean & securely fitted
Bed Serial Number (& Service) Labels, User/Service Manuals
In place & readable
PERFORMANCE CHECK of all Electrical/Mechanical Functions Using all buttons on the Handset. (see page 5 for all Technical Specifications)
Platform Hi-Lo True Floor Level Highest Platform Level
Test perfectly parallel to floor Confirm full range at all 4 corners Quiet & smooth operation
Backrest Panel Kneebreak (thigh & calf panels) Auto Contour - Cardiac Chair
Confirm full range Quiet & smooth operation
Trendelenburg & Reverse Trendelenburg
Confirm full range at all 4 corners Quiet & smooth operation
Battery Backup - Disconnect Mains Power to Test
Check fully charged & operational
Accessories (See pages 9-10 for complete list)
Intact, clean & secure
Inspector’s Name:
Inspection result:
24
Inspector’s Signature:
Kneebreak The kneebreak is a double mattress panel that splits as it electronically lifts or bends the patient’s thigh and calf at the knee, thus combining functionality and comfort for both the patient and carer.
Auto-Contour A Handset feature that uses one button to adjust both Backrest & Kneebreak simultaneously, into a cardiac chair position, even when the bed is in it’s lowest height position. Battery Backup The Battery Backup allows for operation of the bed, should mains power fail, or if the bed is being operated temporarily away from mains power. It can operate for up to 15 minutes, under a normal load, Do not exceed the duty cycle (see page 5). To ensure long battery life, the bed should be connected to mains power, at all possible times. If the backup battery becomes flat, raising/ lowering functions will slow down or cease. A replacement should be ordered and fitted. Batteries in good condition will normally recharge in 12 hours or overnight when the bed is plugged back into the mains power supply. Extended periods without mains power will make the batteries unable to be recharged or operate at all. A replacement unit will need to be ordered and fitted.
OPTIONAL ACCESSORIES It is important that only Human Care accessories are fitted to Human Care beds, as any incompatible accessories can create hazards. Human Care Australia, formerly known as The LiftCare Bed Company, pioneered, developed and manufactured world-standard beds with True Floor-Level Nursing. Human Care cares about the comfort of patients and residents. Human Care supports carer’s desires for quality patient care. Human Care considers the health and safety of all carers.
The Protean 3 bed is a “True Floor-Level” bed, featuring design quality, durability and functionality based on many years of experience and technological development. Many optional accessories are available to be fitted, upon request.
Dual Wheel Castors 125mm Dual Wheel Castors
Push Handle A multi position push handle is fitted to the foot end of the bed to assist carers with easy bed manoeuvrability.
Wall Bumper Bar The Wall Bumper Bar protects the head end of the bed. It is fitted to the lower cross beam between the castors.
Oxygen Bottle Holder A bracket holds a ‘C-size’ Oxygen Bottle conveniently to the Protean 3 Bed.
Date:
Human Care Australia Pty Ltd - A MEMBER OF THE HUMAN CARE GROUP. Protean 3 (P3AU2) user manual July 2014 This manual may not be reproduced in part, or in whole, without the written permission of the publisher.
Human Care Australia Pty Ltd - A MEMBER OF THE HUMAN CARE GROUP. Protean 3 (P3AU2) user manual July 2014 This manual may not be reproduced in part, or in whole, without the written permission of the publisher.
9
OPTIONAL ACCESSORIES
TROUBLESHOOTING
It is important that only Human Care accessories are fitted to Human Care beds, as any incompatible accessories can create hazards. Mattresses
Self Help Pole
The Protean 3 bed is designed for use with specific mattress types and dimensions measuring 1980mm (78”) long by 900mm (35”) wide and 125mm (5”) deep. It is imperative to use this size mattress to reduce the risk of entrapment and falls.
The Self Help Pole is used by a patient to assist movement within the confines of the bed. The Self Help Pole has a safe working load of 75kg (165lb).
WARNING: Incompatible mattresses can create hazards.
Intravenous (IV) Pole: The Human Care range of mattresses provide superior support and comfort while possessing intrinsic anti-bacterial and anti-fungal properties. Human Care mattresses contain no latex. Our mattresses are covered in fabrics designed for healthcare featuring: Cover is impregnated with Anti-Bacterial & Anti-Fungal Agents
Fluid-proof
Stain & Tear Resistant
Antistatic
Durable Solid Construction
Comfortable
Flame Retardant
Flexible
Extension Kit Human Care’s beds can be extended to provide extra comfort for taller patients. The kit comes complete with instructions and requires tools for fitting.
The IV Pole is used by nurses to hang drip bags to deliver a patient’s IV medication. It is height adjustable and can be fitted to both ends of the bed. The IV Pole has a safe working load of 7kg (15lb). It is important to only use Human Care IV Poles, as any incompatible IV poles could cause damage and/or injury.
Care Assist Rails Designed to assist patients safely in and out of bed, it is ergonomically designed and low profile to avoid feeling restricted or restrained.
Side Rails Human Care is aware that in some cases, side rails can be expected for care.
Only authentic Human Care side rails should be fitted to a Human Care true floor-level bed, as The sleeping space of the bed is extended by any incompatible side rails may cause damage 175mm (7”) with the addition of this kit. A and/or injury. bolster mattress is available, measuring 175mm (7”) long by 900mm (35”) wide and 125mm (5”) deep. (See pages 15-17 for full installation HUMAN CARE STRONGLY RECOMMENDS instructions). AGAINST THE USE OF SIDE RAILS AS THEY CAN CAUSE DEATH AND INJURY!
10
Human Care Australia Pty Ltd - A MEMBER OF THE HUMAN CARE GROUP. Protean 3 (P3AU2) user manual July 2014 This manual may not be reproduced in part, or in whole, without the written permission of the publisher.
Problem
Cause
Remedy
Bed functions are slow
Backup battery is low due to bed not Confirm mains power cable is being connected to power source and plugged in, and outlet switch is off at mains power outlet turned on, to recharge the battery
Handset does not work
Backup battery has flattened due to Confirm mains power cable is bed not being connected to power plugged in, and outlet switch is source and off at mains power outlet turned on, to recharge the battery
Handset does not work
Handset cable or mains power cable Visually check that mains power has been run over by the bed being and handset cables have no cracks moved incorrectly and are intact
Handset does not work
Handset is dropped
damaged
from
being Order replacement handset
Bed stops operating mid Over-temperature safety cut-off switch Stop usage of bed functions, until movement activated due to overload on duty cycle it cools down One button on the The corresponding actuator or its cable Check that the corresponding handset does not work may be damaged or become actuator and its cables for are disconnected correctly connected and are intact Several buttons on the The control box or any of its cables Check that all cables are correctly handset do not work may be damaged or have become connected and are intact disconnected
If any problem persists, please call the SALES & SERVICE HOTLINE, in your country. Alternatively, call/email/fax the Human Care Head Office in Australia. Try speaking directly with our friendly Human Care Service Technicians, who will diagnose the problem, and in most cases, remedy the problem over the phone. All contact details are listed on the Back Cover Page of this User Manual. WHEN CONTACTING HUMAN CARE: 1. Please quote the bed’s individual BED SERIAL NUMBER (see page 5), to aid in providing advice or for ordering any Spare Parts. 2. Please describe/photograph/scan any part(s) involved in a problem. It is highly recommended that only Human Care accessories/parts are used on Human Care beds! If other parts are used injury or damage may occur, and the Warranty may be invalidated! Human Care Australia Pty Ltd - A MEMBER OF THE HUMAN CARE GROUP. Protean 3 (P3AU2) user manual July 2014 This manual may not be reproduced in part, or in whole, without the written permission of the publisher.
23
FOLDING THE BED - Requires two persons The 4 Fixing-Bolts must be un-slotted from the 8. Standing either side of the centre hinging J-Hooks (one on each side, and at each end). saddle, pull the saddle cross bar up, folding the 4. Standing either side of the head end, lift out the beams/pedestal ends into a vertical position. beams. The Swinging J-Hook may facilitate The base will roll along the foot end castors disconnection. Lay carefully on bed base, so as into a folded position standing on its 4 castors. not to scratch bed paintwork. Take care to keep all cables safe! 5. Repeat the above step at the foot end. 6. With one person on either side, carefully lift the 9. Ensure that the centre saddle is horizontal to platform up and off the bed base. Carefully replace the 4 Centre Saddle Locking Bolts, with place on the protected floor, on its side edge. the 5mm Allen Key, thus locking the base into Take care not to scratch bed paintwork. its folded position. Keep all cables and actuators safe! 10.Safely lock all castors, until ready to move the bed.
BED ASSEMBLY - Requires two persons and a Mains Power Outlet REQUIREMENTS:
BED ASSEMBLY STAGES
1. Two qualified assembly persons who are very familiar with this User Manual and all facets of bed assembly and operation. 2. A mains power outlet/power-point since the Backup Battery may not be fully charged at time of delivery.
1) Pre Assembly 2) Bed Base Assembly 3) Raise The Bed Base 4) Mattress Platform Assembly 5) Attach Mattress Platform to the Bed Base 6) Connecting Cables & Mattress Retainers 7) Conclude Assembly & Test all Functions.
TOOLS REQUIRED: 1. 3mm & 5mm Allen Keys 2. 13mm & 17mm spanner/socket wrench
PRE-ASSEMBLY
Confirm power source is compatible.
FOLD MATTRESS PLATFORM 1. Holding the mattress platform upright, tape the READY BED FOR STORAGE backrest and kneebreak panels to the mattress 1. Safely wrap all cables (Mains Power, Handset, platform frame. This prevents them from Backrest & Kneebreak Actuator cables) around swinging loose and getting damaged. the bed base, storing them off the floor. 2. Remove the 2 locking lanyard pins on either 2. Label and store all 4 disassembled pieces side of the centre hinge saddle. together with this User Manual. 3. Fold the two ends together and secure closed by reinserting the lanyard pins in the same holes and hooking the metal transport latch. CLEANING Keep all cables and actuators safe! Human Care beds can be safely cleaned with all 4. Store safely. common hospital cleaning agents. Wipe all surfaces with a soft cloth moistened FOLD BED BASE with hot water and mild detergent (or the 1. All bolts have been pre-loosened, as above. hospital’s recommended cleaning solution). 2. Ensure the J-Hooks are put back into their Extra care should be taken with areas that original positions, on each pedestal end. Failure harbor dirt or dust. Rinse with clean water and to do this may damage bed! dry with paper towels. 3. Remove the 4 Lower Beam Centre Saddle To clean potentially infectious material such as Locking Bolts (Locking Bolts are on the outside body fluids, or when the bed has been used by of the Hinging Circlip Pins). (page 13). a patient with a known infection, clean with 4. On either side of the Head End, hold the NaDCC (e.g. Prepsept, Actichlor) at 10,000ppm pedestal end cap at the top of the pedestal of available chlorine. Rinse and dry. with one hand, and with the other hand reach down and firmly lift the Head End Cross Bar, Allow the clean bed to dry before replacing the mattress. that joins the two lower beams, to lift the slots Human Care beds are not intended for on the Lower Beam Brackets off the Pedestal use with high pressure steam or jetBracket Latch Bolts. Slowly fold the Head End stream washing procedures. pedestal down flat onto the bed base beams. 5. Lock head end pedestal to the beams with the Do not pour liquids on any part of the bed end panels or close to parts plastic transport latch. containing electrical componentry, 6. Repeat the above for the foot end pedestal. which could damage the electronics. 7. Unlock the Foot End Castors ONLY.
22
Human Care Australia Pty Ltd - A MEMBER OF THE HUMAN CARE GROUP. Protean 3 (P3AU2) user manual July 2014 This manual may not be reproduced in part, or in whole, without the written permission of the publisher.
DELIVERY
Australian Power-Point and Plug
The bed is delivered, packed in two cartons: 1. Folded Bed Base Attached Handset Head/Foot Boards
2. Ensure there is floor space for assembly. Assemble on a covered surface, to protect both floor and bed surfaces. The packing cardboard is a useful protector. 2. Folded Mattress Platform Remove all packaging Mattress Retainers materials and transport Ensure the cartons are received in the securing devices from Bed correct upright position. Base box only. (Leave Mattress Check for any visible, external Platform box until later). damage. The unpacked folded bed base will be resting upright on all four wheel castors. Protean 3 - A True Floor-Level Folding Electric Bed Bed in a Floor-Level Reverse-Trendelenburg Cardiac Chair Position Removable Head & Foot Boards Electric Backrest Mattress Retainer - useful to hang handset Electric Kneebreak
Bed Serial Number located on the Upper Beam Mattress Platform Inside Head End Pedestal Control Box Head End Hi-Lo Actuator Green Steering Castor
Lower Beam - Bed Base Red Braking Castor
Foot End Pedestal
Human Care Australia Pty Ltd - A MEMBER OF THE HUMAN CARE GROUP. Protean 3 (P3AU2) user manual July 2014 This manual may not be reproduced in part, or in whole, without the written permission of the publisher.
11
BED ASSEMBLY - Requires two persons and a Mains Power Outlet 7. The person holding the upright foot pedestal end, then lifts the foot end cross Resting upright, the lower saddle is bar, to firmly slot the lower beam brackets positioned on top. The two bed base lower onto the latch bolts (one on each side of beams are hinged in half at the saddle and the foot pedestal end’s brackets). They are are positioned perpendicular to the floor. located beneath the hinging bolt. The lower beams and pedestal ends must be Note: All 4 pre-positioned and pre-loosened flattened, the pedestal ends raised and all Nyloc bolts (2 x Locking Latch Bolts + 2 x bolts secured. Hinging Bolts) may need to be loosened some more, to facilitate this process.
BED BASE ASSEMBLY
Lower Beam Saddle
1. Ensure all castors are locked for safety. Foot End Cross Bar Foot End Hinging Bolt 2. Separate out the cables (3 including (top) Handset) and gently fold them, out of the Locking Latch Bolt way, over the head pedestal end. (bottom) 3. Using the 5mm Allen Key, remove the 4 Centre Saddle Locking Bolts (early models 8. Remove the head end transport latch and may have lanyard pins). Two each are repeat the process to raise the head located on either side of the saddle. pedestal end and lock in the latch bolts. 9. Using the 17 mm spanner, tighten the 8 Removing Lanyard Pins Nyloc bolts (2 Lower Beam Hinging Bolts from upright saddle. and 2 Locking Latch Bolts at each end). Locking Bolts Avoid bolts slipping out of place, as on outside of tightening is done! Hinging Circlip Pins Note: Adjusting the pedestal end or lifting the cross bar assists to lock the pedestal end in an perfectly upright position. 4. Working on the foot end first, un-brake Note: ENSURE that all Nyloc bolts the two red braked wheel castors. are TIGHTENED VERY TIGHTLY, in 5. Unlatch only the plastic transport latch the upper most position to avoid that holds the beams against the foot the latch bolts slipping out of the pedestal end. Swing away the latch, slots, as the bed in used. parallel against the beam. 10. Using the 5mm Allen Key, replace and 6. While one person supports and lowers the tighten the 4 locking bolts into the same saddle, the other person slowly rolls the holes on the saddle, locking the lower unlocked foot pedestal end out, on its beams in place. (The outside holes are castors, unfolding the foot pedestal end to used with a bed extension kit). an upright position and flattening out the NOTE: The bolts be a tight fit. Gently lower beams parallel to the floor. The lifting the saddlemay aids fitting each bolt in. head pedestal ends automatically folds flat 11. Confirm that all bolts are tightened at on top of the flattened lower beams. both ends of the bed: The 4 Saddle Locking Bolts The 4 Lower Beam Hinging Bolts The 4 Pedestal Latch Locking Bolts. 12. Whilst unattended, safely lock all castors.
12
Human Care Australia Pty Ltd - A MEMBER OF THE HUMAN CARE GROUP. Protean 3 (P3AU2) user manual July 2014 This manual may not be reproduced in part, or in whole, without the written permission of the publisher.
FOLDING THE BED - Requires two persons The Protean 3 bed is designed to be folded for DISCONNECT CABLES transport, relocation or storage. Disassembly or 1. To allow better access to cables and bolts: folding is a similar process to the reversal of 1) Raise the bed to its maximum height and assembly (pages 11-14). The bed is disassembled 2) Lift backrest and foot-end panels (page 13). into 4 pieces: Folded Mattress Platform 2. Release the backrest and kneebreak cables from Folded Bed Base the plastic retaining clips (1 backrest cable Headboard &Footboard clip/3 kneebreak cable clips) that secure them to inside of the mattress platform frame. REQUIREMENTS: 3. Disconnect the kneebreak (long) cable from its 1. Two qualified assembly persons mini-fit actuator plug, by first removing the 2. A mains power outlet/power-point plastic retaining clip with a small flat screwdriver (page 14). Keep the plastic retaining TOOLS REQUIRED: clips safe by storing them inside the mini-fit 1. 3mm & 5mm Allen Keys plugs. Keep the cable safe, during the 2. 13mm & 17mm spanner/socket wrench disassembly process. 3. Packing tape for securing panels 4. Repeat above step for backrest (short) cable. 4. Small flat screwdriver Note: Nothing needs to be done with any other cables, as they all remain connected to the control FOLDING STAGES box and attached to the bed base during storage. 1) Preparation 2) Disconnect Cables LOOSEN BED BASE BOLTS 3) Loosen Bed Base Bolts 4) Remove Mattress Platform from Bed Base 1. To aid bed base folding later, at each pedestal 5) Fold Mattress Platform end, use the 17mm spanner, to completely 6) Fold Bed Base loosen all 8 Bed Base Lower Beam Bolts (4 x 7) Ready bed for storage Hinging Bolts and 4 x Pedestal Latch Locking Bolts), that are seated in either end’s Pedestal End Lower Brackets. DO NOT REMOVE THE PREPARATION NUTS from the end of these Bolts (page 14). 1. Remove all bedding and accessories. (e.g. 2. Also on the bed base, use the 5mm Allen Key to Mattress, Side Rails IV/Self Help Poles). loosen ONLY, the 4 Centre Saddle Locking Bolts 2. Remove the Head/Footboards and store. (locking bolts sit outside of the hinging circlip 3. Using the handset, test all functions of the bed. pins). DO NOT REMOVE THE LOCKING BOLTS, (page 18) Complete a visual inspection. (page from the lower beam centre saddle (page 14). 24) Report any faults or damage. 4. Clean the bed thoroughly (page 22). REMOVE MATTRESS PLATFORM 5. Ensure there is sufficient floor space for disassembly. 1. At each pedestal end, use the 5mm Allen Key, 6. Disassemble on a covered surface (e.g. a to completely loosen all 4 Mattress Platform blanket), to protect both floor and bed Upper Beam Fixing-Bolts that are seated in the surfaces. Fixed (foot end) and Swinging (head end) 7. Connect the mains power cable to the mains Pedestal End Bracket J-Hooks. DO NOT power outlet. REMOVE THE NUTS from the end of these 8. Ensure all castors are locked for safety. Fixing-Bolts (page 14). 9. Using the handset, flatten/neutralize all the bed positions (backrest, kneebreak, 2. Using handset, take bed to its lowest position. Trendelenburg/reverse). 3. Unplug the Mains Power Cable from the power outlet and safely store it, out of the way. Human Care Australia Pty Ltd - A MEMBER OF THE HUMAN CARE GROUP. Protean 3 (P3AU2) user manual July 2014 This manual may not be reproduced in part, or in whole, without the written permission of the publisher.
21
PUTTING THE BED INTO SERVICE BEFORE PUTTING THIS BED INTO SERVICE FOR THE FIRST TIME 1. Read through this User Manual completely, understanding all operations and functions, (see page 18 Operating The Bed). Pay special attention to all safety issues (see pages 3, 6, & 7), so as to prevent injury to persons, or damage to the bed or environment, due to incorrect operation. 2. Confirm that the electricity supply and the wall power-point/outlet/socket are both compatible with the bed’s voltage requirements and the bed’s mains supply cable plug. This will differ between countries.
Australian Power-Point and Plug
3. Inspect the mains supply cable for perfect condition. Check for any damage in transit. 4. Fully unpack and assemble the bed and attach all accessories (see pages 8-14). 5. Confirm that all cables and cords (eg mainspower supply cable, motor cables and handset cable) are connected and securely routed out of the way of all the bed’s moving parts, so they can not be damaged. Also confirm that there are no obstacles, (e.g. bedside cabinets, chairs, or wall fixtures, etc.) which could impede adjustment of the bed (see pages 3 & 7). 6. Confirm that all nuts, locking bolts, pins and fasteners are fully engaged and correctly tightened. Ensure that the battery is plugged into the control unit. Regular checks are recommended (see the Checklist on page 24). 7. For safety, ensure that all bed wheel castors are locked unless the bed is being moved. 8. Test that the bed and all its accessories (including all adjustment functions) are all fully functioning and in perfect working order (see Handset functions on page 18). 9. Clean and disinfect the bed prior to placing the mattress and any bedding on the bed, for first time use (page 22). 20
PUTTING THIS BED INTO SERVICE FOR THE FIRST TIME 1. Read and follow the previous section, including reading this User Manual, and attending to all safety issues & operation usage. 2. Confirm wheel castors are locked. 3. Ensure clearance for bed movements. Provided the above has been complied with, the bed may now be put into service. 1. Confirm that the wall power switch is OFF (in countries where this applicable). 2. Plug the mains supply cable into the wall powerpoint/socket/outlet. 3. Turn ON the wall switch at the power-point, (country-determined). This bed should be connected to the mains power supply and remain switched on at all times, to guarantee that the bed’s battery backup is adequately charged and ready for operation at any time. 4. Check that the bed is fully functioning by testing the perfect working order of each handset button (see page 18). 5. Confirm that the bed has been cleaned and disinfected (see page 22). PUTTING THE BED BACK INTO SERVICE 1. Read and follow the previous two sections (reading the User Manual, attending to all safety issues & operation usage). 2. Conduct a complete Maintenance Check (see page 24), for safe bed functioning and perfect working order. Especially check for the safe routing of all cables/cords and clearance for all bed adjustments. 3. Verify wheel castors are locked. 4. Confirm mains wall power is OFF. 5. Recheck the mains cord/plug for damage while out of use, push into wall socket. 6. Turn ON the wall switch (in countries where this is applicable) and leave permanently on, for charging back-up battery. 7. Confirm bed is cleaned and disinfected.
Human Care Australia Pty Ltd - A MEMBER OF THE HUMAN CARE GROUP. Protean 3 (P3AU2) user manual July 2014 This manual may not be reproduced in part, or in whole, without the written permission of the publisher.
BED ASSEMBLY - Requires two persons and a Mains Power Outlet RAISE THE BED ATTACH THE MATTRESS PLATFORM 1. Plug the mains power cord into the wall TO THE BED BASE
outlet/socket/power point. 1.With both persons on one side, vertically 2. Using the Handset, (already secured to the raise the mattress platform to its side with bed base and attached to the control box), the beams facing away from the body. raise the bed base 300mm (12”), to aid 2.One person then brings the bed base Mattress Platform attachment to Bed Base. (unlocking the castors, first), to the platform. Ensure that the base head end DO NOT LOWER THE BED AT THIS STAGE! aligns with the platform head end and the DAMAGE TO CHAINS MAY OCCUR! platform beams are facing the base. Relock the castors. MATTRESS PLATFORM ASSEMBLY 3. Both persons should carefully lift the 1. Lay mattress platform box flat on the floor 2. Open the 3 taped sides and fold out the mattress platform to lie flat on the base. cardboard box to cover the floor for ENSURE: 1) The backrest panel (largest panel) is assembly. As the mattress platform is positioned at the head end of the bed base (near the green wheel castor). assembled, remove all packaging materials 2) Beams face down, and panels are up. and transport-securing devices. 3) Both platform upper beams sit over and 3. Remove the two locking lanyard pins from outside the base lower beams. either side of the centre hinge Note: Keep the cables and actuators section/upper beam saddle. safe that are located inside the bottom of the mattress platform. Folded Mattress Platform 4. Lift backrest and footUpper Beam Saddle Locking Lanyard Pin end panels, allowing easy upper beam access. 4. Unlatch the metal transport latch. 5.At the foot end, lift the beams to slot the 2 5. Unfold the mattress platform until the Platform Bracket’s Fixing-Bolts (Nylon Bush) beams are straight. The flat mattress side into the 2 Pedestal End’s Fixed J-Hooks. will be facing down on the cardboard. Head End Swinging J-Hook 6. Re-insert the 2 locking lanyard pins, to lock (Growth Link Plate) Foot End Fixed J-Hook the mattress platform into a flat position. .
Platform Nylon Bush Fixing-Bolts Lower Beam - 4 Nyloc Nuts
6.Lift the beams to fully seat the fixing-bolts. 7.Position the nylon bush to the outside, and the thin spacer/washer between the metal brackets. NOTE: The pins may be a tight fit. Gently Spacer variations exist on early models. lifting one side aids fitting each pin in. 8. Repeat above steps at the head end. NOTE: The mattress platform has a small Note: The Head End Swinging J-Hooks must centred positive camber; deliberately designed to support the integral strength be swung up, then down into the nylon of the bed. After initial loading and use the bushes. Also, the head end fixing-bolts have camber will decrease slightly. a wider spacer. Human Care Australia Pty Ltd - A MEMBER OF THE HUMAN CARE GROUP. Protean 3 (P3AU2) user manual July 2014 This manual may not be reproduced in part, or in whole, without the written permission of the publisher.
13
BED ASSEMBLY - Requires two persons and a Mains Power Outlet 9. Using the 5mm Allen Key, firmly tighten all 2.To allow better access to the underneath of 4 Upper Beam Fixing-Bolts, ensuring that the mattress platform: each bush is correctly located in its J-Hook. Use the handset to raise the bed to its maximum height 10.Using the 13mm spanner, confirm that all Lift backrest and foot-end panels 4 Fixing-Bolt Nuts are firmly attached to 3.Connect the Backrest (short) the end of the bolt, with a wide space cable to the short mini-fit plug between the nut and the upper beam cable, and lock in the plastic bracket. retaining clips, ensuring that the locking tabs sit in the plug’s slots securely, as pictured. 4. DO NOT TIGHTEN these Fixing-Bolt Nuts! Connect the Kneebreak (long) The Swinging J-Hook (Growth Link Plate) cable to the long mini-fit plug cable and and the additional space between the nuts lock in the retaining clips, as pictured. and the brackets allow for platform flexing 5.Secure all cables to the inside frame of the and full bed operation particularly for mattress platform with the plastic ‘p’ clips. Trendelenburg positions.
CONNECTING CABLES Cables connect the Control Box with: 1. The Mains Power Outlet 2. The Handset 3. The 4 Actuators (Hi-Lo Head, Hi-Lo Foot, Backrest, Kneebreak).
CONNECTING MATTRESS RETAINERS Using the screws Mattress Retainers (4) provided, attach the 4 mattress retainers to the mattress platform.
CONCLUDING ASSEMBLY
1. Add any ordered accessories such as Self Help Pole, IV Pole, wall bumper, etc. 2. Re-check that all attachments are tightened All cables are secured to the bed frame 3. Lower (identical) Head & Footboards into on the inside with plastic ‘p’ Clips. the bracket slots on the inside of each pedestal end (in front of the IV Pole slot). All cables are pre-attached to the Control Box, which is located on the inside of the 4. Ensure the bed is fully cleaned before placing the mattress on the bed. Head End Pedestal on the Bed Base. The two Hi-Lo Actuators are located inside TEST ALL FUNCTIONS the Head and Foot End Pedestals and 1. Check all Handset buttons are working to cables are pre-attached to their actuators. the full travel range of adjustment for each The Backrest & Kneebreak Actuators are position (Backrest, Kneebreak, Hi-Lo, located on the underside of the mattress Trendelenburg/Rev & Auto Contour). (See the platform. Their respective cables must be Operating The Bed section on page 18). attached to their appropriate mini-fit 2. Lower the bed to its lowest position, plugs. confirming that it is completely horizontal. 1.Attach the mains cable to the mains power 3. Confirm working order of all other outlet, rechecking for damage in transit. attached accessories. Actuators are connected to the Control Box via a cable and mini-fit plug.
14
Human Care Australia Pty Ltd - A MEMBER OF THE HUMAN CARE GROUP. Protean 3 (P3AU2) user manual July 2014 This manual may not be reproduced in part, or in whole, without the written permission of the publisher.
CPR & INTUBATION CASTORS & BRAKES MOVING THE BED BRAKED CASTORS CPR & INTUBATION
The CPR emergency procedure (combined Braked Castors (red) are locked by rescue breathing and chest compressions) is depressing the front of the pedal on each castor lever. This is done by foot pressure used on a patient in cardiac arrest. CPR can be administered when the bed is in a when wearing appropriate protective CPR position - a totally horizontally, flat shoes. Brakes are released by depressing the top mattress platform. If CPR, intubation or head access is required of the castor lever until it unlocks. 1. Raise/lower the bed, to the preferred height. Note: This Protean 3 bed does Do not attempt to set or release the brakes NOT feature any CPR Emergency Quick using your hands/fingers, injury may occur. Release systems! 2. Remove the Headboard. There is no need MOVING THE BED to place the headboard under the Before moving the bed, raise the mattress, as all Human Care bed platforms mattress platform to a minimum of are solid enough for effective chest 200mm from the floor. compressions. When moving the bed, first release the 3. Release the Brakes, to allow the bed to be brakes on all castors so that the bed can pulled out from the wall for easy access to move freely. the patient’s head. Once the bed is If brakes are not released and the positioned, reapply the brakes. bed is forcibly moved when the wheels are locked, the treads may be damaged. CASTORS & BRAKES Re-engage the directional lock to assist There are two types of wheel castors. with steering. The Protean 3 bed is fitted with Standard To control movement forwards or Wheel Castors. Dual Wheel Castors are an backwards only, orientate the directional/ alternative and optional accessory. steering wheel, so it is parallel with the side edge of the bed and then depress the The set of Standard Wheel Castors lock lever to the “ON” position with your comprises: foot. This will engage a lock on this wheel 1 GREEN Steering/Directional Castor which will permit the bed to run straight 3 RED Braked Castors forward or backward when being moved. DIRECTIONAL LOCK CASTOR The wheel itself can be positioned towards The Directional Lock (green) is located on the front or the back of the castor one castor at the head end. outrigger but it is recommended to point It can be locked in any position to aid and down the bed’s length. ensure a smooth and straight path down a hallway. The Directional Lock Castor should be For safety, if leaving the bed for any time ensure engaged to the “ON” position at all times. castors are turned To disengage the Directional Lock, depress inwards and locked. the “OFF” lever. Human Care Australia Pty Ltd - A MEMBER OF THE HUMAN CARE GROUP. Protean 3 (P3AU2) user manual July 2014 This manual may not be reproduced in part, or in whole, without the written permission of the publisher.
19
OPERATING THE BED - HANDSET CONTROL AND FUNCTIONS Only use a Human Care recommended mattress, to prevent possible damage or injury! Mattress Platform Positions
True Floor-Level - 99mm (4”) off floor Highest Platform Height 799mm (31½”) Backrest Panel - 70° Thigh Panel - 45° }operate together as Calf Panel - 25° }the kneebreak panel Kneebreak Position - 110° Trendelenburg Tilting Position - 18° Reverse-Trendelenburg Tilt Position - 18° Head High Trendelenburg Tilt Position - 45° Head Low Trendelenburg Tilt Position - 45°
the Troubleshooting section on page 22. BACK REST UP
BACK REST DOWN
KNEE BREAK UP
KNEE BREAK DOWN
HI-LO UP REVERSE TRENDELENBURG TILT (HEAD HIGH/FEET LOW) TILT
18
The standard length of the Protean 3 bed’s mattress platform is 2000mm (78¾”) measured internally between the head and footboards (sleeping space). An optional Bed Extension Kit may be purchased separately, that will lengthen the sleeping space by 175mm (7”) to 2175mm (85½”) to accommodate taller people. The bed’s total length also lengthens from 2325mm (91½”) to 2500mm (98 ½”).
REQUIREMENTS:
The Handset is directly connected to the control When desired position is reached, release the button. box, via a curly cord. When maximum raised or lowered positions of Each button has a Raise (Left Side) and mattress base or backrest are reached, a built-in limit a Lower (Right Side) function that switch will automatically override the handset button adjusts all mattress platform positions. and movement will stop. All the buttons (labelled below) should be explained to the patient. DO NOT CONTINUE TO PRESS ANY BUTTON, Top Buttons - Backrest - Press the (Left) button to raise the AFTER DESIRED POSITION IS ATTAINED! Backrest up. Press the (Right) button to lower it down. Movement in the opposite direction will be resumed Second Buttons - Kneebreak - Press the raise or lower key when the appropriate button is pressed. to adjust kneebreak up or down. The handset may be stored by clipping it into the NOTE: Some earlier models do not have this function mattress retainers (side of mattress platform) or over and this button will be inactive. the Head/Foot Boards. Third Buttons - Auto-Contour - Press the raise or lower key LOCKOUT to adjust both Backrest & Kneebreak simultaneously, into A small blue plastic ‘lock out key’ is a cardiac chair position (if the kneebreak is fitted). included, to lock any function on the bed: Fourth Buttons - Hi-Lo Mattress - Press the raise or lower 1. Insert the key into the two holes in the key to bring the mattress to any ergonomically-convenient button you wish to lock out height or lower the mattress to a ‘True Floor-Level’. 2. Gently turn the key from the Fifth Buttons - Trendelenburg & Reverse Trendelenburg ‘green’ - 12 o’clock position Press the raise or lower key to adjust the tilt (Head-Low / toward the unlock or lock Feet-Low ) positions. symbols at 11 or 1 o’clock positions respectively. TO IMMEDIATELY STOP MOVEMENT Gently turn the lockout key in the holes, RELEASE THE HANDSET BUTTON! or key tabs may break. NOTE: If a problem occurs with the handset, see
AUTO CONTOUR UP
EXTENDING THE BED - Requires two persons
AUTO CONTOUR DOWN HI-LO DOWN TRENDELENBURG TILT (HEAD –LOW/FEET HIGH)
Human Care Australia Pty Ltd - A MEMBER OF THE HUMAN CARE GROUP. Protean 3 (P3AU2) user manual July 2014 This manual may not be reproduced in part, or in whole, without the written permission of the publisher.
1. Two qualified assembly persons 2. A mains power outlet/power-point
TOOLS REQUIRED: 1. Work bench 2. 3mm, 4mm & 5mm Allen Keys 3. 10mm & 13mm Spanner/Socket Wrench 4. Needlenose Pliers 5. Small flat screwdriver
EXTENSION KIT CONTENTS
2 x Extension Brackets An Extension Mattress Platform Panel (F8) 4 x Extension Panel Platform Bolts/Nuts Full instructions to fit the extension.
BED EXTENSION STAGES 1) Preparation 2) Disconnect Cables 3) Remove Mattress Platform from Bed Base 4) Install Mattress Platform Extension Brackets 5) Add Extension Panel to Mattress Platform 6) Extend Bed Base 7) Re-Attach Extended Mattress Platform 8) Re-Connecting Cables 9) Conclude Assembly & Test all Functions.
PREPARATION 1. Confirm all the kit contents. 2. Remove all bedding and accessories. 3. Test bed functions (page 18) & complete a visual inspection (page 24). Report any faults/damage. 4. Clean the bed thoroughly (page 22). 5. Ensure sufficient protected floor space for installation. 6. Remove the Head/Footboards, and safely set aside. 7. Connect mains power cable to power outlet. 8. Ensure all castors are locked for safety. 9. Using the handset, flatten/neutralize all the bed positions (backrest, kneebreak, Trendelenburg/reverse).
DISCONNECT CABLES
1. To allow better access to cables and bolts: Raise the bed to its maximum height and Lift backrest and foot-end panels (page 13). A matching mattress bolster is 2. Release the backrest and kneebreak cables also available as an optional extra from the plastic retaining clips (1 backrest cable to complement the existing clip/3 kneebreak cable clips) that secure them Human Care mattress. to inside of the mattress platform frame. 3. Disconnect the kneebreak (long) cable from its At the foot end of the mattress mini-fit actuator plug, by first removing the platform beams, extension brackets will replace plastic retaining clip with a small flat the standard brackets and an additional mattress screwdriver (page 14). platform panel is fitted over the extension brackets. 4. Set aside the plastic retaining clips and The bed base lower beam has a built in keep the cable safe. adjustment, that extends the lower beam. For explanatory pictures, please refer to Bed 5. Repeat above step for backrest (short) cable. Assembly (pages 11-14) and Folding the Bed (pages 21-22) sections. Human Care Australia Pty Ltd - A MEMBER OF THE HUMAN CARE GROUP. Protean 3 (P3AU2) user manual July 2014 This manual may not be reproduced in part, or in whole, without the written permission of the publisher.
15
EXTENDING THE BED - Requires two persons REMOVE MATTRESS PLATFORM INSTALL EXTENSION PANEL 1. At each pedestal end, use the 5mm Allen TO MATTRESS PLATFORM
Key, to completely loosen all 4 Mattress Fit the extension Platform Upper Beam Fixing-Bolts that are panel with the seated in the Fixed (foot end) and Swinging Button Head (head end) Pedestal End Bracket J-Hooks. Screws and Nyloc DO NOT REMOVE THE NUTS from the end Nuts. of these Fixing-Bolts (page 14). EXTEND BED BASE 2. Lower bed to its lowest position. 1. Release the brakes on the Head End 3. Unplug the Mains Power Cable from the Castors. power outlet and safely store. The 4 Fixing-Bolts must be un-slotted from 2. On the bed base lower beam centre saddle, using a pair of pliers, remove the 2 the J-Hooks (1 on each side, at each end). HEAD END Circlips on the Circlip Hinging 4. Standing either side of the head end, lift Pins (1 each side). out the beams. The Swinging J-Hook may aid disconnection. Lay carefully on bed Bed Base Lower Beam Centre Saddle. HEAD END Locking Bolts base, so as not to scratch bed paintwork. on outside of 5. Repeat the above step at the foot end. HEAD END Circlip Hinging Pins 6. With one person on either side, carefully 3. Using the 3mm spanner, remove the 2 lift the platform up and off the bed base. HEAD END Circlip Hinging Pins. Carefully place on a protected work bench. 4. Using the 5mm Allen Key, remove the 2 Take care not to scratch bed paintwork. HEAD END Locking Bolts (Early models had Keep all cables and actuators safe! Lanyard Pins and additional saddle holes,
INSTALL EXTENSION BRACKETS TO MATTRESS PLATFORM 1. Remove the mattress platform locking bolts and fit them to the extension brackets. 2. Using the 17mm spanner, remove the FOOT END Mattress Platform Standard Brackets. 3. Replace them with the 2 x Extension Brackets. Ensure the support tab sits under platform. NOTE: Label the standard length beam brackets with the bed serial number.
16
as pictured). 5. Second person supports and moves apart both beams to line up outermost HEAD END saddle holes with beam HEAD END extension holes. 6. Replace the 2 Locking Bolts in the outermost holes. Completely tighten both Locking Bolts. 7. Replace the Circlip Hinging Pins and their Circlips in the next holes (smaller holes). 8. Repeat the above steps for the FOOT END Circlip Hinging Pins and Locking Bolts to complete the beam extension. 9. Lock all castors
Human Care Australia Pty Ltd - A MEMBER OF THE HUMAN CARE GROUP. Protean 3 (P3AU2) user manual July 2014 This manual may not be reproduced in part, or in whole, without the written permission of the publisher.
EXTENDING THE BED - Requires two persons RE-ATTACH MATTRESS PLATFORM CONCLUDE ASSEMBLY AND TO BED BASE TEST ALL FUNCTIONS 1. Move the bed base close to the 1. Lock all castors for safety. workbench, relocking all castors. 2. Re-check that all bed base and mattress 2. Carefully place the extended mattress platform bolts/pins are tightened platform on the bed base, ensuring that appropriately. the base head end aligns with the platform 3. Replace the Head/Footboards. head end and both platform upper beams 4. Replace bed accessories. sit over and outside the base lower beams. 5. Clean the bed thoroughly (page 22). Keep the cables and actuators safe! 6. Replace the mattress on the bed with the 3. Lifting the panels for space, lift the beams extension mattress bolster. to slot the 2 Foot End Extended Bracket’s 7. Re-test all bed functions; checking all Fixing-Bolts into the 2 Fixed J-Hooks. Handset buttons are working to the full 4. Lift the beams to fully seat the fixing-bolts. travel range of adjustment for each 5. Position the nylon bush to the outside, and the position (Backrest, Kneebreak, Hi-Lo, thin spacer/washer between the metal Trendelenburg/Rev & Auto Contour). (See the brackets. Operating The Bed section on page 18). 6. Repeat above steps with the Head End 8. Lower the bed to its lowest position, Swinging J-Hooks. LEAVE THE NUTS ON confirming that it is completely THE END OF THE FIXING BOLTS - DO NOT horizontal. OVERTIGHTEN! 9. Confirm working order of all other 7. Using the 5mm Allen Key, firmly tighten all attached accessories. 4 Upper Beam Fixing-Bolts, ensuring that 10. Replace all bedding. each bush is correctly located in its J-Hook. 8. Using the 13mm spanner, confirm that all 4 Fixing-Bolt Nuts are firmly attached to the REMOVING THE EXTENSION KIT end of the bolt, with a wide space between To remove an Extension Kit from a bed, the nut and the upper beam bracket. follow the above instructions in reverse. DO NOT TIGHTEN these Fixing-Bolt Nuts! Remember to keep all the parts, labelling them with the bed serial number, so that it RE-CONNECT CABLES 1. Re-connect the mains cable to the mains may be fitted again in the future. power outlet. 3. Re-attach the Backrest and Kneebreak cables to their respective mini-fit plugs, locking in the plastic retaining clips. 4. Re-secure all cables to the inside frame of the mattress platform with the plastic ‘p’ clips.
Human Care Australia Pty Ltd - A MEMBER OF THE HUMAN CARE GROUP. Protean 3 (P3AU2) user manual July 2014 This manual may not be reproduced in part, or in whole, without the written permission of the publisher.
17