Instructions for Use
40 Pages
Preview
Page 1
1132.03AX/BX
Instructions for Use
Universal Operating Table
Englisch
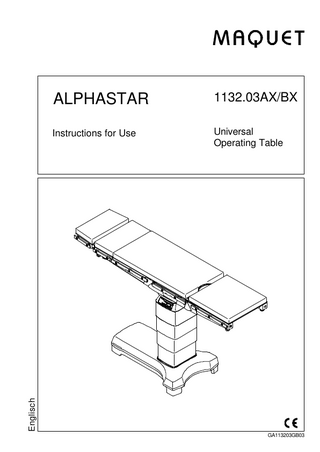
ALPHASTAR
GA113203GB03
1132.03
Overview
1
Head rest (e.g. 1132.64)
2
Fastening screws for head rest
3
Locking lever for short back plate
4
Back plate, removable
1 2
2
3 4
8
5
9
6
10
7
11
(3113.0889 for 1132.03A0) (3113.0859 for 1132.03B0)
12
13
14
3113.1259
2
15
5
Additional interface for accessories
6
Back plate
7
Hook for mains power cord
8
Leg plate
9
Seat plate
10
Infrared receiver
11
Override system with status indication for operating table
12
Receptacle for cable-connected hand control and foot switch
13
Mains power cord connection
14
Cable-connected hand control
15
IR remote control (optional)
3113.1269
GA113203GB03
1132.03
List of contents I. II.
Important safety instructions ... 4 Important information ... 6 1. Important information in the Instructions for Use... 6 2. Intended use of the operating table ... 6 3. Purpose: ... 6 4. Basic safety aspects ... 6 III. General description ... 7 1. General features ... 7 2. Activating the functions ... 8 2.1. Functions of the cable-connected hand control ... 9 2.2. Override system = emergency operation ... 11 2.3. IR remote control 3113.1269 (optional ... 13 2.3.1 IR system code ... 14 2.3.2 Charging station ... 15 2.4 Activation via foot switch ... 15 3. Table top components ... 16 3.1 Head rest ... 16 3.2 Back plate ... 16 3.3 Interface ... 17 3.4 Table top padding ... 17 3.5 X-ray top ... 17 4. Operating table drive unit 1132.60 ... 18 IV. Operating the operating table ... 19 1. General ... 19 2. Operation on battery power ... 19 3. Operation on mains power ... 20 4. HF surgery / Use of defibrillators ... 20 V. Positionings ... 21 1. General ... 21 2. Gall bladder ... 21 3. Lateral position (e.g. kidney, thorax) ... 23 4. Percutaneous nephrolithopaxy ... 22 5. Rectal surgery ... 23 6. TUR ... 24 7. Lithotomy ... 25 8. Struma ... 25 9. Oral maxillo-facial surgery ... 26 10. Neurosurgical procedures(patient in the prone or supine position) .. 27 11. Neurosurgical procedures (patient in the sitting position) ... 27 12. Treatment of fractures ... 28 VI. Maintenance and servicing ... 29 1. Cleaning ... 29 2. Disinfection ... 29 3. Maintenance ... 29 4. Malfunctions ... 30 5. Environmental protection ... 30 VII. Specifications... 31 1. Operating table adjustments ... 31 2. Electrical data ... 31 VIII. List of accessories... 33 1. Accessories for attachment to the side rails ... 33 2. Accessories for the head-end interface ... 33 3. Accessories for the back plate interface... 35 4. Accessories for hand controls ... 36 5. Optional extras ... 37 IX. Replacement parts list ... 38 1. Operating table ... 38 2. Accessories ... 38
GA113203GB03
3
1132.03
I.
Important safety instructions Surgical procedures on patients weighing from 135 kg to 360 kg (300-800 lb.) may only be performed in the NORMAL patient orientation. Only move an operating table bearing a patient weighing from 135 kg to 225 kg (300- 500 lb.) with the table top in its lowest setting. Do not move an operating table bearing a patient weighing more than 225 kg (500 lb.).
Do not use the removable back plate mounted to the operating table for patients weighing more than 225 kg (500 lb.). Make sure that the operating table is set up horizontally and is stable. Lock the operating table in position prior to use. Lock the operating table in position prior to transferring the patient. Secure the patient before adjusting the operating table. When using high-frequency equipment, defibrillators and defibrillator monitors, take care to prevent the patient coming into contact with metal parts of the operating table, the table tops and accessories, and do not position patients on wet or damp surfaces or electrically conductive pads. This can result in injury to the patient (burns). Always comply with the manufacturer’s Instructions for Use. Make sure that table top accessories are fixed properly. When adjusting the operating table, take care to avoid collisions between accessories and the operating table. Do not use worn or damaged accessories. They represent an injury hazard. Non-original accessories which affect the longitudinal geometry of the table top may only be used after consultation with MAQUET. Explosion protection is not provided while operating the table on mains power. Observe the correct sequence of operations when connecting and disconnecting the mains power cord. To avoid endangering the patient’s respiratory system, nerve pathways and circulatory system, the patient should be positioned properly and kept under observation. Check the electrical conductivity of the operating table once a year. This check should only be performed by trained servicing personnel. Prior to the opening of the equipment, disconnect the mains plug. Use of the pelvic extension 1132.55X0 is only possible in the case of patients with a body weight of up to 135 kg.
4
GA113203GB03
1132.03 When using the drive unit 1132.60, please note the following: Remove possible obstacles before moving the operating table. Guide the operating table with at least one hand during movements. When using X-ray top 1132.80, please note the following: Do not use the X-ray top bearing a patient weighing more than 225 kg (500 lb.). Before swinging the leg plate downwards, remove the X-ray top of the leg plate (e.g. gynaecology). Align the patient in a central position on the individual segments. When using the 1419.01B0 extension unit, please note the following: For patients weighing more than 135 kg (300 lb.), the REVERSE positioning cannot be used. Remove possible obstacles before lowering or tilting the operating table. Danger of operating table tipping over.
Do not place only objects on the base of the operating table. Danger of damage during adjustments. Do not pull or press the covers on the joints. This can result in damage to the equipment. During adjustments, do not reach below the table top or between the components of the table top. This can result in jamming. Do not touch the side rails in the area of the joints when adjusting the operating table top! Hazard of crushing! Hazard of crushing When leg plates are sloping down, avoid collisions with the base of the operating table and the operating table column during adjustments.
è
Make sure the cable of the cable-connected hand control does not become jammed when adjusting the operating table. Before aligning the leg plates horizontally, check the patient’s positioning carefully, particularly when using leg supports. This may result in injury to the patient.
GA113203GB03
5
1132.03
II.
Important information First of all, we should like to thank your clinic for choosing our mobile operating table ALPHASTAR 1132.03
1. Important information regarding these Instructions for Use: l l l
Please read these Instructions for Use very carefully. We have written them so that you can familiarise yourself with the system’s characteristics. Always comply with these instructions. Keep these Instructions for Use near the equipment at all times. This symbol indicates safety instructions in accordance with the prevailing international standard for medical equipment.
l
In these Instructions for Use, we have used the following symbols: è Note This symbol is displayed prior to all notes which help you to avoid malfunctioning of your equipment.
2. Intended use of the operating table MAQUET operating tables are intended for human medicine purposes only. Prior to use, the user must be instructed in the correct operation of the equipment. This must be verified in the form of a handing-over report. The chosen place of use for the equipment must conform to the applicable standards and guidelines. A compulsory requirement for use is proper installation and maintenance of the equipment. è Note The OR-table shall be covered with bio-compatible drapes. 3. Purpose: The purpose of the ALPHASTAR 1132.03 operating table is to position patients for surgery l directly before, during and after the operative phase l in rooms which are used for medical purposes and fulfil the following prerequisites: - devices providing electric shock protection - additional potential equalisation - electrically conductive floor covering (as per Group 1 or 2 according to VDE 0107) l under medical surveillance Due to the design of the table top, the operating table is suitable for all surgical disciplines. The range of possible positionings is specified in the Instructions for Use. Movements are executed electrohydraulically via cable-connected hand control, IR remote control or foot switch. Side rails are provided for securing accessories in accordance with the manufacturer’s specifications. The radiotranslucent table top of the operating table permits intra-operative use of X-ray equipment. 4. Basic safety aspects „CLASSIFIED BY UNDERWRITERS LABORATORIES INC: WITH RESPECT TO ELECTRIC SHOCK; FIRE AND MECHANICAL HAZARDS ONLY IN ACCORDANCE WITH UL 2601-1“ This operating table meets the requirements set forth in the IEC 601-1 international standard, which is equivalent to EN 60601-1. The operating table is classified as Class I equipment of the Medical Device Directive. Include it in your inventory. For maintenance work, please keep in mind that the MAQUET Customer Service is the right address as far as quality of work and warranty are concerned. We are sure you will appreciate that MAQUET can only accept responsibility for the safety of your equipment if installation, extension work, adjustments, modifications and repairs have been carried out exclusively by our Customer Service or by technical experts authorised by us and also if the equipment is operated strictly in accordance with our Instructions for Use.
6
GA113203GB03
1132.03
III.
General description
1. General features In principle, the ALPHASTAR 1132.03 operating table is suitable for the following surgical procedures: • in the thorax and abdominal regions • in the head area • in gynaecology • in urology Separate accessories can be attached to the operating table, as desired.
Head rest
Fig. 1 NORMAL patient orientation for patient weighing up to 225 kg (500 lb.)
The table top has 5 subdivisions: • Head rest (removable) • Back plate (removable) • Back plate • Seat plate • Leg plate
Head rest, optional
Head rest
The back, seat and leg plates are adjusted under motor power. Adjustment of the head rest is performed manually.
The head rest(1) can be attached to both ends of Fig. 2 NORMAL patient orientation for patient weighing from 225 kg up to 360 kg (500 - 800 lb.)
the operating table. This results in two possible patient orientations on the operating table. • •
Head rest
Fig. 3 REVERSE patient orientation for patient weighing up to 135 kg (300 lb.)
NORMAL patient orientation (Fig. 1 and Fig. 2) REVERSE patient orientation (Fig. 3)
Do not use the removable back plate mounted to the operating table for patients weighing more than 225 kg (500 lb.). Surgical procedures may only be performed on patients weighing from 135 kg up to 360 kg (300800 lb.) in the NORMAL patient orientation. Only move the operating table bearing a patient weighing from 135 kg to 225 kg (300- 500 lb.) with the table top in its lowest setting. Do not move the operating table bearing a patient weighing more than 225 kg (500 lb.). X-ray cassettes can be inserted below the table top as far as the seat plate. An X-ray top can be fixed to the table top at the customer’s option. The side rails are for fixing accessories.
NO
Fig. 4 GA113203GB03
YES
OR-table displacement l with patient weighing up to 135 kg (300 lb.): the maximum table top elevation has to be not more than 1m (39 inches). (The warning lable will not be visible.) l with patient weighing from 135 kg to 225 kg (300 - 500 lb.): The table top has to be in lowest position. l with patient weighing more than 225 kg (500 lb.): Displacement is not allowed.
7
1132.03 2. Activating the functions The electrohydraulic functions of the operating table can be initiated using the following control elements: • Cable-connected hand control (see 2.1) • Override system = emergency operation (see 2.2) or optional: • IR remote control (see 2.3) • Foot switch 1009.79F0 (see 2.4) The cable-connected hand control and the IR remote control have almost the same function keys. The override system is used for emergency operation of the operating table. The foot switch is only for adjusting the operating table’s elevation and inclination. è Note: When the UNLOCK function is activated, only the TRENDELENBURG/REVERSE TRENDELENBURG and the orientation (NORMAL/ REVERSE) functions can be used; all other functions are locked. The connections (12) for the cable-connected hand control and foot switch are located on the lower column enclosure. è
12
Note If functions are activated simultaneously by more than one operating element, each movement of the operating table is stopped immediately and is not restarted until none of the operating elements has been operated for at least 2 seconds. Remove possible obstacles before lowering or tilting the operating table. Danger of operating table tipping over. Do not place any objects on the base of the operating table. Danger of damage during adjustments. During adjustments, do not reach below the table top or between the components of the table top. This can result in jamming. When leg plates are sloping downwards, avoid collisions with the base of the operating table and the operating table column during adjustments.
When not in use, place the cable-connected hand control or IR remote control in the holder on the side rail of the operating table. Make certain the cable of the cable-connected hand control does not become jammed when adjusting the operating table. Secure the patient before adjusting the operating table.
8
GA113203GB03
1132.03 2.1. Functions of the cable-connected hand control The desired function can be activated by pressing an single key on the cable-connected hand control (onekey operation).
a
b
c
d
e
f
g
h
i
k
l
m
n
o
p
q
r
s
t
u
v
w
GA113203GB03
d)
ON When the cable-connected hand control is switched on, the yellow LED comes on. The individual functions can now be activated with a single keystroke.
è
Note When you switch on the cable-connected hand control, all the LEDs come on and execute a self-test.
è
Note When you switch ON the cable-connected hand control, the LED status display on the operator panel of the operating table column is active (see chapter entitled “Override System”).
a)
LED for mains connection The green lamp flashes when the operating table is connected to the mains and the cable-connected hand control is switched on.
b)
LED for operating table battery charge level The red lamp flashes if the operating table batteries require to be recharged as soon as possible.
c)
OFF The operating table is switched OFF and all functions are deactivated immediately (emergency stop function).
è
Note The cable-connected hand control switches off automatically approx. 4 minutes after the last keystroke. This function is called Auto-OFF and provides additional safety against unintentional activation of an adjustment. It also prevents the batteries being discharged unnecessarily.
e)
LOCK To lock the operating table, press the LOCK key at least 1 sec.; the table will be locked automatically.
f)
UNLOCK To unlock the operating table, press the UNLOCK key at least 1 sec. the castors are extended automatically and you can move the table.
è
Note If both LEDs are flashing, press the LOCK or UNLOCK key depending on what status is required.
9
1132.03
FLEX position in REVERSE patient orientation
REFLEX position in REVERSE patient orientation
FLEX position in NORMAL patient orientation
REFLEX position in NORMAL patient orientation
10
g)
NORMAL Normal patient orientation: green LED flashing
h)
REV Reverse patient orientation: yellow LED is on
i)
BACKW. Move table backwards (only active when drive unit is installed)
k)
FORW. Move table forwards (only active when drive unit is installed)
l)
TREND Move table top into Trendelenburg position
m)
REV. Move table top into reverse Trendelenburg position
n)
UP Move table top up
o)
DOWN Move table top down
p)
TILT L. Lateral tilt left
q)
TILT R. Lateral tilt right
r)
BACK UP Swing back plate up
s)
BACK DN Swing back plate down
t)
LEG UP Swing leg plate up
u)
LEG DN Swing leg plate down
v)
FLEX Flex-Position Flex position (kidney/gall bladder positioning) Alternately activates the “Table top inclination” and “BACK DN” functions until the table top is in the elevated position. GA113203GB03
1132.03
w)
REFLEX Reflex-Position Alternately activates the “Table top inclination” and “BACK UP” functions until the table top is in the “V” position.
è
Note The flex and reflex positions can be set up in both the NORMAL and REVERSE patient orientation if you have preselected the appropriate mode at the hand control. The joints which must be articulated to set up the position are selected automatically. In the NORMAL orientation, the flex position is flatter in order to avoid overextending corpulent patients.
x
x)
LEVEL 0-position function This function key aligns the table top horizontally. First of all, the tilt angle is fully aligned. After this, the inclination and the segment on which the patient’s back is positioned are alternately aligned horizontally (depending on the patient orientation). A brief audible signal sounds as soon as the table top is in the 0position. Now release the function key. Before aligning the leg plates horizontally, check the position of the patient carefully, particularly if leg supports are being used. This may result in injury to the patient. Press the function key again to also align horizontally the segment on which the patient’s legs are positioned.
2.2. Override system = emergency operation 2.2.1 Override operator panel In case of a malfunction or faulty hand control, you can activate the operating table functions via the operator panel (11) on the upper column enclosure = emergency operation. 11
GA113203GB03
è
Note Always press the ON key together with the desired function key.
11
1132.03 A
C
E
G
I
L
N
è
Note If the operating table batteries are discharged, the override system only works if the operating table is connected to the mains.
The functions of the override system operator panel are shown in the following:
B
D
F
H
K
M
O
A) LED-status display of operating table è
Note The status display is only active when the cableconnected hand control or IR remote control is switched on. •
•
•
•
12
Description of the symbols from left to right: Mains connection: the green LED flashes when the operating table is connected to the mains. Battery charge level: the red LED flashes when the operating table batteries have to be recharged as soon as possible. Lock operating table: the green LED comes on when the operating table is locked, i.e. LOCK activated. Extend operating table castors: the red LED comes on when the operating table is on castors and can be moved, e.g. UNLOCK activated.
B)
ON switches the motor ON and must be pressed in addition to each function key.
C)
TREND Moves table top into Trendelenburg position
D)
REV. Moves table top into reverse Trendelenburg position
E)
UP Moves table top up
F)
DOWN Moves table top down
G)
TILT Lateral tilt left
H)
TILT Lateral tilt right
I)
UP Swing back plate up GA113203GB03
1132.03 K)
DOWN Swing back plate down
L)
UP Swing leg plate up
M)
DOWN Swing leg plate down
N)
LOCK Operating table locked
O)
UNLOCK Operating table on castors, movable
2.3. IR remote control 3113.1269 (optional) The operating table can be equipped with an IR remote control, as desired. In this case, an additional charging station is required for the IR remote control. The layout of the function keys for the operating table adjustments is the same on the cable-connected hand control and IR remote control apart from the following exceptions: • There are no function keys for motor-powered movements. For safety reasons, you can only activate this function via the cable-connected hand control. • The LED “Mains connection operating table” is missing. • The red LED indicates the charge level of the batteries of the IR remote control. It flashes when the batteries have to be recharged.
GA113203GB03
è
Note When you switch on the IR remote control, the LED status display on the operator panel on the operating table column is active (see chapter on “Override system”).
è
Note The IR remote control switches off automatically approx. 1.5 min. after the last keystroke. This function is called Auto-OFF and provides additional safety against unintentional activation of an adjustment. It also prevents the batteries being discharged unnecessarily.
13
1132.03 2.3.1. IR system code An IR remote control is clearly assigned to each operating table through a code. The operating table has the same system code as the associated IR remote control. The operating table and IR remote control may only be encoded by authorised personnel. The operating table and the associated IR remote control are marked by adhesive labels bearing the set system code: • The adhesive labels are affixed to the operating table column next to the IR remote control. • The adhesive labels are affixed to the back of the IR remote control. The two dot-shaped adhesive labels bear a number from 0 bis 9 and a letter from A bis F: • left: 0,1,2,...,A,B,...,F • right: 0,1,2,...,A,B,...,F
Examples of preset system codes Markings:
Marking
1 3 C D
5 A 2 A
è
Note The order of the ID letters/numbers is significant, i.e. the IR system code 4 B does not equal B 4.
è
Note Always leave the IR remote control in the immediate vicinity of the operating table to which it is assigned, since the operating table can only be moved via this IR remote control. Of course, the operating table can be moved via a connected cable-connected hand control or the override system at any time, regardless of the IR remote control.
è
0
14
3
Note The transmit power of the IR hand control is sufficient for long-range adjustment of the draped operating table top. If the operating table does not execute the desired movement even though you are pressing the function key down fully, slightly alter the direction in which you are aiming the hand control or the position in which you are standing. In this case, the receiver on the column is probably being obscured by a person or some other object.
GA113203GB03
1132.03
2.3.2. Charging station Order No.:
3110.26A9 (230V) 3110.26B9 (110V)
Recharging the IR remote control: •
Connect the charging station to the mains.
The green LED in the charging station indicates whether the required supply voltage is available or not. •
Place the IR remote control in the charging station as follows: – –
è
Keypad visible, in serviceable position, i.e. the 0-position key (x) is located at the bottom right The base of the hand control is in contact with the lower limit stop of the holder. Note The rechargeable battery of the IR hand control has enough capacity to ensure several days’ use of the operating table. Nevertheless, we recommend that you insert the hand control into the holder of the charging station so that the battery is recharged overnight.
2.4. Activation via foot switch 1009.79F0 (optional) Connect the foot switch to one of the two socket connections at the head of the column. You can activate the following functions: • Elevation up • Elevation down • Trendelenburg position • Reverse Trendelenburg position è
GA113203GB03
Note Be sure to observe the Instructions for Use of the foot switch.
15
1132.03 3. Table top components 3.1 Head rest With this operating table, you can combine various head rests. A head rest can be connected to both ends of the table top. To attach a head rest (1), insert both pins into the locating holes until fully engaged. Then tighten the two fastening screws (2).
2
1
è
Note Check that the head rest has been fastened correctly by pulling at it on both sides.
è
Note For the various possible adjustments, please observe the Instructions for Use of the head rest.
2
3.2 Back plate
3
4
The table top has a dual-split back plate. The shorter back plate (4) is removable. It allows you to adapt the length of the table top perfectly, e.g. for gynaecological or neurosurgical operations with the patient sitting in the NORMAL orientation.
Removing the back plate (4) •
First of all, remove the head rest.
•
Operate the two levers (3) and pull out the back plate at the interface (5).
5
Do not use the removable back plate mounted to the operating table for patients weighing more than 225 kg (500 lb.).
è
Note Only remove the back plate if you have removed the head rest beforehand.
Attaching the back plate (4)
16
•
Insert the pins on the back plate into the locating holes at the interface (5) until fully engaged. The back plate is then located in position automatically.
è
Note Check that the back plate has been fastened correctly by pulling at it on both sides.
GA113203GB03
1132.03
3.3. Interface Removing the back plate (4) frees up an additional interface (5) for fixing accessories to the operating table. For a list of accessories, see Chapter VIII. 3.4. Table top padding 1000.32 The table top padding comprises three component parts which are secured to the table top plates with Velcro fastenings. Paddings can be fixed to the table top in an offset position, e.g. in order to cover joints in the flex position. 3.5. X-ray top 1132.80
5 Do not use the X-ray top with the operating table for a patient weighing more than 225 kg (500 lb.) Purpose The X-ray top is an accessory that is used exclusively for the operating table 1132.03. After attaching the X-ray top, you can insert X-ray cassettes from the side. Patients weighing up to 225 kg may be positioned on the X-ray top. è
Note When the X-ray top is attached, the lowest operating table elevation is raised by approx. 50 mm (2 inches).
Attaching the X-ray top to the operating table The X-ray top is attached in between the padding and table top plates. Follow this procedure: • Remove the padding • Attach the X-ray top to the table top plates • Attach the padding to the X-ray top è
Note Before attaching the X-ray top, check to see if there are two rubber protection rings on each segment and that they are in perfect condition. The rubber protection rings are located on two diagonally opposed pins on each segment. Before swinging the leg plate down, remove the X-ray top from the leg plate (e.g. gynaecological procedures). Position the patient centrally on the individual segments.
GA113203GB03
17
1132.03 4. Drive unit 1132.60 (optional) Displacement is not allowed for patient weighing more than 225 kg (500 lb.). The operating table can be equipped with a drive unit as an optional extra. A table equipped with a drive unit starts moving slowly and slows down softly after you release the function key (i or k).
i
k
i)
BACKW. Move table backwards in a longitudinal direction
k)
FORW. Move table forwards in a longitudinal direction
To move the operating table, follow this procedure: • Disconnect the mains cable form the operating table • Press the ON key • Extend the operating table castors fully (press UNLOCK key) • Guide the operating table with at least one hand • Press function key (i or k) • Release function key (i or k) as soon as the operating table has reached the desired position
backwards
è
Note If the LEDs of the LOCK and UNLOCK functions are flashing, press the UNLOCK key.
Guide the operating table with at least one hand during movements.
forwards è
Note When moving the operating table, do not press the override system keys, since this will cause several functions to be activated simultaneously and involves the risk of injuries or collisions with possible obstacles. Movement of the operating table is only permissible up to a table top elevation of 1 m (39 inches). The warning label is not visible. Make sure that the operating table is set up horizontally and is stable. Remove possible obstacles before moving the operating table.
è
18
Note The operating table can only be moved laterally if you have not activated the BACKW. or FORW: function.
GA113203GB03
1132.03
IV.
Operating the operating table
1. General To ensure safe operation of the operating table, several fundamental principles should be observed. Check the electrical conductivity of the operating table once a year. This check should only be performed by trained servicing personnel. è
Note Attach the operating table to the equipotential bonding in the operating room while the operation is in progress (see DIN VDE 0107). For this purpose, connect the equipotential bonding pin to an equipotential bonding of the operating room in the immediate vicinity of the patient. An equalization cable (5 m long) with connectors at both ends is included in the scope of supply of the operating table.
2. Operation on battery power When the operating table and mobile column run on the integrated batteries and not on mains power, it complies with the regulations for anaesthesia equipment testing (category AP). The equipment may be used in Zone M explosion-hazard zones. Battery operation of the operating table is always preferable to operation on mains power.
Potential equalization line
The capacity of the fully charged batteries provides at least 1 week’s use of the operating table, depending on how often you make adjustments. If the charge level of the batteries drops below a minimum permissible value, this is indicated by the flashing red LED on the cable-connected hand control and at the operating table status indication LED when the operating table is switched on. è
Note The operating table switches off automatically when the battery charge level drops below 10%.
Recharging the batteries Discharged batteries will again be 90% recharged after approx. 5 hours of charging and 100% recharged after approx. 10 hours. The batteries are automatically recharged as soon as you connect the operating table to the power supply by plugging in the mains cable. There is no explosion protection during the battery charging cycle.
GA113203GB03
19
1132.03 To connect and disconnect the mains power cord, follow this procedure: • Prior to connecting the charging cable, first of all connect the operating table and plug the cable into the socket. • Prior to disconnecting the charging cable, first of all pull the plug out of the socket and then disconnect the cable from the operating table. è
Note We recommend you to recharge the batteries overnight, but at least every 2 days, even if “low charge level” of the rechargeable batteries has not been indicated yet. Regular recharging of the rechargeable batteries will not only give you the reassuring knowledge that there is sufficient battery power available for the operation programme, it will also serve to prolong the useful life of the rechargeable batteries.
power cord Socket
3. Operation on mains power As soon as you have connected the operating table to the power supply via the mains power cord, the batteries are recharged automatically. There is no explosion protection during the battery charging cycle. The separation of the OR-table from the mains is made by the power plug. Connect the operating table to the power supply via the mains power cord. To connect and disconnect the mains power cord, follow this procedure: • Prior to connecting the charging cable, first of all connect the operating table and plug the cable into the socket. • Prior to disconnecting the charging cable, first of all pull the plug out of the socket and then disconnect the cable from the operating table. è
Note Damaged cables must be replaced immediately.
4. HF surgery / Use of defibrillators In the field of HF surgery and when using defibrillators, it is essential that you heed the following safety instructions: When using HF equipment, defibrillators and defibrillator monitors, avoid contact between the patient and metal parts of the operating table, table tops and accessories, and do not deposit the patient on damp or wet surfaces or electrically conductive padding. This can result in burns. It is absolutely essential that you comply with the equipment manufacturer’s Instructions for Use.
20
GA113203GB03