User Manual
27 Pages
Preview
Page 1
REF m-101
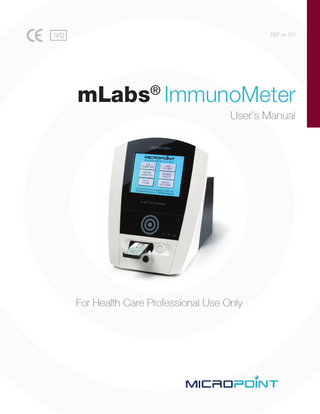
mLabs® ImmunoMeter User’s Manual
For Health Care Professional Use Only
Contents 1.
Introduction………………………………………………………………………..….pg 2 1.1
How to Use this Manual
1.2
Introduction
1.2.1 1.2.2
2.
The mLabs® ImmunoMeter Components Diagram of mLabs® ImmunoMeter
1.3
Specifications
1.4
Warnings, Precautions and Limitations
1.5
Symbols and Explanations
Installation and Configuration………………………………………...…...…...pg 7 2.1
2.2
Instrument Set Up 2.1.1 2.1.2
Connect the Power Adapter to mLabs® ImmunoMeter Install the Printing Paper
Power up and Configure mLabs® ImmunoMeter
2.2.1 Power up the mLabs® ImmunoMeter 2.2.2 Configure the mLabs® ImmunoMeter 2.2.2.1 Set Time and Date 2.2.2.2 Set Printing Mode 2.2.2.3 Set Calibration Frequency 2.2.2.4 Set User ID 2.3
3.
Operation……………………………………………………………………..……...pg 11 3.1
Install the Data Drive
3.2
Run QC Test
3.3
4.
Calibrate mLabs® ImmunoMeter using Calibration Cartridge
3.2.1 3.2.2
Prepare QC Sample and test Cartridge Run QC Test
Test Patient Sample 3.3.1 Enter User ID 3.3.2 Enter Patient ID 3.3.3 Start the Test
3.4
Retrieve Results
3.5
Export Data to an External USB Device
Maintenance………………………………………..………………………...……..pg 19 4.1
Clean mLabs® ImmunoMeter
4.2
Calibrate Touch Screen
5.
Troubleshooting…..………………………………..………………………...……..pg 21
6.
Warranty…...……………...……………………pg 23
7.
Contact Addresses and Phone Numbers………………...……………………pg 25
1
1. Introduction 1.1
How to Use this Manual
This user manual contains important information regarding the proper operation and maintenance of the mLabs® ImmunoMeter. The mLabs® ImmunoMeter User Manual consists of seven sections: 1. 2. 3. 4. 5. 6. 7.
Introduction: An overview of mLabs® ImmunoMeter Installation and Configuration: Guides through first time setup Operation: Instructs how to run tests, view and delete results Maintenance Troubleshooting Warranty Contact Addresses and Phone Numbers
1.2
Introduction 1.2.1 The mLabs® ImmunoMeter Components • One mLabs® ImmunoMeter, as shown in Fig. 1-1.
Fig. 1-1 1-1 Fig. • User Manual • One power cable and one power adapter, as shown in Fig. 1-2.
Fig. 1-2
2
• One roll of printer paper, as shown in Fig. 1-3.
Fig. 1-3 • One Calibration Cartridge, as shown in Fig. 1-4.
Fig. 1-4 (Calibration Cartridge barcode number may be different than shown.)
• One Touch Pen, as shown in Fig. 1-5.
Fig. 1-5 Optional Accessory (available from Micropoint): Barcode Scanner, as shown in Fig. 1-6.
Fig. 1-6 Contact your local Micropoint distributor to obtain information about the replacement of the power adapter & cable, printing paper, and Calibration Cartridge, touch pen, and barcode scanner if necessary.
3
1.2.2 Diagram of mLabs® ImmunoMeter
Front Panel: (1) LCD Touch Screen (2) Warning Light (3) Status Light (4) Power Light (5) Cartridge Holder (6) Cartridge Holder Eject Button (7) Power On/Off Button
1
2 3 4 5 6 7
13 Rear Panel: (8) Power Cable Connector (9) RS232 Serial Port (10) Ethernet Interface (11) SD Card Slot (12) USB Ports (x2) (13) Thermal Printer (inside)
8 9 10 11 12
Fig 1-7
4
1.3
Specifications Display Screen Keyboard I/O Printer Print paper OS Language Patient Records Dimension Weight Power Environment
Warranty Period
1.4
5.7” True Color Screen Touch Screen USB Ports ×2, Ethernet Interface ×1, RS232 Serial Port ×1, SD Card Slot ×1 Built-in 50 mm Thermal Printer Width: 58 mm, Outside Diameter: 50mm Windows CE English 1000 Test Results 296 mm x 224 mm x 268 mm (L×W×H) 3.0 Kg Adapter Input:100V-240 V AC, 50-60 HZ ImmunoMeter Input: 12 V DC, 50 W Indoor use only Altitude should be <2,000 m Temp: 5°C~40°C Related Humidity: ≤80% Avoid direct exposure to sunlight and strong magnetic field 1 Year
Warnings, Precautions and Limitations CAUTION: mLabs® ImmunoMeter is for in vitro diagnosis use only. •
Read the manual carefully prior to operation.
•
Test results are intended only for applications specified in the product insert.
• Use the provided AC/DC power adapter and ensure that mLabs® ImmunoMeter is operated within the recommended voltage. •
Immediately unplug the AC/DC power adapter if smoke is observed.
• Service of mLabs® ImmunoMeter should be performed only by Micropoint Bioscience’s service engineers. •
Warranty will be voided if mLabs® ImmunoMeter is opened or disassembled by user.
5
1.5
Symbols and Explanations Symbol
PN
Description
Symbol
Description
Lot Number
Expiration Date
Caution. Read Carefully.
Fragile
Grounded
This Side Up
Name and Address of Manufacturer
Avoid Liquid Spills
Manufacture Date
European Authorized Representative
Hot Surface
Stacked no more than 5 layers
For In Vitro Diagnostic Use Only
SN
Serial Number
Part Number
Rev.
Revision
6
2. Installation and Configuration 2.1 •
Instrument Set Up Place the mLabs® ImmunoMeter and accessories on a flat workbench.
• Do not leave mLabs® ImmunoMeter to exposed to direct sunlight or place it near an area with a high heat source or strong magnetic field. • Please contact your local Micropoint distributor if there is any damage caused during shipping process. 2.1.1 • • •
Connect the power adapter to mLabs® ImmunoMeter Connect the power adapter and the power cable. Plug the power adapter into mLabs® ImmunoMeter (see Fig. 1-7(8)). Plug the other end of the power cable into power outlet.
2.1.2 Install the Printing Paper • Pull and open the cover of thermal printer (see Fig. 1-7(13)) and insert printing paper according to Fig. 2-1. • Allow a small portion of the printing paper to be extended outside the printing paper compartment. Close the cover and the printing paper will be fed automatically.
Fig. 2-1 CAUTION: The thermal printing compartment may be hot during operation! It is recommended to handle the thermal printer after it has cooled down. 2.1.3 Install the Barcode Scanner • Connect the barcode scanner into the RS232 Serial Port of the mLabs® ImmunoMeter (see Fig 1-7(9)). • Follow the instructions supplied with the barcode scanner. 2.2
Power Up and Configure mLabs® ImmunoMeter 2.2.1 Power up the mLabs® ImmunoMeter • Press and hold the black “Power On/Off” button on the front of the instrument until the green power light turns on. • A “System Check” status shows on the screen with the status light on before “Main Menu” displays. •
Wait for up to 1 minute to allow “Main Menu” screen to appear as shown in Fig. 2-2. 7
Fig. 2-2 (Each mLabs ImmunoMeter may have different software version and S/N number than shown.) ®
2.2.2 Configure the mLabs® ImmunoMeter • Touch “SETUP SYSTEM” on the screen as shown in Fig. 2-2. The setup menu will display as in Fig. 2-3.
Fig. 2-3 •
Adjust the following settings: 1. 2. 3. 4.
Time and Date Printing Mode Instrument’s Calibration Frequency User ID
• After setting up the basic parameters for mLabs® ImmunoMeter, touch “SAVE” to save the configuration or touch “BACK” to return to previous menu. 2.2.2.1
Set Time and Date
• Use the pull-down menu and/or up-and-down arrows as shown in Fig. 2-3 to set the correct date and time. 2.2.2.2
Set Printing Mode
• Choose printing mode by touching the open circle to either “AUTOMATIC” or “MANUAL” as shown in Fig. 2-3. 2.2.2.3
Set the Calibration Frequency
• As shown in Fig. 2-3, select “NONE” or “30 DAYS” on “CALI. FREQ” to select the instrument calibration interval. 8
2.2.2.4
Set User ID
• Each instrument has a default user ID and password as “000001” and “123”, respectively. Touch “ADMIN” as shown in Fig. 2-3 and enter this user ID and password as shown in Fig. 2-4. In the screen as shown in Fig. 2-5, only the administrator can add or delete a user ID, and edit user information such as status, authorized date (start-end), password, and ID BYPASS mode. Authorized users can modify their passwords only. • There is an option for the ID BYPASS ON as shown in Fig. 2-5. If this option is selected (designated by the mark, ), no USER ID is required when performing “Run Patient Test” or “Run QC Test”; the mLabs® ImmunoMeter will recognize the user as default 000001. If this option is not selected and left blank as □, the operator is required to enter a USER ID each time before running test (“Run Patient Test” or “Run the QC test”).
Fig. 2-4
Fig. 2-5 2.3
Calibrate mLabs® ImmunoMeter using Calibration Cartridge • The mLabs® ImmunoMeter will prompt user to perform calibration test when the calibration interval in “Cali. REQ” is set “30 DAYS” and when the calibration is due. • To perform a calibration, touch “PERFORM CALIBRATION” in main menu, a screen as shown in Fig. 2-6 will display.
9
Fig. 2-6 •
Press cartridge holder eject button (see Fig 1-7(6)) to eject the cartridge holder.
• Place the provided Calibration Cartridge with barcode side facing up in the cartridge holder and touch “START”. • mLabs® ImmunoMeter will perform calibration automatically. After calibration is completed, mLabs® ImmunoMeter will display either “CALIBRATION PASS” or “CALIBRATION FAIL” on the screen. • After calibration is complete, the calibration cartridge will be ejected. Remove the calibration cartridge from the holder and replace it back to the original zip-locked pouch. DO NOT DISPOSE OF THE CALBRATION CARTIDGE. • Press cartridge holder eject button to bring the cartridge holder back into mLabs® ImmunoMeter. •
Do not add sample or control or any liquid into the Calibration Cartridge!
•
If calibration fails, contact the local Micropoint distributor for further advice.
10
3. Operation 3.1 Install the Data Drive • Prior to running any assay, the Data Drive for that Assay Lot must be installed into the mLabs® ImmunoMeter. The Data Drive provides Lot-specific information and the expiration date, and is only required to be installed once for each Lot. The mLabs® ImmunoMeter can store information from different Lots. If the maximum is exceeded, the oldest entry is overwritten. A Lotspecific Data Drive is provided with each test kit. •
Insert the Data Drive (USB drive) into a USB port at the rear of mLabs® ImmunoMeter.
•
From the main menu, select “INSTALL DATA DRIVE”
•
A screen as shown in Fig. 3-1 will display.
• Touch “Install” as shown in the bottom right corner of Fig. 3-1. The Data Drive will be installed automatically.
Fig. 3-1 • The screen displays “PLEASE WAIT, INSTALLATION IN PROGRESS” while installing the Data Drive. After the Data Drive is successfully installed, the screen will display “DATA DRIVE FOR TEST CARTRIDGE INSTALLED!” Touch the upper right corner “OK” to confirm. As shown in Fig. 3-2.
Fig. 3-2 • Remove the Data Drive (USB drive) from mLabs® ImmunoMeter after installing the Data Drive. • Lot number information on the Data Drive will be displayed on screen after the Data Drive is successfully installed. Fig. 3-3 shows a typical display after the Data Drive is successfully installed for D-Dimer Cartridge with lot number 000014. “Lot Num” represents the Lot Number of the cartridges and “ITEMNAME” is the type of test cartridge. The lot manufacture date and expiration date are also shown on the screen. 11
Fig. 3-3 • To delete data drive, select the data drive you want to delete, then touch “DELETE” and input the admin user name and password. It is not recommended to Delete any Data Drive from the mLabs® ImmunoMeter if not necessary. •
Touch “BACK” to return to the Main Menu.
3.2 Run QC test Install the Data Drive for QC test before the QC test is conducted. Follow the steps described in 3.1 3.2.1 Prepare QC Sample and test Cartridge •
Follow the instructions provided with QC materials to prepare liquid QC Samples.
•
QC lot number and expired data will be on the QC material label.
• Add liquid QC samples into cartridge according to QC material instructions. Follow the instructions in 3.2.2, “Running QC Test” after QC liquid sample is added into cartridge. 3.2.2 Run QC Test •
Touch “RUN QC TEST” on the Main Menu screen.
•
Enter USER ID as shown in Fig. 3-4 and touch “OK”.
•
Enter the QC lot number as shown in Fig. 3-5 and touch “OK”.
12
Fig. 3-4
Fig. 3-5 NOTE: If an unregistered or wrong user ID is entered, the system will prompt as shown in Fig. 3-6(1). If the Data Drive for the QC lot is not installed, system will prompt as shown in Fig. 3-6(2). If the Data Drive for the test cartridge is not installed, system will prompt as shown in Fig. 3-6(3).
(1)
(2)
(3)
Fig. 3-6 •
Insert the QC test sample Cartridge and touch “START”.
• mLabs® ImmunoMeter will perform QC test automatically, and display results as shown in Fig. 3-7. 13
Fig. 3-7 (Result shown for reference only)
3.3 Test Patient Sample •
Prepare cartridge according to the package insert of the test kit.
•
From main menu, touch “RUN PATIENT TEST”.
3.3.1 Enter User ID •
Enter the user ID as shown in Fig. 3-8.
•
Touch “OK”. A screen as shown in Fig. 3-10 will display.
NOTE: If you enter an unregistered user ID, system will prompt as Fig. 3-9.
Fig. 3-8
Fig. 3-9 3.3.2 Enter Patient ID • Enter an up to 15 digit number as patient ID. Fig. 3-10 shows an entry for Patient ID “789”. Touch “OK” to advance to next step.
14
Fig. 3-10 3.3.3 Start the Test •
Press cartridge holder eject button (see Fig. 1-7(6)). The cartridge holder will be ejected.
•
mLabs® ImmunoMeter will display test menu as Fig. 3-11.
Fig. 3-11 •
Add sample into the cartridge follows instructions in the Package Insert.
• Put the cartridge into the cartridge holder and touch “START” as shown in Fig. 3-11 to start the test. • When the test is complete, the cartridge holder will be ejected automatically. The test results will be displayed on the screen and saved automatically (Fig. 3-12).
Fig. 3-12 (Result shown for demonstration purposes only)
• Results will automatically be printed if mLabs® ImmunoMeter is configured for “AUTOMATIC” printing, see 2.2.2 Configure the mLabs® ImmunoMeter. If printer’s mode is set at “MANUAL”, touch “PRINT” to print the result. •
Touch “Back” to return to previous menu to enter a new Patient ID for next patient sample. 15
3.4
Retrieve Results • Touch “RETRIEVE RESULTS” on the main menu. The screen will display the SEARCH OPTIONS as shown in Fig. 3-13:
Fig. 3-13 • In the “SEARCH OPTION” menu as shown in Fig. 3-13, users can select one or more options: (1) Result TYPE, (2) Test ITEM (analyze), (3) Patient ID, (4) User ID or (5) Test date (FROMTILL). Results will be displayed according to search selections. •
Touch “ALL” to see all test results as shown in Fig. 3-14.
• Touch “PRINT SEL” to print the selected results. Select “PRINT ALL” to print all the displayed results. •
Touch “DELETE” to delete any checked data.
•
Touch “BACK” to return to the previous menu.
Fig. 3-14 3.5 Export Data to an External USB Drive • Touch “RETRIEVE RESULTS” on main menu. The screen will display the SEARCH OPTIONS as shown in Fig. 3-13. • Insert an external USB drive to the rear of mLabs® ImmunoMeter (see Fig. 1-7(12)). For your data safety, it’s strongly recommended to use the USB drive authorized by Micropoint Bioscience, Inc. • Touch “UPLOAD” as shown in Fig. 3-13. mLabs® ImmunoMeter will prompt to input the USER ID and password, only the admin user with a correct ID and password can access this function as shown in Fig. 3-15.
16
Fig. 3-15 • The mLabs ImmunoMeter creates a folder named “Data” in the USB drive and upload all original data and test results to the newly created “Data” folder. The uploading process is shown in Fig. 3-16, with the “progress bar” indicating the status of uploading process. ®
• The “progress bar” will disappear after finishing uploading. Do not remove the USB drive until the uploading process is completed. If the USB drive removed during the uploading process, the data will be permanently lost. • As shown in Fig. 3-16, system prompt whether to keep the patient results during this upload process, select “Yes” to keep the patient results in mLabs® ImmunoMeter, and “No” to remove all the patient result from mLabs® ImmunoMeter. Also, system prompt whether to keep the QC and calibration result, select “Yes” to keep the result, and “No” to remove all the result from mLabs® ImmunoMeter as shown in Fig. 3-17 and 3-18. • When upload is completed the screen will indicate data transfer completed as shown in Fig 3-19. Touch “OK” to close the window before remove the USB drive. Touch “BACK” to return to the main menu.
Fig. 3-16
Fig. 3-17
17
Fig. 3-18
Fig. 3-19 CAUTION: (1) After the data is saved onto an external USB drive, the data stored in mLabs® ImmunoMeter will be permanently removed if you select “No” as shown in Fig 3-16. (2) Please ensure that there is no ”Data” file in the external USB drive before performing the data uploading process from mLabs® ImmunoMeter.
18
4. Maintenance 4.1
Clean mLabs® ImmunoMeter •
Unplug mLabs® ImmunoMeter prior to cleaning.
• Clean the exterior surface and the cartridge holder of mLabs® ImmunoMeter with a lint-free wipe.
4.2
•
Do not immerse mLabs® ImmunoMeter in cleaning liquid.
•
Avoid spilling liquids on the mLabs® ImmunoMeter and related accessory devices.
Calibrate Touch Screen • From the main menu touch “System Setup”, then “Touch Cali”. The prompt on the screen shows whether continue the calibration shown as Fig. 4-1.
Fig. 4-1 •
Touch “Yes” to start calibration, and a cross cursor will be displayed on the screen.
• Touch the middle of the cursor with a blunt tip (recommend to use touch pen) until the cursor move to the next position, and repeat the operation until the cursor disappears from the screen. The cursor moves as the broken line shown in Fig. 4-2.
Fig. 4-2
19