User Manual
34 Pages
Preview
Page 1
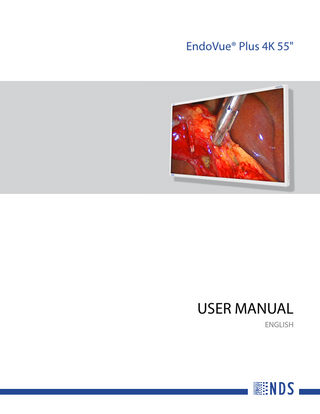
EndoVue® Plus 4K 55"
USER MANUAL ENGLISH
© 2021 NDS Surgical Imaging, LLC. All rights reserved. Information in this document has been carefully checked for accuracy; however, no guarantee is given to the correctness of the contents. This document is subject to change without notice. NDS provides this information as reference only. Reference to products from other vendors does not imply any recommendation or endorsement. This document contains proprietary information protected by copyright. No part of this manual may be reproduced by any mechanical, electronic, or other means, in any form, without prior written permission of NDS. All trademarks are the property of their respective owners.
Table of Contents Safety Information... 1 Warnings and Cautions... 1 Medical Device Shipping Symbols... 1 System Safety Requirements... 1 Grounding... 2 Power Cord... 2 Installation Notes... 2 Intended Use and Contraindications... 2 Image Retention Notice... 3 VESA Compliant Display Mounting... 1 Installation Notes... 1 Enclosure Assembly and Cleaning... 2 Cable Cover Installation... 2 General maintenance information... 2 Cleaning Instructions... 2 Display User Interface... 3 Display Keypad... 3 Menu Navigation... 3 Input Menu... 3 Display Menu... 4 Image Adjustment... 8 Connector Panel Overview... 9 EndoVue Connector Panel (90K0091/90K0093)... 9 EndoVue Connector Panel (90K0092/90K0094)...10 Electrical Symbols...10 Power On or Off Device...10 Cable Bend Radius...10 Specifications...11 Specifications...11 EndoVue Plus 4K 55" Parts List by Region...11 Operating principle...12 Troubleshooting...13 Electromagnetic Compatibility Tables...15 Electromagnetic Emissions...16 Electromagnetic Immunity...17 Recommended Separation Distances...18 Terms and Conditions...21 Declarations of Conformity...21 Legal Statement...22
Table of Contents | i
ii | Table of Contents
Safety Information Warnings and Cautions This symbol alerts the user that important information regarding the installation and/or operation of this equipment follows. Information preceded by this symbol should be read carefully. This symbol warns the user that uninsulated voltage within the unit may have sufficient magnitude to cause electrical shock. Do not touch any part inside the unit. To reduce the risk of electric shock, DO NOT remove the cover or back. Note: There are no user serviceable parts inside. Refer servicing to qualified service personnel. This symbol alerts the user that information preceded by this symbol should be read carefully to avoid damage to the equipment. This symbol denotes the manufacturer. This symbol denotes the manufacturer’s European Community representative. This symbol indicates compliance with the Waste Electrical and Electronic Equipment Directive (WEEE Directive). Please follow the national guidelines for unit disposal. This symbol indicates the device is a Medical Device. This product is intended only for use by healthcare professionals in professional healthcare environments. This product is T.U.V. approved with respect to electric shock, fire and mechanical hazards only in accordance with CAN/CSA C22.2 No. 60601-1 and ANSI/AAMI ES60601-1. This product meets the requirements of EN60601-1 so as to conform to the 2017/745 Medical Device Regulation of European Union. Alternating Current This symbol indicates only use at altitudes below 2000 meters.
Note: If any serious incident or adverse event has occurred in relation to the device, it should be reported to the manufacturer and the competent authority of the Member State in which the user and/or patient is established.
Medical Device Shipping Symbols Medical device shipping symbols, as defined below are printed on the shipping containers used to transport this product. Position the
Keep dry
Fragile
Fragile keep dry
container up
System Safety Requirements External equipment connected to the signal input/output or other connectors of this product for use in a patient environment must comply with the requirements of ISO and UL/EN/IEC 60601-1 safety standards. A person who connects such equipment to this product has by definition formed a system, and is responsible for compliance of that system to the same ISO and UL/EN/IEC 60601-1 safety standards. To prevent fire or shock hazards, do not expose this unit to rain or moisture.
Safety Information | 1
Grounding This product is energized from an external electrical power source for 2017/745 Medical Device Regulation of European Union Class I equipment. It is the responsibility of the installer to test the product's earth ground to verify that it complies with the hospital, local and national impedance requirements. A ground post is located on the back of the product to use for grounding the chassis of the unit. Any such grounding must be installed in accordance with applicable electrical codes. The installation shall only be carried out by NDS authorized and trained personnel.
Power Cord MEDICAL EQUIPMENT should be positioned so that the disconnect device is readily accessible. The power cord is the only recognized disconnect device. Disconnect the power cord from the AC mains. Remove power cord to fully turn off the device. For Customers in North America Use a hospital grade power cord with the correct plug for your power source. Monitors should be powered from a center tapped circuit when used in the US at voltages over 120 volts. WARNING: To avoid the risk of electric shock, this equipment must only be connected to a supply mains with protective earth (ground). For Customers in China Use China Compulsory Certificate (CCC)-approved power cord. For Customers in Japan The supplied power cord is for use only with this monitor.
Installation Notes This product is a Class I medical device. No modifications are allowed. Monitors are intended for continuous operation.
Intended Use and Contraindications EndoVue Plus 4K 55” This product is intended only for use by healthcare professionals in professional healthcare environments. Intended Use The EndoVue Plus 4K 55" is intended for use in a medical environment to display high quality video and graphics images. The EndoVue Plus 4K 55" is indicated for use in surgical procedures where a reference image is to be displayed. The EndoVue Plus 4K 55" is intended for infant or adults by profession Health care professionals. Contraindications 1. This product is capable of displaying Radiology (PACS) images for reference only. 2. This product is not for diagnostic use. 3. For mission critical applications, we strongly recommend that a replacement unit be immediately available. 4. Do not use this product in the presence of flammable anesthetics mixture with air, oxygen or nitrous oxide. 5. No part of this product may come in contact with a patient. Never touch the product and a patient at the same time.
2 | Safety Information
Image Retention Notice Warning: Leaving a fixed (constant) image on the monitor for a long period of time can result in image retention. Avoid leaving a fixed image on the monitor, or turn the monitor off when it is not in use. • No Applied Parts •I IPX0 • Not AP or APG Category
Safety Information | 3
4 | Safety Information
VESA Compliant Display Mounting EndoVue series displays are compliant with the VESA Mounting Interface Standard. EndoVue® Plus 4K 55" The EndoVue® Plus 4K 55" utilizes 500mm x 100mm VESA mounting pattern configured to size and weight of the display suitable for wall mounting. Warning: The mounting bracket screws must be securely tightened. Failure to properly secure the mounting bracket to the display could be hazardous. Use suitable mounting apparatus to avoid risk of injury. It shall be mounted by trained and authorized personnel on adequate allowances for quality materials used to make the connection. In consideration of thickness of the mounting bracket or stage, tighten the M6 Screws (4pcs) with washer which depth of tapped hole is 30mm length.
Installation Notes This product is a Class I medical device. No modifications are allowed. Monitors are intended for continuous operation.
VESA Compliant Display Mounting | 1
Enclosure Assembly and Cleaning Cable Cover Installation 1. 2. 3. 4.
Connect power, control, and video cables before installing the cable cover. Align the cable cover to the cable well recess on the back of the display. Slide the cable cover forward into the recess, with cables positioned under the cut-out. Slide the cable cover forward until tabs on the bottom edge click into place and using a screw driver, tighten the screw. 5. The cable cover cannot be removed under normal use conditions.
General maintenance information EndoVue series monitors do not require any scheduled maintenance or calibration activities. If any abnormal situation found, please return the display to our approved maintenance organization. For any questions, please call Customer Service for assistance at (877) 637-1110.
Cleaning Instructions Warning: Prior to cleaning, the display should be turned OFF and disconnected from the power source. • Do not allow liquids to enter the interior of the unit, as severe damage to the unit can result. • Do not use solvents such as benzene or thinner, or any acid, alkaline or abrasive detergents. Front Glass: Thoroughly wipe the front glass surface with a lint-free cloth. For persistent spots or smudges, use a lint-free cloth dampened with distilled water. Do not use any harsh solvents, abrasive detergents or chemical cleaning cloths. Enclosure: Wipe all exterior surfaces with a lint-free cloth dampened with distilled water or 70% Isopropyl alcohol or Vinegar (distilled white vinegar, 5% acidity). If 70% Isopropyl alcohol or Vinegar (distilled white vinegar, 5% acidity) is used, wipe all exterior surfaces with a lint-free cloth dampened with distilled water afterwards. Cleaning frequency: Once every two weeks Note: Do not use the following products: • MEK (Methyl Ethyl Ketone) • Toluene • Acetone • Benzene or thinner • Acid • Alkaline or abrasive detergents • Chemical Cleaning cloths
2 | Enclosure Assembly and Cleaning
Display User Interface Display Keypad The Display Keypad is located at the lower right side of the front frame edge, providing controls for adjustment of display parameters using the On Screen Display (OSD) Menu system.
Menu Navigation INPUT and MENU Buttons: Open OSD Menus To open the Input Menu, press the INPUT button. To open the Display Menu, press the MENU button. INPUT
MENU
SCROLL Button: Vertical Selection Control
SCROLL
To enter a menu and begin a parameter selection process, press the SCROLL button. The top parameter row is first selected, and the selection moves downward to the next row with each successive press of the button. To exit a menu, use the SCROLL button to move the selection to the bottom menu row, and then press the SCROLL button just once to highlight the menu tab, where you can use the or buttons to select another menu tab.
Left/Right Buttons: Horizontal Selection Controls To adjust a parameter, select the parameter row using the SCROLL button, then press the buttons to make the adjustment or to select a setting.
or
Input Menu INPUT
To select or change an input source, press the INPUT button to access the Input Menu. press the SCROLL button to highlight the desired input and press the button to select it. A P symbol in the left column designates the active input of Primary image, and an S symbol in the right column designates the active input of Secondary.
The Input Menu automatically closes 30 seconds after the last action. It can also be closed by pressing the INPUT button. Display User Interface | 3
Display Menu MENU
To open the Display Menu of the primary, press the MENU button (press twice for secondary). The Picture Menu displays by default, with details of the current video input listed across the top of the menu above the menu tabs. To select other menus, press the or buttons to highlight the menu tab, then press the SCROLL button to enter the menu.
To adjust a parameter, press the SCROLL button to move the row selection down to it, and then press the or buttons to adjust the parameter or to select a setting. Parameter adjustments are applied in real time while changing values or settings. The Display Menu automatically closes 30 seconds after the last action. It can also be closed by pressing the MENU button. Note: Grayed out descriptions indicate parameters not available for the current signal or input configuration.
Picture Menu
Note: Picture Menu display only those parameters that apply to specific input signals. Sharpness To adjust sharpness (edge enhancement) of the displayed image, press the or buttons. Overscan (Video) Parameter enabled when the input is 16:9, 480P, 576P, or interlaced. Press the or buttons to select. 0: The image is displayed at a size that fills the screen without losing any video information. Image could be displayed as letterboxed, with black bars top and bottom or left and right. 1, 2, 3, 4, 5 or 6: Incrementally enlarges and crops the centered image. As the image becomes larger, video information is lost on all sides. Scaling (Graphics) Parameter enabled when input signal is not 16:9, 480P, 576P, or interlaced. Press the Mirroring On/Off The displayed image swapped from right to left. The default setting is Off. Press the On or Off. After AC on, the mirror setting will always be set to Off automatically. Operating Hours Displays in hours and minutes the accumulated time the monitor has been in use. BIOS Version number of the display firmware. 4 | Display User Interface
or
buttons to select.
or
buttons to select
Color Menu
Gamma To select a gamma setting, press the or buttons. 1.8, 2.0, 2.2, 2.4 or 2.6: Preset gamma values Video: Linear gamma Look Up Table (LUT) PACS: DICOM gamma LUT This product is capable of displaying Radiology (PACS) images for reference purposes only. Color Temperature To select a preset color temperature, press the or buttons. 5500, 6500, 8000, 9300: Preset color temperatures. User: If a preset color temperature is selected, and any other parameter is subsequently changed, the resulting values are copied to the Color Temperature User presets and User is selected Red, Green, Blue To increase or decrease the intensity of the selected color, press the
or
Saturation To set the saturation (color intensity) of the image, press the
buttons.
Hue To set the hue (color tint) of the image, press the
or
or
buttons.
buttons.
Video Level Expand input signal level for limited timing. Normal: Provides a dynamic range equivalent to the incoming signal with no change. Expanded: Expands the signal level such that an input signal with range 16 (black) to 235 (white) will be expanded to a range of 0 (black) to 255 (white). Color Correction Select color gamut standard. If BT709 or BT2020, some color functions should be disabled for color gamut accuracy.
Display User Interface | 5
Setup Menu
Menu Position: To select from nine preset screen locations for display of the OSD menus, press the
or
buttons.
Language: To select one of 19 languages: English, German, French, Italian, Swedish, Spanish, Dutch, Portuguese, Norwegian, Danish, Finnish, Turkish, Greek Russian, Polish, Korean, Japanese, Simplified Chinese, Traditional Chinese, press the or buttons. DPMS Enable To enable or disable Display Power Management System (DPMS), press the or buttons. Off: Default setting. On: If there is no input signal, a “D.P.M.S” message displays for 10 - 15 seconds before the display goes into Power Saving mode. The display turns on when the input signal is restored. Auto Source Select To disable or enable Auto Source Select, press the or buttons. Off: Video input is manually selected. On: Searches through all possible input sources until an active video source is found. Menu Lock To enable Menu Lock, press the button. Off: Default setting. On: Disables access to OSD menus to prevent inadvertent changes to display settings. The OSD closes, and a MENU LOCKED message displays briefly. To unlock OSD access, simultaneously press and hold the MENU and SCROLL buttons until a MENU UNLOCKED message displays.
6 | Display User Interface
Defaults Menu
Factory Defaults To return all changed parameter settings to factory preset values, press the Defaults” message displays while processing.
button. The “Restoring Factory
User Defaults To save changes to default parameters in a User Default profile, press the SCROLL button to select a User Defaults profile marked ***EMPTY*** and press the button to save the profile. The “Saving User Defaults” message displays while processing.
To restore a User Defaults profile after changing other parameters, select the saved User Defaults profile and press the button. The “Restoring User Profile” message displays while processing. To clear a User Defaults profile, select the saved User Defaults profile and press the (Brightness/Contrast) button. The “Clearing User Profile” message displays while processing.
Display User Interface | 7
Image Adjustment Brightness/Contrast Button Press the (Brightness/Contrast) button once to access the Brightness control. Press the button twice to access the Contrast control, or press it three times to access the Backlight control. Press the or buttons to adjust the controls. Press [SCROLL] to select Primary/Secondary displayed image for adjusting. Brightness Control To adjust brightness of the designated input of primary, press the or buttons. Press [SCROLL] to select secondary. To adjust brightness of secondary press the or buttons. NOTE: Setting brightness too high or too low reduces the range of shadow and highlight detail of the displayed image. Contrast Control To adjust contrast of the designated input of primary, press the or buttons. Press [SCROLL] to select secondary. To adjust contrast of secondary, press the or buttons. Note: Setting contrast too high or too low reduces the range of shadow and highlight detail of the displayed image, with a negative effect on color saturation. Backlight Control To adjust the backlight level of your monitor, press the or buttons. Press [SCROLL] to select secondary. To adjust backlight of secondary, press the or buttons. Note: Lower backlight levels increase backlight lifetime.
8 | Display User Interface
Connector Panel Overview The EndoVue® Plus 4K 55" is available in two different input/output connector panel configurations: Part number 90K0091/90K0093 – DisplayPort and HDMI inputs only Video inputs: • Two DisplayPort 1.2 Inputs • Two HDMI 2.0 Inputs Video Outputs: •
Two HDMI outputs
Part number 90K0092/90K0094 – with optional Quad-Link/12G-SDI Video Inputs: • Two DisplayPort 1.2 Inputs • Two HDMI 2.0 Inputs • Four SDI Inputs (Supporting multiple signal configurations, see below*) Video Outputs: • •
Two HDMI outputs Four SDI outputs
EndoVue Connector Panel (90K0091/90K0093)
Connector Types Inputs
Connector Types
DisplayPort 1.2 HDMI 2.0 RJ-11
DisplayPort, Digital 100 Ohm differential HDMI, Digital 100 Ohm differential RS-232 transmission only. Do not use for Internet
Connector Panel Overview | 9
EndoVue Connector Panel (90K0092/90K0094)
Note: The four SDI input connections can support one of the following signal configurations at a given time: • Quad-link SDI (UHD resolution, Square Division or 2Si), 4 x 3G-SDI using 4 BNCs • A single 12G-SDI input, using one of the four input BNCs • Four separate 3G-SDI signals each at full HD resolution (can be displayed as a quad-split, or individually upscaled to full screen) Note: The 5VDC/2A Output port shall be used only for external accessories such as fiber optical to DVI converter.
Electrical Symbols
Equipotentiality This symbol appears next to the display Potential Equalization Conductor (ground post). Closed (On) Switch This symbol appears below the closed, or on, side of the display On/Off switch. Open (Off) Switch This symbol appears below the open, or off, side of the display On/Off switch.
Power On or Off Device The device has a power switch next to the AC power input. Make sure the power switch is in the ON position after the power is connected. The power switch can be used to power off the display. NOTE: Disconnect the power cord to remove power to the device. This is the only authorized power removal procedure. Power cord shall be connected to a socket-outlet near the device and be easily accessible. WARNING: To avoid the risk of electric shock, this equipment must only be connected to a supply mains with protective earth (ground).
Cable Bend Radius We recommend that the bend radius of metallic cables be no less than 63 mm (2.5 inches) or 7 times the diameter of the cable whichever is greater. The bend radius of Fiber Optic cables should be no less than 10 times the diameter of the cable. Sharper bends can damage the cable, and/or degrade the video signal.
10 | Connector Panel Overview
Specifications Specifications Specifications are subject to change without notice. Contact factory for current specifications.
EndoVue 55" Model Name
BC-WK55-A1B00
Viewing Area (Diagonal)
54.64 in. (1388mm)
Typical Luminance (cd/m2)
460
Native Resolution
3840 x 2160
Aspect Ratio
16:9
Pixel Pitch (mm)
0.315
Viewing Angle (Horizontal & Vertical)
178°
Contrast Ratio (Nominal)
1000:1
RATING/AC Input
100-240V~,50-60HZ,2A-0.83A
RATING/DC Output
5V/2.0A, 12V/2.0A
AC Power Consumption (Nominal)a
BC-WK55-A1B00: 185W
Dimensions (W x H x D)
Display only: 71.6 x 1261.8 x 738.8mm Display with carton: 210 x 1455 x 923 mm
Display Weightb
BC-WK55-A1B00 Net weight 71.21 lb (32.3 kg) Gross weight 93.70 lb (42.5 kg)
Operating Temperature
0 – 40°C (Ta=40°C, Humidity max=90%)
Non-Operating Storage Temperature
-20 – 60°C (Ta=60°C, Humidity max=40%)
Transport Temperature
-4 – 122°F (-20 – 50°C)
Operating Humidity (Non-condensing)
20 – 80%
Storage Humidity (Non-condensing)
10 – 90%
Transport Humidity (Non-condensing)
10 – 90%
Operating Altitude (Maximum)
0 to + 6,560 feet [2,000m]
Non-Operating Storage Altitude (Maximum)
33,000 ft (10,000 m)
Transport Altitude (Maximum)
33,000 ft (10,000 m)
EndoVue Plus 4K 55" Parts List by Region Part Number
Item Name
90K0091
ENDOVUE PLUS 4K 55", AMERICA, JAPAN, EMEA, BC-WK55-A1B00
90K0092
ENDOVUE PLUS 4K 55", QUAD-LINK SDI, AMERICA, JAPAN, EMEA, BC-WK55-A1B20
90K0093
ENDOVUE PLUS 4K 55", CHINA, BC-WK55-A1B00
90K0094
ENDOVUE PLUS 4K 55", QUAD-LINK SDI, CHINA, BC-WK55-A1B20
Specifications | 11
Operating principle The LCD monitor will contain an interface board with driver board, a power board, a function key board. The interface board will house the flat panel control logic, brightness control logic and DC-DC convection to supply the appropriate power to the whole board and LCD panel, and transmitting by one signals into LCD Module to drive the LCD display circuit. The function key board will provides the OSD control signal to the interface board. The driver board will drive the LCD monitor backlight. The power board provides the DC12V to interface board and LED driver board, it also provides the DC 12V, to the panel via interface board. The interface board will provides the 5V and 12V out to external media BOX. The power board shall accept AC power.
12 | Specifications