Operators Manual
62 Pages
Preview
Page 1
* Specification and design are subject to change without notice for improvement.
HEAD OFFICE
TOKYO OFFICE (International Div.)
NIDEK INCORPORATED
NIDEK SOCIETE ANONYME (Représentant Autorisé)
: 34-14, Maehama, Hiroishi-cho, Gamagori, Aichi 443-0038, Japan Telephone: (0533) 67-6611 Facsimile: (0533) 67-6610 : 6th Floor, Takahashi Bldg., No.2, 3-chome, Kanda-jinboucho Chiyoda-ku, Tokyo 101-0051, Japan Telephone: (03) 3288-0571 Facsimile: (03) 3288-0570 Telex: 2226647 NIDEK J : 47651 Westinghouse Drive Fremont, California 94539, U. S. A. Telephone: (510) 226-5700 Facsimile: (510) 226-5750 : Europarc 13, rue Auguste Perret, 94042 CRETEIL, France Telephone: (01) 49 80 97 97 Facsimile: (01) 49 80 32 08 2000.3 14800-P902F Printed in JAPAN
BEFORE USE OR MAINTENANCE, READ THIS MANUAL. THIS MANUAL CONTAINS ONLY INFORMATION TO UNDERSTAND THE OPERATING PROCEDURE AND MAINTENANCE. This manual contains information to understand the NIDEK Echoscan Model US-800. This manual provides general information of the instrument, cautions for safety, name and explanation of the configuration, operating procedures, maintenance, specifications and accessories. To understand the correct use of the instrument, this manual is needed. Especially, cautions for safety and operating procedure must be thoroughly understood before using this instrument. Be sure to keep this manual with the instrument and read it every time it is needed. Use of this instrument is limited to measurement of the axial length and calculation the refractive power of IOL by qualified physicians. There are no user-serviceable parts inside the instrument except a printer paper and fuses. Therefore, if you find any problems or have questions about the instrument during operation, please contact your authorized distributor.
Table of Contents
§1 INTRODUCTION ...Page 1-1 1.1 Outline ... 1-1 1.2 Principle ... 1-1 1.3 Classification ... 1-2 1.4 Symbol Information ... 1-3 1.5 Voltage Check... 1-3
§2 SAFETY ... 2-1
2.1 Cautions in Use ... 2-1 2.2 Storage and Transport Environmental Conditions ... 2-2 2.3 In Transport ... 2-2 2.4 In Installation ... 2-3 2.5 After Use ... 2-4 2.6 In Maintenance ... 2-4 2.7 In Disposal ... 2-5 2.8 Labels ... 2-5
§3 CONFIGURATIONS ... 3-1
3.1 Main Body ... 3-1 3.2 Display ... 3-4
§4 OPERATION ... 4-1
4.1 Preparation ... 4-1 4.2 Axial Length Measurement ... 4-1 4.2.1 Basic operation of axial length measurement ... 4-1 4.2.2 Cautions on measurement ... 4-5 4.2.3 Manual gate ... 4-7 4.3 Check and Setting of the Measured Value and A-mode Waveform ... 4-8 4.4 Calculation of IOL Refractive Power ... 4-11 4.4.1 Calculation ... 4-11 4.4.2 Examples of IOL refractive power calculation ... 4-14 4.5 ID Function... 4-15 4.5.1 Inputting of patient’s data ... 4-15 4.5.2 Delete function ... 4-17
4.6 Other Functions ... 4-18 4.6.1 Registration of IOL data ... 4-18 4.6.2 SF value reverse calculation function ... 4-20 4.6.3 Individual A-constant calculation function ... 4-21 4.6.4 Change of sonic velocity for conversion ... 4-23 4.6.5 Change of IOL formula constant ... 4-24 4.6.6 Setting date and time ... 4-25 4.6.7 Check of communication function ... 4-26 4.6.8 Printing out ... 4-27 4.7 Using the Test Piece ... 4-28
§5 MAINTENANCE ... 5-1
5.1 Replacement of Printer Paper ... 5-1 5.2 Replacement of Fuses... 5-3 5.3 Cleaning of Exterior ... 5-4 5.4 Selecting of the Voltage ... 5-4 5.5 List of Parts for Replacement ... 5-4
§6 IOL FORMULA ... 6-1
6.1 Outline of IOL Formula... 6-1 6.2 SRK Formula... 6-1 6.3 SRK-II Formula ... 6-2 6.4 SRK-T Formula ... 6-3 6.5 BINKHORST Formula... 6-4 6.6 HOLLARDAY Formula ... 6-5
§7 SPECIFICATIONS ... 7-1 §8 ACCESSORIES & OPTIONS ... 8-1 8.1 Standard Accessories... 8-1
§9 ACOUSTIC FIELD EMISSIONS ... 9-1
§1 INTRODUCTION 1.1 Outline NIDEK Echoscan Model US-800 is an ultrasonic instrument to measure the axial length which applies the ultrasonic pulse reflection method, consisting of the main unit, the solid probes, the foot pedal and the power cord. When touching the probe to the cornea, ultrasonic pulse is transmitted by a transducer, reflected from each boundary face of intraocular tissue and its echo is received by the same transducer. US-800 measures the length of various intraocular tissue by measuring the time required for receiving echo pulse and converting it to the distance. The axial length is measured as one of the parameters in order to determine the refractive power of IOL, when implanting IOL in the cataract surgery. In addition, by inputting other parameters, this instrument can calculate the refractive power of IOL, which is necessary for the medical treatment.
1.2 Principle When voltage is applied to a built-in transducer of a probe, the transducer vibrates and the pulsed ultrasonic waves are emitted. The ultrasonic waves have the following properties similar to light in a condition under water or media like it. They have high tendency of traveling straight. They have phenomena such as reflection and refraction on the boundary faces of media which have different acoustic impedance. (Acoustic impedance = Density of medium × Ultrasonic Velocity in the medium) By touching the probe to the eyeball, the ultrasonic pulse travels inside the eye. A part of the pulses is reflected from each boundary face, between the probe tip and the cornea, the cornea and the anterior chamber, the anterior chamber and the lens, the lens and the vitreous, the vitreous and the retina. Their echoes are received at the same probe that the ultrasonic pulses are transmitted, which are then shown on the display as the electronic acoustic signals. Echo intensity is shown as the height of the waveform. It is possible to calculate each length of the intraocular tissue (axial length, anterior chamber depth, lens thickness and vitreous length) by converting the interval of releasing and receiving each echo into the distances. When the directions of the ultrasonic waves are not perpendicular to each boundary face, however, the echo is rather weak or does not return to the probe. For such reason, it is very important to coincide the direction of the ultrasonic wave with the visual axis in order to achieve the correct measurement.
1-2
1.3 Classification [Classification under the provision of 93/42/EEC (MDD)] Class IIa US-800 is classified into the Class IIa instrument. [Protection method against electric shock] Class I US-800 is classified into the Class I instrument. Class I instrument in which protection against electric shock does not rely on basic insulation only, but which includes an additional safety precaution in such way that means are provided for the connection of accessible conductive parts to the protective (earth) conductor in the fixed wiring of the installation in such a way that accessible conductive parts cannot become live in the event of a failure of the basic insulation. [Degree of protection against electric shock] Type B US-800 is classified into Type B instrument. Type B instrument with an internal electrical power source providing an adequate degree of protection against electric shock particularly regarding; -- allowable leakage currents -- reliability of the protective earth connection (if present). [Degree of protection against ingress of liquids] IP20 US-800 is the ordinary unit (enclosed unit without protection against ingress of liquids). Be careful not to splash water on the instrument. [Degree of safety of application in the presence of flammable anaesthetics and/or flammable cleaning agents] US-800 should be used in environments where no flammable anaesthetics and/or flammable cleaning agents are present. [Mode of operation] Continuous operation [Methods of disinfection recommended by manufacturer] Disinfect the solid probe tip with following medical fluid. • 0.1% Chlorhexdine Gluconate Solution • Ethanol for Disinfection
1-3
1.4 Symbol Information This symbol shows that the reference of operator’s manual is necessary for the part before use. This symbol means degree of protection against electric shock is for Type B instrument. This symbol both sides of the power switch means that the power is ON. This symbol both sides of the power switch means that the power is OFF. This symbol means the fuse rating.
1.5 Voltage Check US-800 is equipped a voltage selector for 100V / 120V / 220V / 240Vac in the fuse holder on the rear panel. Check if the indicated voltage matches to the wall outlet one.
§2 SAFETY In this manual, Signal Words are used to designate a degree or level of safety alerting, whose definitions are as follows. CAUTION:
Indicates a potentially hazardous situation which, if not avoided, may result in minor or moderate injury or property damage accident.
To avoid damaging to personnel and the delivery unit, follow all the instructions mentioned below.
2.1 Cautions in Use CAUTION • Use this instrument only for measuring the axial length or calculating the refractive power of IOL. NIDEK assumes no responsibility for accident caused by using for other purposes. • In the event of trouble, unplug the power cable and contact your authorized distributor without touching inside of the instrument. • Do not modify or touch inside of the instrument. You may get an electric shock or the instrument may malfunction. • Use the wall-outlet with protective earth which meets the requirement of the power specifications, and connect the supplied power cable. If the line voltage is too low or too high, the instrument cannot deliver full performance and will be damaged. • Never pull the power cable to unplug it from wall-outlet. Always hold the plug to unplug. The metal cores may break. It may cause an ignition or an electric shock. • Never put the weight on the power cable. The cable sheath may break. It may cause an ignition or an electric shock. • Never pull the probe cable and the foot pedal cable forcefully. The metal cores may break.
2-2
CAUTION • If the metal cores of cable are exposed, replace it to normal one immediately. It may cause an electric shock or a fire. • Be sure to verify that there is no scratch nor chip on the surface of the probe tip. If such probe is used for measurement, it may hurt the patient’s cornea. • Be sure to hold the plug when connecting or disconnecting the probe. The probe cable may be broken if you hold the cable only. • Disinfect the probe tip for every patient. If the probe tip is not disinfected, the cornea may be infected. • Be sure to disinfect the probe tip with medicament. Never autoclave the probe. The probe tip may break.
2.2 Storage and Transport Environmental Conditions NOTE • Avoid storing the instrument in places where are splashed rain or water, there is corrosive gas/liquid, or exposed to the direct sunlight. • Store the instrument in a stable place where is vibration-free, shock-free, and level. Otherwise the instrument may drop or have troubles. • Store the instrument in the following environment. Temperature: -20 to +60ºC (-4 to 140ºF) Humidity: 10 to 95% (Non-condensing) Others: No dust nor corrosive gas/liquid
2.3 In Transport CAUTION • Never trail the power cable to transport the instrument. The instrument may have troubles caused by a shock, and the power cable may break when it is stepped on or pulled. • Unplug the probe and store it to the attached box before transporting the instrument. If hitting the probe directly, the probe may have a permanent damage.
2-3
2.4 In Installation CAUTION • Install the instrument in a level and stable place where is vibration-free and shock-free. The instrument may drop or may have troubles. • Check that the line voltage is proper before plugging the power cable to the wall-outlet. The proper voltage is shown on the rating plate. If the line voltage is too low or too high, the instrument cannot deliver full performance and will be damaged. If the line voltage is different from the selected one of the voltage selector, you shall change the voltage of the voltage selector. (See “5.4 Selecting of the Voltage” (P.54).) • Avoid installing the instrument in a place where is splashed water. If water gets into the instrument, you may get an electric shock and the instrument may have troubles. • This instrument has been tested and found to comply with the limits for medical devices to the IEC 60601-1-2:1993, EN60601-1-2:1994, Medical Device Directive 93/42/EEC. These limits are designed to provide reasonable protection against harmful interference in a typical medical installation. This instrument generates, uses and can radiate radio frequency energy and, if not installed and used in accordance with the instructions, may cause harmful interference to other devices in the vicinity. However, there is no guarantee that interference will not occur in particular installation. If this instrument does cause harmful interference to other devices which can be determined by turning the instrument off and on, the user is encouraged to try to correct the interference by one or more of the following measures; - Reorient or relocate the receiving device. - Increase the separation between the instrument. - Connect the instrument into an outlet on a circuit different from that to which the other device(s) are connected. - Consult the manufacturer or field service technician for help. • When this instrument is used together with other equipment, the equipment shall be certified according to Standard IEC60601-1. If this instrument is used together with the equipment which is not certified according to Standard IEC60601-1, you may get an electric shock and the instrument may have troubles.
2-4
NOTE • Install the instrument in the following environment. Temperature : 10 to 40ºC (50 to 104ºF) Humidity : 10 to 85% (Non-condensing) Others : No dust, corrosive gas/liquid nor scattering light
2.5 After Use CAUTION • When the instrument will not be used for a long time, unplug the power cable from walloutlet. If dust and moisture settle on the plug of the power cable, a short and a fire may occur. • After using the instrument, turn OFF the power and put the dust cover on. If the instrument is not covered for an extended period, the accumulation of dust may get the instrument insanitary.
2.6 In Maintenance CAUTION • Be sure to use the specified fuses when replacing the fuses. Otherwise the instrument may have troubles and a fire may occur.
NOTE • Only a service technician properly trained in NIDEK can repair the instrument. NIDEK assumes no responsibility for accident caused by improper repair. • Never use a solvent in organic/abrasive to clean the exterior of the instrument as it may ruin the appearance. • When the instrument is sent back to NIDEK for repair or maintenance, wipe the surface of the instrument with a clean cloth dampened with cationic detergent, etc. (such as Benzalkonium chloride: 0.05 - 0.2% solution) which does not cause deformation or discoloration of the surface.
2-5
2.7 In Disposal NOTE • Follow local governing ordinances and recycling plans regarding disposal or recycling of device components when disposing the instrument. Especially the disposing method of lithium batteries varies according to the government. This instrument has electric circuit boards with lithium batteries in the instrument. When disposing the board, follow the instruction of the government. • When disposing packing, sort them by the materials and follow local governing ordinances and recycling plans.
2.8 Labels In order to draw the physician’s attention, the appropriate warning labels are attached to the specified locations on the rear panel of the instrument.
or For 100V area
For 200V area
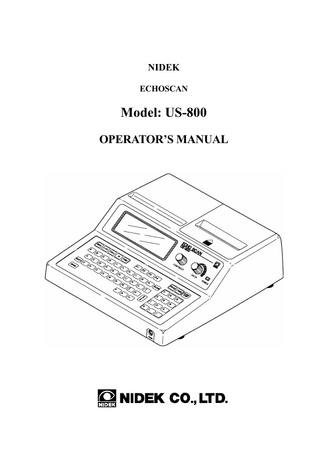
§3 CONFIGURATIONS 3.1 Main Body [Top view]
[Front view]
3-2 Display The display shows the data, A-mode waveforms, etc.. F keys [ , , , ] These keys are used to operate and to set the function in the designated mode. The functions of these keys are shown on the display. Mode keys [ , , , , ] These keys are used to set the modes ; Measuring mode, LIST mode, IOL mode, ID mode, and Function menu. • key This key is used to set the measuring mode. • key This key is used to set the LIST mode which show the measured data list. • key This key is used to set the IOL mode for calculating the refractive power of IOL. • key This key is used to set the ID mode in which the patient’s data is inputted. • key This key is used to set the mode of Function menu.
key This key is used to correct the inputted figures and letters. By pressing this key, one letter at the left of cursor is deleted. Numeric keys These keys are used to input the figures and set the items. key This key is used at the measuring mode to changeover freeze condition to measuring condition alternately instead of the pedal. key This key is used to feed the printer paper. key This key is used to print out the data on the display. Printer cover This cover is opened and closed when changing the printer paper. Probe rest This is used to place the probe on when it is not in use.
Alphanumeric keys These keys are used to input the patient’s data and IOL data.
Contrast control [CONTRAST] This is used to control the contrast on the display. Adjust the contrast for the clear vision.
Arrow keys [ , , , ] These keys are used to move the manual gate, to set the items, and to set the time and date.
Sensitivity control [GAIN] This is used to adjust the sensitivity as [GAIN] of the echo. By turning it clockwise, the gain increases.
key This key used to input figures and letters, and to set items.
Pilot lamp [POWER] This lights while power is ON. Probe connector [PROBE] The solid probe for axial length measurement is connected to this plug.
3-3 [Rear View]
External interface [RS-232C] External personal computers can be connected through this interface. Accessory equipment connected to the analog and digital interfaces must be certified according to the representative appropriate national standards (for example, UL 1950 for Data Processing Equipment UL 2601-1 for Medical Equipment, and CSA C22.2 No. 601-1, EN 60601-1 and IEC 60601-1.) Further more all configurations shall comply with the system standard IEC 606011-1. Everybody who connects additional equipment to the signal output part configured a medical system, and is therefore responsible that the system complies with the requirements of the system standard IEC 60601-1-1. If in doubt, consult the technical service department or your local representative.
Adjuster foot By turning this adjuster foot, you can adjust the inclination of device to get a clear vision of display. Fuse holder It contains voltage selector as well as implanted fuses. Power cord inlet [INLET] Power switch [POWER] Pedal plug [FOOT SW.] The cable of the foot pedal is connected to this plug. Fixation light plug [FIX. LIGHT] This plug is for the fixation light.
3-4
3.2 Display This chapter explain words and abbreviations indicated on the display and printed papers. A. Measuring mode This mode is for measuring axial length.
Conditions [>FREEZE</>START<] >FREEZE< is indicated while in frozen condition and >START< is indicated while measur ing. Measurement [AUTO1/AUTO2/AUTO3/MANU] It shows whether the measurement is automatic or manual. Use key to set AUTO1, AUTO2, AUTO3 or MANU. In auto measurement, A-mode waveform are automatically judged.* When it becomes good, measured data will be shown on the display and frozen automatically. In manual measurement, measurement is continued without freezing though measured data is shown on the display. When good A-mode waveform is obtained, step on the foot pedal or press key to freeze it.
…
Manual gate [GTOFF/GTON] It shows whether manual gate function is on or off. The position of gate is indicated with dotted line ( ) in the A-mode waveform. Use key to set ON/OFF of the manual gate. Condition of patient’s eye [PHAKIC/APHAKIC/IOL] It shows the condition of patient’s eye. Set PHAKIC for phakic eye, APHAKIC for aphakic eye, and IOL for IOL implanted eye. Use key set to the condition of patient’s eye.
* For details, see page 4-2.
3-5 OD/R or OS/L display This shows whether measuring eye is right eye (OD/R) or left eye (OS/L). Use key to set OD/R or OS/L. OD/R: Oculus Dexter/Right eye OS/L : Oculus Sinister/Left eye Axial length This shows the measured axial length in mm unit. Sonic velocity for conversion This is sonic velocity used in calculating axial length. Anterior chamber depth [AD] This shows the measured anterior chamber depth in mm unit. Lens thickness [LT] This shows the measured lens thickness in mm unit. Vitreous body length [VT] This shows the measured vitreous body length in mm unit. Average [AV] This shows the average of the measured axial length. Standard deviation [SD] This shows the standard deviation of the measured axial length. A-mode waveform This shows the condition of the echo received by the probe. The vertical lines show the intensity of the echo, and the horizontal lines show the time that the echo takes to travel through the several tissues in the eye. Scale This scale is a standard guideline of A-mode waveform when the converting sonic velocity is set at 1550m/s and the horizontal line is converted to the distance. One graduation corresponds to 5mm.
3-6 B. LIST mode This mode is to check the measured values and A-mode waveform and to set the measured value which is used for calculating IOL refractive value.
Axial length [L] This shows the last six value of axial length including the latest value. (Column 1) Average [AV] This shows the average of measured axial length. Standard deviation [SD] This shows the standard deviation of the measured axial length. A-mode waveform This shows the A-mode waveform of value where the cursor ( ) points. OD/R or OS/L display [OD/R or OS/L] It shows that displayed data is either for right eye (OD/R) or for left eye (OS/L). Use key to set this item.
3-7 C. IOL mode In this mode, IOL refractive power is calculated.
IOL formula [SRK/SRK-2/SRK-T/BINKHORST/HOLLARDAY] This shows the IOL formula for calculation. Use key to set IOL formula. IOL style This shows the IOL style used for calculating IOL refractive power. Use item.
key to set this
OD/R or OS/L display [OD/R or OS/L] This shows the right eye (OD/R) or left eye (OS/L) which IOL refractive power is calculated. Use key set to OD/R or OS/L.
3-8 Corneal curvature [K-1, K-2] This is a column to input the data of corneal curvature, which is one of the parameter for the IOL refractive power calculation. The data can be inputted in either mm unit (Corneal radius) or D unit (Corneal refractive power). *Corneal refractive power (D) = 337.5/Corneal radius (mm) A-constant [A] This is a column to input the A-constant of IOL which is one of the parameters for IOL refractive power calculation. Predictable anterior chamber depth of postoperation [AD] This is a column to input the predictable anterior chamber depth of postoperation which is one of the parameters for IOL refractive power calculation. Surgeon factor [SF] This is a column to input the surgeon factor which one of the parameters for IOL refractive power calculation. Desired postoperative refractive power [TGT] This is a column to input the desired post operative refractive power which is one of the parameters for IOL refractive power calculation. Axial length [AXL] This is a column of axial length which is to be used for designated calculation in LIST mode. Ametropic IOL refractive power [IOL] This shows the calculated ametropic IOL refractive power. Spectacle refractive power for aphakic correction [SPE.] This shows the calculated spectacle refractive power for aphakic correction.
Contact lens refractive power for aphakic correction [C.L.] This shows the calculated contact lens refractive power for aphakic correction. IOL refractive powers in diopter [IOLP] This shows the table as the IOL refractive power which would exist and close to the value displayed on the IOL column. “>” shows the closest value to the calculated ametropic IOL refractive power. Predictable postoperative refractive power [ERROR] The predictable postoperative refractive power in the case that the IOL of the power which is displayed at [IOLP] is implanted.