56 Pages
Preview
Page 1
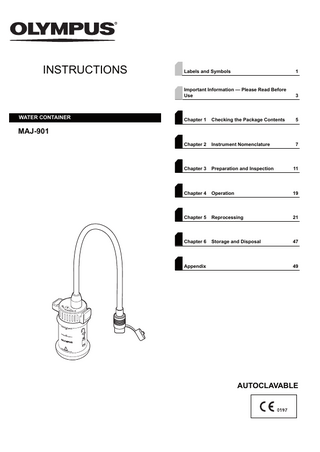
INSTRUCTIONS
WATER CONTAINER
Labels and Symbols
1
Important Information - Please Read Before Use
3
Chapter 1
Checking the Package Contents
5
Chapter 2
Instrument Nomenclature
7
Chapter 3
Preparation and Inspection
11
Chapter 4
Operation
19
Chapter 5
Reprocessing
21
Chapter 6
Storage and Disposal
47
MAJ-901
Appendix
49
AUTOCLAVABLE
Contents
Contents Labels and Symbols ... 1 Important Information - Please Read Before Use ... 3 Intended use / Intended purpose ... 3 Contraindications ... 3 Instruction manual ... 3 User qualifications ... 3 Instrument compatibility ... 3 Reprocessing and storage ... 4 Repair and modification ... 4 Signal words ... 4 Precautions ... 4
Chapter 1 Checking the Package Contents ... 5 1.1
Checking the package contents ... 5
Chapter 2 Instrument Nomenclature ... 7 2.1
Nomenclature and functions ... 7
Chapter 3 Preparation and Inspection ... 11 3.1
Precautions for preparation and inspection ... 11
3.2
Preparation and inspection ... 13
3.3
Connecting to the endoscope ... 15
3.4
Disconnecting from the endoscope ... 16
Chapter 4 Operation ... 19 4.1
Operation ... 19
4.2
Transportation ... 20
Chapter 5 Reprocessing ... 21 5.1
Instruction ... 21
5.2
General policy ... 22
5.3
Compatibility summary ... 23
5.4
List of the compatible methods ... 24
5.5
Detergent solution for manual cleaning ... 25
5.6
Disinfectant solution for manual disinfection ... 26
5.7
Water ... 27
5.8
Rinse water ... 27
5.9
Alcohol ... 27 MAJ-901 INSTRUCTION MANUAL
i
Contents
5.10 Washer disinfector ... 28 5.11 Steam sterilization (autoclaving) ... 31 5.12 Signs of degradation from reprocessing and its number of times ... 33 5.13 Workflow ... 34 5.14 Prepare equipment for reprocessing ... 35 Equipment needed ... 35
5.15 Manually cleaning the water container ... 36 Equipment needed ... 38 Clean the external surface ... 38 Flush the tube with detergent solution ... 39 Immerse the water container in detergent solution ... 39 Remove detergent solution from the tube ... 39 Dry the water container ... 40
5.16 Manually disinfecting the water container ... 41 Equipment needed ... 42 Immerse the water container in disinfectant solution ... 42 Rinse the water container ... 43 (Optional) Alcohol flush ... 44 Dry the water container ... 44
5.17 Sterilizing the water container ... 45 Equipment needed ... 45
5.18 Reprocessing using a WD ... 46 WD ... 46 (Optional) Alcohol flush ... 46 Dry the water container ... 46
Chapter 6 Storage and Disposal ... 47 6.1
Inspection before storage ... 47
6.2
Storage ... 47
6.3
Disposal ... 48
Appendix ... 49 Specifications ... 49 Environment ... 49 Specifications ... 49
ii
MAJ-901 INSTRUCTION MANUAL
Labels and Symbols
Labels and Symbols The meaning(s) of the symbol(s) shown on the package, the back cover of this instruction manual and/or this instrument are as follows:
Front side
CE marking
Caution, refer to instructions.
MAJ-901 INSTRUCTION MANUAL
1
Labels and Symbols
Back cover of this instruction manual Symbol
Description Manufacturer
Authorized representative in the European Community
Translation
Importer (into European Union)
Date of manufacture
2
MAJ-901 INSTRUCTION MANUAL
Important Information - Please Read Before Use
Important Information - Please Read Before Use
Intended use / Intended purpose This instrument has been designed to be used with endoscopes (EVIS EXERA series videoscope, 40 series endoscope) to allow gas insufflation and water feeding from the endoscope. Do not use this instrument for any purpose other than its intended use.
Contraindications None known.
Instruction manual This instruction manual contains essential information on using this instrument safely and effectively. Before use, thoroughly review this manual and the manuals of all equipment which will be used during the procedure and use the equipment as instructed. Keep this and all related instruction manuals in a safe, accessible location. If you have any questions or comments about any information in this manual, please contact Olympus.
User qualifications The operator of this instrument must be a physician or medical personnel under the supervision of a physician and must have received sufficient training in clinical endoscopic technique. This manual, therefore, does not explain or discuss clinical endoscopic procedures.
Instrument compatibility This instrument is compatible with Olympus light sources and endoscopes (EVIS EXERA series videoscope, 40 series endoscope). Using incompatible equipment can result in patient injury and/or equipment damage.
MAJ-901 INSTRUCTION MANUAL
3
Important Information - Please Read Before Use
Reprocessing and storage This instrument was not disinfected or sterilized before shipment. Before using this instrument for the first time, reprocess it according to the instructions given in Chapter 5, “Reprocessing”. After using this instrument, reprocess and store it according to the instructions given in Chapter 5, “Reprocessing” and Chapter 6, “Storage and Disposal”. Improper and/or incomplete reprocessing or storage can present an infection control risk, cause equipment damage or reduce performance.
Repair and modification This instrument does not contain any user-serviceable parts. Do not disassemble, modify or attempt to repair it; patient or user injury and/or equipment damage can result.
Signal words The following signal words are used throughout this manual:
DANGER
Indicates an imminently hazardous situation which, if not avoided, will result in death or serious injury.
WARNING
Indicates a potentially hazardous situation which, if not avoided, could result in death or serious injury.
CAUTION
Indicates a potentially hazardous situation which, if not avoided, may result in minor or moderate injury. It may also be used to alert against unsafe practices or potential equipment damage.
NOTE
Indicates additional helpful information.
Precautions NOTE In case of any serious incident happens to User or Patient while operating the device, the incident should be reported to Olympus and the competent authority of the respective member state or country.
4
MAJ-901 INSTRUCTION MANUAL
1.1 Checking the package contents
Chapter 1
1.1
Checking the Package Contents Ch.1
Checking the package contents
Match all items in the package with the components shown below. Inspect each item for damage. If the instrument is damaged, a component is missing or you have any questions, do not use the instrument; immediately contact Olympus. This instrument was not disinfected or sterilized before shipment. Before using the instrument for the first time, reprocess it according to the instructions given in Chapter 5, “Reprocessing”.
Water container (MAJ-901)
MAJ-901 INSTRUCTION MANUAL
Instructions
5
1.1 Checking the package contents
Ch.1
6
MAJ-901 INSTRUCTION MANUAL
2.1 Nomenclature and functions
Chapter 2 2.1
Instrument Nomenclature
Nomenclature and functions
Ch.2
MAJ-901 INSTRUCTION MANUAL
7
2.1 Nomenclature and functions
2
9
2
Ch.2 12
1 3
13
4
10 11
5
8 6 7
6
8
8
MAJ-901 INSTRUCTION MANUAL
2.1 Nomenclature and functions
No.
Nomenclature
Description
1
Tip receptacle
Insert the metal tip and hold it.
2
Lid
Attach to the container opening.
3
Hook
Attach this instrument to a the light source
4
Lot No.
Lot No. of this instrument
5
Specified water level marks
The upper and lower limit lines for the amount of sterile water to be put into the container.
6
Container
Put in sterile water.
7
Lowest water level line
If the sterile water level falls below this line, water feeding may not be possible.
8
Container protector
Protect the bottom of the container.
9
Tube
Air/water supply channel
10
Metal tip
Connect to the air and water supply connector on the endoscope
11
Cleaning cap
Attach to the metal tip for reprocessing
12
Water tube
Send sterile water from the container to the scope.
13
O-ring
Used to seal the container with the lid.
MAJ-901 INSTRUCTION MANUAL
Ch.2
9
2.1 Nomenclature and functions
Ch.2
10
MAJ-901 INSTRUCTION MANUAL
3.1 Precautions for preparation and inspection
Chapter 3 3.1
Preparation and Inspection
Precautions for preparation and inspection WARNING • Some national or professional guidelines recommend reprocessing endoscopes and accessories prior to their first use of the day or when a certain time passes after disinfecting/sterilizing, or in case the storage time recommended by the national authorities is exceeded.
Ch.3
• Before each case, prepare and inspect this instrument as instructed below. Inspect other equipment to be used with this instrument as described in the respective instruction manuals. Should the slightest irregularity be suspected, do not use this instrument; contact Olympus. Damage or irregularity may compromise patient or user safety and may result in more severe equipment damage.
CAUTION • This instrument was not disinfected or sterilized before shipment. Before using this instrument for the first time, reprocess it according to the instructions given in Chapter 5, “Reprocessing”. Failure to do so could pose an infection control risk and cause tissue irritation. • Never drop the water container or subject it to impacts. The container could become damaged, which could make air and/or water feeding impossible. • The water container is a consumable item. If inspection of the water container reveals any irregularities, use a new water container. • Do not bend, twist or pull the tube excessively. The tube could become damaged, which could make air and/or water feeding impossible. • The O-ring is subject to wear. Replace it with a new one whenever you detect damaged or deformed areas. Otherwise air and/or water feeding might be impossible.
MAJ-901 INSTRUCTION MANUAL
11
3.1 Precautions for preparation and inspection
CAUTION • To remove the O-ring, pull out the portion that lies in the notch along the container’s rim. Attempting to pry the O-ring out of its groove could damage the O-ring and/or the container. Notch Groove
Container
Ch.3
Figure 3.1 •
Do not bend, pull or twist the water tube on the underside of the lid with excessive force. Doing so could damage the water tube, making water feeding impossible.
Water tube
Figure 3.2 • Never detach the water tube from the lid (see Figure 3.2). Doing so could damage the water tube, making water feeding impossible.
12
MAJ-901 INSTRUCTION MANUAL
3.2 Preparation and inspection
3.2
Preparation and inspection 1 Referring to Chapter 2, “Instrument Nomenclature”, inspect the water container and all of its components. Confirm that all components free of damage or irregularities. WARNING • Never fill in the container with sterile water while holding it over electrical equipment. If water is spilled on or into the equipment, electrical shock or damage can result. • Use sterile water only. Using non-sterile water can result in growth of bacteria or channels clogging, and this could pose an infection control risk and tissue irritation.
NOTE Fill the container with sterile water to within the specified water level marks. If the container is not filled between these marks, water feeding will be inadequate.
2 Fill the container with sterile water until the water level is within the water level marks specified on the outside of the container.
Specified water level marks
Figure 3.3
CAUTION If the O-ring is not correctly attached and the lid is not closed properly, gas insufflation and water feeding may not be possible. (See Figure 3.4)
MAJ-901 INSTRUCTION MANUAL
13
Ch.3
3.2 Preparation and inspection
3 Attach the lid to the container. Screwing the lid onto the container, the torque for screwing may grow. After that, screw the lid 180° clockwise.
O-ring
Container
Figure 3.4
4 Attach the container protector to the bottom of the container. Ch.3
CAUTION Hang the hook of the water container on the water container holder of the light source or mobile workstation. Otherwise, the water container may fall and sterile water could be spilled on surrounding equipment. This could result in equipment damage and/or malfunction.
5 Hang the hook of the water container on the water container holder of the light source or mobile workstation.
6 Connect the metal tip of the water container to the endoscope as described in Section 3.3, “Connecting to the endoscope”.
7 Inspect gas insufflation and water feeding as described in the endoscopic instruction manuals. NOTE To disconnect the metal tip of the water container from the endoscope, perform the procedure as described in Section 3.4, “Disconnecting from the endoscope”.
14
MAJ-901 INSTRUCTION MANUAL
3.3 Connecting to the endoscope
3.3
Connecting to the endoscope CAUTION • Never drop the water container or subject it to impacts. The container could become damaged, which could make gas insufflation and water feeding impossible. • Do not bend, twist or pull the tube excessively. The tube could become damaged, which could make gas insufflation and water feeding impossible. • Connect the metal tip slowly and carefully. Otherwise, the metal tip could become damaged, which could make gas insufflation and water feeding impossible. • Push the metal tip straight onto the water supply connector on the endoscope. If connection to the endoscope is excessively angled, the metal tip may be damaged.
Connect the metal tip of the water container to the endoscope connector as described below. (See Figure 3.5)
1 Push the metal tip’s water supply channel gently onto the water supply connector on the endoscope at an angle of 90° to the connector. (See Figure 3.5)
2 Turn the metal tip 90° clockwise to align the air supply channel with the air supply connector of the endoscope. (See Figure 3.5)
3 Gently press the metal tip to confirm that it is securely connected to the endoscope. Endoscope 1.
2.
3.
Turn 90° clockwise Air supply connector Water supply connector
Air supply channel Water supply channel
Metal tip
Figure 3.5
MAJ-901 INSTRUCTION MANUAL
15
Ch.3
3.4 Disconnecting from the endoscope
3.4
Disconnecting from the endoscope CAUTION • Never drop the water container or subject it to impacts. The container could become damaged, which could make gas insufflation and water feeding impossible. • Do not bend, twist or pull the tube excessively. Otherwise, the tube could become damaged, which could make gas insufflation and water feeding impossible. • Disconnect the metal tip slowly and carefully. The metal tip could become damaged, which could make gas insufflation and water feeding impossible.
Ch.3
• Pull the metal tip straight out. If connection to the endoscope is excessively angled, the metal tip may be damaged. When disconnecting the metal tip of the water container from the endoscope, perform the following procedure slowly and carefully. (See Figure 3.6)
1 Close the gas cylinder’s valve, then disconnect the gas tube connector from the gas tube connector on the lid of the water container.
2 Gently pull the metal tip off the air supply connector of the endoscope. 3 Turn the metal tip counterclockwise (90°). 4 Pull the metal tip straight off to completely disconnect it from the endoscope connector. Endoscope 2.
3.
4.
Turn 90° counterclockwise
Figure 3.6
CAUTION Always keep disconnected metal tip above the water level in the container. Otherwise, water may drip or spill from the metal tip onto surrounding equipment, which may cause damage and malfunction.
16
MAJ-901 INSTRUCTION MANUAL
3.4 Disconnecting from the endoscope
5 Lift the disconnected metal tip upwards. Metal tip
Light source
Endoscope
Ch.3
Figure 3.7
6 Attach it to the tip receptacle on the lid.
Tip receptacle
Light source
Figure 3.8
MAJ-901 INSTRUCTION MANUAL
17