Information for Use
24 Pages
Preview
Page 1
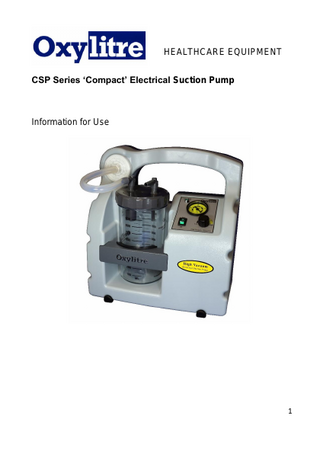
HEALTHCARE EQUIPMENT CSP Series ‘Compact’ Electrical Suction Pump
Information for Use
1
1.
Cautions Please read these Operating Instructions carefully. This device is to be used by personnel fully trained in the use of medical suction equipment. Ensure that the suction unit is tested for Electrical Safety at least once annually. To operate the suction unit correctly, ensure that the Operating Instructions in this document are followed. Ensure the cleaning procedure and safety precautions are followed to avoid the risk of an electrical shock. Contact our service department immediately if an electrical fault has been detected when using the suction unit. The unit whilst in use is be placed in a position where ease of access is readily available to the mains connection port at the back of the unit. Ensure that you check the contents of your package thoroughly before use. Ensure the cable is neatly wrapped prior to moving. Please avoid using the suction unit near other types of electrical equipment that are non-approved electrical medical devices that may release strong electromagnetic/radiated emissions. Do not use any flammable agents near or on the equipment when in use. Do not submerge the product in water or leave resting in puddles or severe wet environments. Do not clean the suction unit unless the plug has been removed from the mains socket supply. Do not rinse or use excessive amounts of water or fluid over the suction unit. Do not remove the filters, receiver jar or tubing unless the suction unit has been turned off and the mains lead has been disconnected. Do not stretch or pull the mains cable or make contact with any sharp implements that may penetrate the cable (e.g. carpet rail, protruding nails etc.). Warning: Electrical Safety The CSP Series suction is operated from a 110-240 Volt mains supply. DO NOT remove or open the main panels of the electrical suction. Do not position the Suction Unit in such a way that it is difficult to operate. The panels on the product must only be opened by an Oxylitre Service Engineer or by qualified personnel
Warning: Material Compatibility* The Oxylitre Jar and Lid supplied with CSP001 are manufactured from Polycarbonate. They should not come into contact with compounds such as Alkalis, Ammonia solutions & Amines that may be found in some strong disinfecting and sterilizing agents. Such agents can cause stress cracking.
2
Contents 1.
Cautions
Page
2
2 2.1 2.2 2.3 2.4 2.5
Introductions Pre-Use Inspection Contraindications Warranty Variants High Suction (for 100ml Jar only) Variants Low Suction (for 100ml Jars only)
Page Page Page Page Page Page
5 6 6 6 6 6
3 3.1 3.1.2
Knowing your Suction Pump Using an Oxylitre Receiver Jar Rear Panel
Page Page Page
7 7 7
4.
Operating Instructions
Page
8
5 5.1 5.2 5.3 5.4
Jar Systems Oxylitre 1000ml Reusable Receiver Jar HOSPIRA Receptal and 1000ml Canister System SERRES 1000ml Jar and Liner System Vac Sax 1000ml Canister Liner System
Page Page Page Page Page
8 9 11 12 13
6
Servicing, Preventative Maintenance & Cleaning
Page
15
7
Replacement Parts
Page
16
8
EQUIPMENT application specification
Page
17
9 9.1 9.2 9.3 9.4 9.5 9.6
Technical Specifications 1000mL Receiver Jar Performance Filtration Tubing Exhaust Unit Dimensions
Page Page Page Page Page Page Page
18 19 19 19 19 19 19
10
Motor
Page
19
11
Electrical Specification Electrical Testing
Page Page
19 20
11
Environmental Conditions for use, transportation and storage
Page
20
12
Materials Specification
Page
20
3
2
Introduction The CSP Series Suction unit has been fully designed in accordance with the requirements of the Medical Device Directive 93/42/EC and appropriate safety/compliance standards. This enables the ESS Series Suction unit to be fully compatible for use within the European Community and Worldwide. The Oxylitre CSP Series Suction unit has been designed for use within most types of Healthcare environments. Suction units are available in adjustable Theatre High Vacuum - High Flow, Standard High Vacuum - High Flow and Low Vacuum - High Flow models. The units come complete with a choice of single1 litre capacity Jar(s) and the Jar type is available in either the Oxylitre reusable/Autoclaveable, Hospira “Receptal” , VacSax® or Serres disposable liner type units. (Please Note: This product is not suitable for Field or Transport use). The robust design features a flame retardant case, with integral carry handle The Suction unit is 230V AC mains operated. The product is a Class II Type BF Electrical Medical Device and complies with EN 60601-1: Medical electrical equipment. General requirements for safety. Hydrophobic/Bacterial Filtration Each unit is fitted with a Hydrophobic/Bacterial Filter. The Filter Element is 99.99% effective that provides an effective barrier against contamination and protection to the environment. The Filter also protects the Suction unit by preventing any moisture or fluid passing through. The Oxylitre reusable receiver jar is fitted with a protective overflow float valve assembly. In the event of over filling the receiver jar whilst aspirating, the float valve assembly will automatically shut off the suction supply. Jars with liners also have cut-off devices. Please note this device is not MR conditional. A wall mounting docking station is also available for easy storage. It can incorporate the required recharging power cord so that the unit connects to the recharging power source automatically when the unit is mounted for storage. Medical Purpose To aspirate bodily fluids and collect, not to be used for continuous drainage as defined by BS EN ISO 10079-1 i.e. not to be used for specific endoscopic
5
use, closed system wound drainage or suction for permanent tracheostomy etc. 2.1
Pre-Use Inspection Remove all packaging from your Compact Suction Pump, inspect all parts for any signs of damage and ensure all of the contents are there. If you see any signs or suspect that the unit may have been damaged, DO NOT use. Notify Oxylitre immediately.
2.2
Contraindications None known
2.3
Warranty The Company Warranty; in respect of durable goods (but not in respect of disposable goods) that such goods will correspond with their specification at the time of delivery and will be free from defects in material and workmanship for a period of 7 years from delivery (N.B. Warranty is 1 year for the battery and 3 years for the Oxylitre Jar). Our full warranty statement is available on request.
2.4
2.5
Variants High Suction (for 1000ml Jars only) I Ii Iii Iv
Oxylitre Receiver Jar Hospira Receptal Canister & Liner SERRES Jar & Liner Vac Sax Canister & Liner
CSP001 CSP002 CSP003 CSP004
v
Tubing Holder
“B” Suffix on Code
Variants Low Suction (for 100ml Jars only) I Ii Iii Iv
Oxylitre Receiver Jar Hospira Receptal Canister & Liner SERRES Jar & Liner Vac Sax Canister & Liner
CSP001L CSP002L CSP003L CSP004L
v
Tubing Holder
“B” Suffix on Code
6
3
Knowing your Compact Suction Pump
3.1
Using an Oxylitre Receiver 1000mL Jar Filter Cartridge Vacuum Connect or Tube
Carrying Handle
Patient Tube Connector
Vacuum Gauge 1000ml Reusable Receiver Jar
Suction Control
Jar Retainer
On/Off Rocker Switch
3.1.2
Anti-Slip Rubber Feet
Rear Panel Charging Station retaining bars
Female AC/ DC Power Socket. (with blanking plugs fitted) Exhaust Outlet See separate instructions
Product data label
7
4
Operating Instructions Please Note: the equipment is NOT suitable for continuous drainage.
4.1
Before use, ensure that your new Suction unit’s Rocker Switch is in the “OFF” position, before you plug the unit into the mains supply.
4.2
Ensure the Receiver Jar “Float Assembly” is operational. (The Float should move up/down freely). Inspect all Receiver Jar components and accompanying Tubing for wear or damage. Always replace worn or damaged components
4.3
Connect the supplied Suction Connecting Tube to the “Patient” Inlet on the Receiver Jar Lid and then connect the required Catheter to the male end of the Suction Connection Tube. If required, place Anti-frothing agent into the Receiver Jar (please use any Anti-frothing agent in accordance to the manufacturers instructions).
4.4
Insert the plug into the mains supply socket. Switch ON “O” the Green Rocker Switch to start the unit. The green neon switch will illuminate when the pump is running.
4.5
Adjustment for the required suction is effective by the suction Control Valve. To increase the Suction, turn the Control Valve clockwise. To decrease the required suction, turn the Control Valve anti-clockwise. With the “Patient” Connector on the Jar Lid occluded, the Vacuum Gauge will give an accurate indication of the suction being applied
4.6
Aspiration should be stopped when fluid has reached the top graduation. In the event of an accidental overflow, the Float Valve will operate shutting off the vacuum supply to the Receiver Jar.
4.7
When the Jar is full, pull out the male adapter probe from the top of the Jar Lid and unhook the Retaining Spring Clips. Remove the Jar carefully from out of the Cradle and dispose of the contents appropriately. Also unscrew the Float assembly from the base of the Jar Lid. Both the Float assembly and the Lid must be thoroughly cleaned. Re-assemble in the reverse order.
5
Jar Systems The Compact Suction Pump can be operated with four canisters, the Oxylitre Standard Reusable Jar, the Hospira Receptal Canister and Liner System, the Serres Canister and Liner System and the Vac Sax Canister and Liner Systems as shown in section 3. All come with customized canister retainers, which are a permanent fixture to that particular model.
8
Caution Check the filter after each use. If the filter is broken so liquid penetrates the membrane, the pump will be contaminated and the PSP must be returned for service. Aspiration should stop when fluid has reached the top graduation in the receiver jar. This applies to all jar types, this is due to the float valve in the case of the Oxylitre Standard reusable jar and the filter in the disposable systems. To continue suctioning one of the following methods should be employed. 5.1
Oxylitre 1000ml Reusable Receiver Jar It is advised that the jar is used patient-specifically then decontamination is required to prevent the risk of cross infection. See Servicing, Preventative Maintenance & Cleaning for instructions. If the same patient undergoes long-term treatment, empty the jar of its contents at least every 24 hours, following guide lines below. When fluid reaches the top of the Jar, the CSP will stop suctioning. To continue suctioning, remove and empty the contents of the Receiver Jar and remove any suctioned material from the float valve under the lid. Failure to remove this material may result in the overflow system failing and material potentially damaging the device. Disconnect the tubing from the filter and hold upright, take hold of the suction connecting tube with catheter (if connected). Hold upwards alongside of the vacuum tubing to prevent any fluid draining and spilling. Hold the two tubes in one hand and jar in the other.
Take the receiver jar to a disposal point where the jar contents can be safely released and dispose of according to local protocols.
9
Unscrew the lid from the jar by turning the lid anticlockwise and gently pour away the contents preventing any spillage or splashing. Rinse the jar. Caution WHEN HANDLING A FULL SUCTION JAR ATTENTION SHOULD BE PAID TO THE FACT THAT IT MIGHT CONTAIN INFECTIOUS WASTE. Pull the float valve assembly from beneath receiver jar lid then remove the float from the float housing and rinse. Also thoroughly rinse jar and any tubing.
Replace the float valve assembly
Screw the jar lid on to the receiver jar, clockwise securely. Place the receiver jar into the holder at the front of the unit.
Ensuring that the tubing on the suction unit has either been replaced or cleaned, connect the vacuum tube to the filter and the other end to the connector marked “Vacuum” on the receiver jar securely. See section 3 for tubing set up.
10
5.2
HOSPIRA Receptal and Canister System Receptal disposable bags must be replaced patient-specifically. If the same patient undergoes long-term treatment, the suction bag must be replaced at least every 24 hours. The reusable liner must be decommissioned if it has become damaged or dose not function as planned. At the end of the procedure the vacuum supply should remain switched (ON) while the patient suction tubing is removed from the patient port and discarded.
Disconnect the liner lid tubing from the canister tee and immediately reconnect the yellow connector to the patient port with a push and twist motion
Turn the vacuum off and use the thumb tab to remove the liner for disposal. The liner lid tubing must not be used as a carrying handle. Disposal Considerations Safe to dispose of by landfill or incineration. Do not discharge into sewers. Dispose of in accordance with appropriate local procedures.
Caution NOTE! REUSE OF DISPOSABLE PRODUCTS IS STRICTLY FORBIDDEN. REUSE REDUCES THE PERFORMANCE OF THE PRODUCT AND CAN CAUSE AN INFECTION RISK. WHEN HANDLING A USED SUCTION BAG ATTENTION SHOULD BE PAID TO THE FACT THAT IT MIGHT CONTAIN INFECTIOUS WASTE.
11
Insert the liner in to the canister and make sure the liner is tightly secured in the canister by locating the thumb tab above the ‘canister tee’ and firmly pushing the lid.
Connect the vacuum source tubing to one side of the canister tee the other to the filter. Connect the liner lid tubing to the other side of the ‘canister tee’ using the ‘yellow to yellow’ coding.
Finally, connect the patient tubing to the patient port, directly or by using the white elbow connector. See Section 3 for tubing set up. Canister system is now ready for use.
5.3
SERRES 1000ml Jar and Liner System SERRES suction bags, are disposable and must be replaced patientspecifically. If the same patient undergoes long-term treatment, the suction bag must be replaced at least every 24 hours. The reusable liner must be decommissioned if it has become damaged or dose not function as planned. After the suctioning procedure, disconnect the patient tube and white angled connector (or alternatively straight connector). Close the connection with the patient connector plug provided on the lid of the suction bag. Finally, turn off the vacuum source. Lift the suction bag using the handle on the lid. DO NOT TURN OFF THE PSP BEFORE YOU HAVE CLOSED THE SUCTION BAG.
12
Disposal Considerations Safe to dispose of by landfill or incineration. Do not discharge into sewers. Dispose of in accordance with appropriate local procedures.
Caution NOTE! REUSE OF DISPOSABLE PRODUCTS IS STRICTLY FORBIDDEN. REUSE REDUCES THE PERFORMANCE OF THE PRODUCT AND CAN CAUSE AN INFECTION RISK. WHEN HANDLING A USED SUCTION BAG ATTENTION SHOULD BE PAID TO THE FACT THAT IT MIGHT CONTAIN INFECTIOUS WASTE. The suction canister and angle connector can be washed (95 °C) and autoclaved (121 °C). Remove the grey, angled connector before washing. Other reusable products can be wiped with disinfectant.
Whilst installing the suction canister place the suction canister in a bracket in an upright position. Unfold the suction bag and place it into the suction canister. Turn on the vacuum source and install the suction bag by using the vacuum. Close the patient connector with your finger and simultaneously push the suction bag slightly from the middle of the lid NOTE! BEFORE USE, ENSURE THAT THE VACUUM HAS BEEN CREATED AND THE SUCTION BAG IS FULLY INFLATED. Connect the patient tube to the patient connector. The system is ready for use. See Section 3 tubing for set up. 5.4
Vac Sax 1000ml Canister Liner System Vac Sax Suction liners, are disposable and must be replaced patientspecifically. If the same patient undergoes long-term treatment, the suction bag must be replaced at least every 24 hours.
13
The reusable liner must be decommissioned if it has become damaged or does not function as planned. At the end of the procedure DO NOT turn off the PSP whilst disconnecting the patient tubing. Remove the patient tubing connector from the male port marked ‘patient’ on the lid and fit the blanking stop over the port. The blanking stop is attached to the lid of the liner directly facing the patient and vacuum ports. Remove the vacuum connection by twisting the tapered connector
Using the handles, lift the liner out of the canister.
14
Disposal Considerations Safe to dispose of by landfill or incineration. Do not discharge into sewers. Dispose of in accordance with appropriate local procedures. Caution NOTE! REUSE OF DISPOSABLE PRODUCTS IS STRICTLY FORBIDDEN. REUSE REDUCES THE PERFORMANCE OF THE PRODUCT AND CAN CAUSE AN INFECTION RISK. WHEN HANDLING A USED SUCTION BAG ATTENTION SHOULD BE PAID TO THE FACT THAT IT MIGHT CONTAIN INFECTIOUS WASTE. Ensure the canister is clean, wipe the inner rim surface with a damp cloth if deemed necessary. To ensure a vacuum seal. Push the liner firmly in to the canister
Push the tapered connector in to the female vacuum port, using a twisting action. Turn on the PSP using the +500 (max) vacuum override button to inflate the bag. Once this has been achieved turn reduce the vacuum level to desired level. If the bag fails to inflate or vacuum level is not achieved, replace the liner and check hydrophobic filter on the unit. Fit patient tubing and occlude and confirm that vacuum is being achieved throughout the system. The system is now ready for use. See section 3 for set up.
6
Servicing, Preventative Maintenance & Cleaning Intended to be serviced annually, see maintenance & service manual To ensure the quality and performance, this product should be inspected frequently (at least annually) by a Service Engineer/qualified Technician. A
15
Major Service is recommended every 5 years. For service/repair enquiries and information, please contact our sales office. i
ii
iii
iii
Do not clean the suction unit unless the plug has been removed from the mains socket supply. Do not rinse or use excessive amounts of water or fluid over the suction unit. Do not submerse this unit in water. The Hydrophobic/Bacterial Filter should be immediately replaced when found discoloured or if wetted/contaminated. Such contamination can reduce pump performance. Discolouration can be simply checked by comparing it with a new replacement filter, along with the tubing connecting the jar and filter. It is recommended that these parts are changed on a regular basis. Use mild cleaning agents/detergents (e.g. diluted Dettol or similar) when cleaning the unit and Receiver Jar components (* see ‘Warning’ on page 2). The Oxylitre Receiver Jar and Lid Components are Autoclaveable up to 121°C (for 3 minutes); see Guidelines for Autoclaving Doc-OP-4403. Be advised that the tubing and connecting catheter is to be used patient-specifically and must be disposed of and replaced after use each patient use.
iv
7
There are no user serviceable components inside the unit’s enclosure. Do not open the enclosure. Unauthorised repairs will invalidate the warranty. Refer servicing to Oxylitre qualified engineers ([email protected]).
Replacement Parts a. Suction Tubing with Male Tapered Connector: b. Suction Tube: Hydrophobic/Bacterial Filter: Suction Connecting Tube 1.8 m: e. Suction Jar Lid: f. Lid Sealing Ring: g. Float Assembly: h. Suction Jar: c.
d.
Ref: S75251 Ref: VAC201 Ref: S750 (Pack of 30) Ref: 180FFM Ref: S7520 Ref: S6190 Ref: S7130 Ref: S6100
16
8
EQUIPMENT application specification The CSP has been designed to meet the essential requirements of IEC 60601-1. Medical purpose To aspirate bodily fluids and collect, not to be used for continuous drainage. Intended Operator The unit is to be used by trained medical or paramedical staff who understands the use of suction equipment to aspirate bodily fluids and the vacuum level to be applied. Intended Patient Age: new born to geriatric Weight: > 2.5 kg Health: not relevant PATIENT state: Not relevant - PATIENT is not the OPERATOR Intended User Profile Age: Adult Nationality: Multiple Gender: Male or Female Cultural: Multiple Condition: Mentally Stable Level of Competence: Minimum-Medically Competent, No maximum Application Environment Hospital Care Home/Hospice Could be damaged by impact (designed to withstand a drop of 1m onto concrete) Can withstand rainfall (IP24D) Intended to be serviced annually Meets requirements of IEC 60601-1 for environmental tests Oxylitre canister can be autoclaved up to 121°C Conditions of visibility of Markings
17
Analogue Gauge visible from 1+ metre Ambient luminance 100 – 500 lux (normal conditions) Vacuum Control showing direction of increase vacuum. Applied Part Interaction There is no direct contact with the patient – an attachment for aspirating will be fitted to the patient tube via the catheter connector. The patient tube and catheter connecter is classed as an Applied Part as it is attached to another device, e.g. catheter to the male end of the Suction Connection Tube, this could have contact with the patient. The tubing could come into contact with the patient during use. Working vacuum up to 500mmHg (or 150mmHg – Low Vacuum) Weight 4.59kg Integral carrying handle Flame retardant structure enclosure Frequency of use Once a year up to 10+ times a day Mobility Not. for field use 9
Technical Specifications Warning the modification of the equipment or the removal of any parts is strictly prohibited and will rescind your warranty. Such action may lead to the unit failing in service.
9.1
1000mL Receiver Jar Capacity: Overflow protection: Cleaning agent: Sterilisation: Material specification: Jar graduation tolerance:
9.2
Performance: Units: Vacuum Range:
1000mL (100ml marking divisions) Float valve shut off Mild detergent (diluted to detergent instructions) Autoclaveable to 121ºC Mainly Polycarbonate ±10% Full scale
mmHg 60 to 500 minimum (High Suction Models) 10 to 150 maximum (Low Suction Models)
18
9.3
9.4
Accuracy: Flow Rates:
±10% on indicated value >25lpm (High Vacuum) >18lpm (Low Vacuum)
Noise Level
<65dB
Filtration Input Filtration:
Applied Parts Tubing:
Tubing Connection: 9.5
11
Silicone wide bore (7 x 3mm), maximum length 1.75m Single Use Maximum temperature 40 ºC Angled Tubing Tail
Dimensions Height: Width: Depth: Weight:
10
Disposable Hydrophobic/Bacterial Filter, 99.99% effective against 0.6 micron particles.
Motor Motor: Standard Supply Max Amp: Fuse type: Electrical Mains Input Voltage:
315mm 305mm 175mm (225mm with docking station) 4.59kg (without docking station) Can withstand rainfall (IP24D)
Enclosed 12 Volts DC 5A 12V AC (F) 5A
110-240V AC (Via mains lead) Maximum current 10 Amps, Fuse 5A
Method of Isolation
Remove plug from mains supply safely
Watts: Frequency: Phase: Fuse Type: Classification:
60 50/60 Hz Single T8 amperes Class II
19
Level of protection: Plug Fuse:
Type BF 5A
Electrical Testing Electrical/Electronic Safety: EMC emissions:
BS EN 60601-1 BS EN 60601-1-2
12
Environmental Conditions for use Transport and Storage Operating/Charging Temperature: 0° C (32°F) to + 40° C (104° F) Recommended Charging 15°C (59°F) to + 25°C (77°F) Temperature: Long term Storage Temperature: 0° C (32°F) to + 40° C (104° F) Max. 24 hour Storage Temperature: -30° C (-22°F) to + 70° C (158° F) Humidity (Operating & Storage): 5-95% RH non-condensing Atmospheric pressure range: 50kPa to 106kPa
13
Material Specification Outer Case (Front)
PC/ABS
Outer Case (Rear)
PC/ABS
Jar Retaining Bracket
PC/ABS
Jar Retainer Insert (Reusable Jar only)
NBR
Anti-slip Feet strip
Santoprene
Reusable Jar Lid
PC
Reusable Jar only
PC
Sealing Ring for Lid
Neoprene
Float Housing only
PC
Float Body Assembly
PC
Float Valve only
Silicone
O Ring for Float Housing
Nitrile
Patient & Filter Tubing
Silicone
Suction Catheter Connector
Styrene-Butadiene
Filter Disk
Styrene-Butadiene
Screws
Steel
20
14
Disposal Guide lines Not for general waste. At the end of life cycle, the PSP is to be disposed of in accordance with the European Directive on the safe disposal of Electrical / Electronic Products and as such shall be handed over to the applicable collection centre for the recycling of electrical / electronic equipment. All items to be disposed of should first be decontaminated to reduce the risk of contamination. Alternatively you should contact Oxylitre to arrange for the collection of the equipment.
15
Symbol Definition Alternating current (AC)
Class II equipment
MR UNSAFE
Type BF applied part
Rating of the degree of protection against intrusive implements and the protection of the environment.
The product has been designed to comply with the safety and design requirements of the European Directives for Medical Devices including Council Directive 92/43/EEC
Follow instructions for use.
Indicates: “Caution”
21