Peak Scientific
N 10DR User Manual Rev 4
User Manual
17 Pages
Preview
Page 1
Nitrogen N*10DR Nitrogen Generator Contents
Contents
Contents Document Change History Warranty Statement Safety Notice to Users RoHS Compliance Statement WEEE Compliance Statement Technical Specification Introduction Unpacking and Installation Removal of Transit Bracket Useful Information Electrical Connection Generator Environment General Dimensions Generator Connections Generator Controls Operation Control Panel / Fault Diagnosis Additional Points to Note Routine Maintenance Maintenance Log
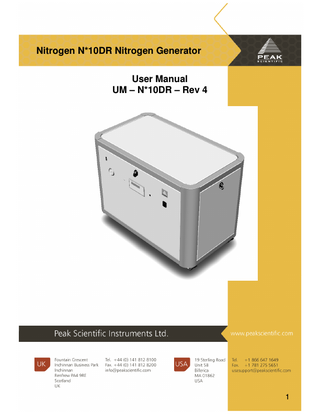
UM – N*10DR – Rev 4
Page 2 3 4 4 5 5 6 7 8 9 10 10 11 11 12 12 13 14 15 16 17
2
Nitrogen N*10DR Nitrogen Generator
UM – N*10DR – Rev 4
History Document Change History
Rev No.
Change
Initials
Date
1
First Release
G.L.
16.10.06
2
Notes added for - Indoor use only & Altitude
T.G.
10.09.07
3
Update USA address
S.K
25/08/2008
4
Updated solenoid valve part #
S.K
26/01/2009
3
Nitrogen N*10DR Nitrogen Generator
UM – N*10DR – Rev 4
Warranties & Liabilities 1. The Company warrants that it has title to the Goods. 2. Subject to the provisions of this clause the Company warrants that the Goods shall comply in all material respects with any specification referred to in the Order Confirmation (as the same may be amended) and shall, subject thereto, be free from defects in material and workmanship for the lesser of a period of twelve months from the date of delivery or thirteen months from the date of dispatch from the factory. 3. Save as provided in this clause and except where the Goods are sold to a person dealing as a consumer (within the meaning of the Unfair Contract Terms Act 1977) all warranties, conditions or other terms implied by statute or common law are hereby expressly excluded save to the extent they may not be lawfully excluded. When the Goods are sold to a consumer within the meaning of the Unfair Contract Terms Act 1977 their statutory rights are not affected by the provisions of this clause. 4. In the event of the Customer making a claim in respect of any defect in terms of clause 2 hereof the Customer must:4.1. reasonably satisfy the Company that the Goods have been properly installed, commissioned, stored, serviced and used and without prejudice to the generality of the foregoing that any defect is not the direct or indirect result of lack of repair and/or servicing, incorrect repair and/or servicing, use of wrong materials and/or incorrect spare parts; and 4.2.allow the company to inspect the Goods and/or any installation and any relevant packaging as and when reasonably required by the Company. 5. Subject to the Company being notified of any defect as is referred to in sub-clause 2 hereof within a reasonable time of it becoming apparent and subject always to the terms of sub-clause 4 hereof, the Company shall, in its option, replace or repair the defective Goods or refund a proportionate part of the Price. The Company shall have no further liability to the Customer (save as mentioned in sub-clause 6 hereof). 6. The Company shall be liable to indemnify the Customer in respect of any claim for death or personal injury to any person in so far as such is attributable to the negligence or breach of duty of the Company or any failure by the Company to comply with the provisions of sub-clause 2 hereof. 7. Save as provided in sub-clause 2 hereof the Company shall not be liable in respect of any claim by the Customer for costs, damages, loss or expenses (whether direct, indirect, consequential or otherwise) or indemnity in any respect howsoever arising including, but not by way of limitation, liability arising in negligence (other than pursuant to clause 6 above) that may be suffered by the Customer or any third party.
SAFETY NOTICE TO USERS
These instructions must be read thoroughly and understood before installation and operation of your Peak N*10DR generator. Use of the generator in a manner not specified by Peak Scientific MAY impair the SAFETY provided by the equipment. When handling, operating or carrying out any maintenance, personnel must employ safe engineering practices and observe all relevant local health and safety requirements and regulations. The attention of UK users is drawn to the Health and Safety at Work Act 1974, and the Institute of Electrical Engineers regulations.
4
Nitrogen N*10DR Nitrogen Generator
UM – N*10DR – Rev 4
Declaration of Conformity
5
Nitrogen N*10DR Nitrogen Generator
UM – N*10DR – Rev 4
Technical Specification
Generator Environment Minimum operating ambient temperature
5°C (41°F)
Maximum operating ambient temperature
25°C (77°F)
Maximum relative humidity Maximum Altitude
70% 2000 Meters
Nitrogen Outlet Maximum flow
30 l/min (1.1 CFM)
Maximum Pressure
6.89 bar (100 psi)
Particles
< 0.01 µm
Outlet 1/4" BSP
1
Pressure Gauges
1
Pthalates
None
Suspended Liquids
None
Electrical Requirements 230V (50/60 Hz)
8.4 amps
Compressor fuse on Control PCB
8.0 amps
PLC / fan fuse on Control PCB
2.0 amps
Electrical connection Noise Level
General
Dimensions in cm (inches) W x D x H Weight Shipping weight
Single phase power cord 57dBA @ 1m
94.5 x 59 x 70.7 (37 x 23 x 28) 145 kg (319 lb) 190 kg (419lb)
6
Nitrogen N*10DR Nitrogen Generator
UM – N*10DR – Rev 4
Introduction
Welcome to the User Manual for the Peak Scientific N*10DR Nitrogen Generator. Enclosed in this manual you will find the information required to ensure that your generator is operated & serviced according to our recommended guidelines which will prepare you for long and trouble free Nitrogen generation. Please review each of the following sections carefully and ensure that the maintenance log at the rear of this manual is updated for future reference. Thank you for selecting Peak Scientific to meet your gas generation needs, and should you require any further assistance or support please do not hesitate to contact us at the addresses displayed on the front cover of this manual.
7
Nitrogen N*10DR Nitrogen Generator
UM – N*10DR – Rev 4
Unpacking and Installation
Unpacking and Installation Although Peak Scientific takes every precaution with safe transit and packaging, it is advisable to fully inspect the unit for any sign of transit damage. Check ‘SHOCKWATCH’ label for signs of rough handling prior to unpacking -
ANY DAMAGE SHOULD BE REPORTED IMMEDIATELY TO THE CARRIER AND PEAK SCIENTIFIC OR THE DISTRIBUTOR FROM WHERE THE UNIT WAS PURCHASED. Follow the un-packing instructions posted on the side of the crate. It will require two people to lift the crate clear and to manoeuvre the generator onto the floor.
8
Nitrogen N*10DR Nitrogen Generator
UM – N*10DR – Rev 4
Installation Removal of Transit Bracket Remove Rear Panel as follows:At the rear of the unit, turn the key in the lock anti-clockwise to unlock the rear panel. Hold the rear panel by the two handles and slowly swivel the bottom of it out and lower it until the top comes free from the chassis. Disconnect the plug at the LHS so that the rear panel can be completely removed. Disassemble Transit Bracket as follows – • Remove Screw 1 holding two pieces of transit bracket together. • Remove Screws 2,3,4,5,holding the Transit Bracket to the Compressors • Remove Screws 6,7 holding the Bracket to the internal side panels. • Remove transit bracket from unit.
6
2
3
1
4
5(Hidden)
7(Hidden)
Re-fit the rear panel in reverse order of removal. Important Note: The Transit Bracket must be removed prior to switching the unit on. Failure to do so will result in damage to the equipment. The Generator can now be moved to its final location on the castors provided. Note: - Included with the Generator is a pack containing hex key, manuals, fittings. Be careful not to discard these with the packing. Please save the product packaging and Transit Bracket for storage or future shipment of the compressor.
9
Nitrogen N*10DR Nitrogen Generator
UM – N*10DR – Rev 4
Installation Useful Information The diameter of the tubing which will be connected to the gas outlets is important and is determined by the length of tubing required. Failure to follow these recommendations could lead to accelerated compressor wear. < 10 meters. > 10 - 40 meters. > 40 metres.
Use 6/4 (6mm O/D, 4mm I/D) P.T.F.E. tubing. Use 10/8 (10mm O/D, 8mm I/D). Please contact Peak with the relevant distance and we will calculate the flow resistance and the tubing size required.
A combination of 6/4 and 10/8 tubing may be used to ensure that there is no large diameter tubing within the lab (i.e. for the first 10 meters use 6/4 tubing and the final 20 meters use 10/8). Keep the connections and bends to a minimum. The imperial equivalents are:-
6/4 = 1/4” O/D, 3/16” I/D. 10/8= 3/8” O/D, 5/16” I/D.
Electrical Connection Important Electrical Notice This unit is classified as SAFETY CLASS 1 equipment. THIS UNIT MUST BE EARTHED. Before connecting the unit to the mains supply, please check the information on the serial plate. The mains supply must be of the stated AC voltage and frequency. The Electrical requirement is:EARTH/GROUND (E):LIVE (L):Neutral (N):-
230V AC (50/60 Hz), 8.4 Amps
Green & Yellow Brown Blue
or or or
Green Black White
Connect the compressor to a single-phase supply using the power cord provided.
10
Nitrogen N*10DR Nitrogen Generator
UM – N*10DR – Rev 4
Generator Environment
The Generator is designed for indoor use only. The unit should be installed adjacent to the Mass Spectrometer it is supplying. If this is not convenient then the unit can be sited elsewhere, however, consideration should be made of the lengths of pipe runs as pressure drops can result from extended runs of pipe. Please see the “Useful Information” section for further details. Performance of the generator (like all sophisticated equipment) is affected by ambient conditions. Note should also be taken to the proximity of Air Conditioning outlets. These can sometimes give rise to “pockets” of air with high relative humidity. Operation of the unit within such a pocket could adversely affect its performance. Consideration should also be given to the air flow around the unit. It is recommended that an air gap of 75mm (3”) should be maintained down both sides, at the rear and across the top of the unit. Please refer to the drawing below for the general dimensions of the unit. Maximum Ambient Conditions:
25°C (dry bulb) 70%RH (Max)
General Dimensions
Unit must always be placed on a level surface. Failure to do so will effect the performance of the Generator.
11
Nitrogen N*10DR Nitrogen Generator Connections
UM – N*10DR – Rev 4
Connections to Rear of Unit
Serial Plate
Power Cord (230V ONLY) 04-1038 (EU) 04-1029 (US) 04-1030 (UK)
Water outlet 1/4” BSPP female 9-way D-type connector for PC Comms.
Rear panel lock Nitrogen outlet 1/4” BSPP female
Generator Controls
Front panel lock
On/Off Switch
Pressure Gauge
Alarm light
Service light
Keypad
12
Nitrogen N*10DR Nitrogen Generator
UM – N*10DR – Rev 4
Operation The N*10DR generator is designed specifically to minimize operator involvement. Given that the system is installed as described in earlier sections and is serviced in accordance with the following maintenance recommendations then it should simply be a matter of turning the generator on. The generator will automatically produce the factory default flow and pressure. Start Up Sequence When the unit is switched on the fans should power up and the display on the front panel should read – Compressor Test
The system will now run through an automatic compressor check procedure. Each of the four compressors is tested in turn to ensure that it is working. The compressor check takes a minute or so and then the system will turn on fully and “PLEASE WAIT” will be displayed while pressure builds. The pressure can be monitored on the front panel gauge. Gas Generation When the system is running, the maximum number of compressors operating at any time is two. To ensure the longevity of the system, the compressors cycle in pairs, with a pair running for a three minutes while the other pair are turned off to cool, then the running pair are switched off to cool and the idle pair are switched on. The display will read Peak Scientific Mode: APCI
*Note: The outlet should be vented to atmosphere for at least 30 seconds to purge the system of impurities. If only a small volume of gas is being drawn from the system, it will automatically change into ESI mode. The display will read Peak Scientific Mode: ESI
Whilst running in this mode, if too much gas is then being drawn from the system, it will automatically change into APCI mode to meet the increased demand. The user can manually select ESI or APCI Compressor mode by pressing the relevant button on the control panel. If ESI mode is selected while the system requires two compressors, it will automatically return to APCI mode. ESI
APCI
13
Nitrogen N*10DR Nitrogen Generator Operation
UM – N*10DR – Rev 4
Control Panel / Fault Diagnosis If there is a problem with the system, the user will be informed by one of the two available indicators SERVICE : Audible buzzer and light on the front panel ALARM : Audible buzzer and light on the front panel. ALARM RESET
To stop the audible buzzer press as long as the unit has power.
on the Control Panel. Note the light will stay illuminated
Interrogating the Control Panel to find fault Diagnostic: To display the current status of each compressor, the system and the inlet filter. The compressors are numbered 1 to 4 from the right-hand side looking from the rear and are identified by holes in the panel they are sitting on. Mode
MENU
Compressor 1: OK Compressor 2: OK
ENTER
Diagnostic
Compressor 3: OK Compressor 4: OK
System: OK Inlet filter: OK
To exit. MENU
ENTER
Operating hours: To display the current operating hours of each compressor / membrane in hours and minutes. Diagnostic
MENU
ENTER
Operating Hours
Comp 1: 29Hr 24Min Comp 2: 27Hr 30Min
Comp 3: 29Hr 24Min Comp 4: 27Hr 30Min
Memb 1: 29Hr 24Min Memb 2: 27Hr 30Min
To exit. MENU
ENTER
System hours: To display the time since the last service and the total system operating time in days. Operating Hours
MENU
ENTER
System Hours
Time since last service: 21 days
Total system run time: 30 days
To exit. MENU
ENTER
To display the software revision. System Hours
MENU
Software Rev. V1.55
To exit. MENU
ENTER
Mode: To display the current operating mode. MENU
Mode Diagnostic
ENTER
Peak Scientific Mode: ESI
14
Nitrogen N*10DR Nitrogen Generator
UM – N*10DR – Rev 4
Additional Points
Additional Points to Note Pressure / Flow Adjustment The system is configured in the factory to give standard Outlet Pressure and Flow Rate (see ‘Technical Specification’ page 6). These settings should NEVER require adjustment during normal operation. During service/fault diagnosis the settings can be changed by adjusting the pressure regulator and flow controller situated on the Electrical Panel (see page 18). Both will be in the locked position on receipt of the unit. To unlock and reset the following steps should be completed – Pressure Regulator •Pull adjustment knob upwards away from the bracket to release the lock. •Rotate to increase/decrease pressure. •Push adjustment knob downwards towards the bracket to lock. Flow Controller •Rotate knurled locking nut at base of adjustment knob to release lock. •Rotate to increase/decrease flow. •Rotate knurled locking nut at base of adjustment knob to lock. Unusual Operation If at any time the generator begins to emit excessive noise or vibration, then it should be switched off and you should contact your local representative or Peak Scientific as soon as possible. System Drain Please ensure that the drain port at the rear of the generator is led to a suitable connection or container make sure the container is not sealed tight. It should be noted that the generator will expel considerable amounts of water from this port. If a container is used it should be emptied at regular intervals. Service Ensure that the generator is serviced in accordance with the maintenance recommendations.
15
Nitrogen N*10DR Nitrogen Generator
UM – N*10DR – Rev 4
Routine Maintenance
Maintenance
WARNING
Servicing and/or repair of the Generator should only be undertaken by a TECHNICALLY COMPETENT PERSON, with the generator in its safely isolated condition.
SAFELY ISOLATED CONDITION
Definition: The unit is in a Safely Isolated Condition when it is disconnected from its application, fully de-pressurised and isolated from the Electrical Supply. Directions for isolating the generator are shown below. Isolating the Generator: a) Switch off the unit. b) Unplug the generator from the mains supply and remove the power cord from the rear of the unit. c) Ensure the pressure gauge on the front panel reads zero. (If gauge does not fall to zero, loosen outlet fitting slightly to allow trapped gas to escape.) d) Disconnect from the application. e) Important Note: Allow 10 minutes for unit to fully de-pressurise. After this time pull out the ‘Quick Release Ring’ on the Pressure Relief valve situated on the tank. Ensure tank is fully depressurised before releasing the ring. Maintenance Schedule SERVICE INTERVAL
1 YEAR
1 YEAR OR ON SYSTEM ALARM ANNUAL SERVICE KIT
2 YEARS
ALTERNATIVE TO COMPRESSOR ASSEMBLY
COMPONENT
PART NO.
ELIMINISER FILTER (x1)
02-4366
COALESCER FILTER (x1)
02-4364
FLOAT ASSEMBLY VALVE (x2)
02-4464
RAC Filter (x1)
00-4425
INLET FILTER (x1)
02-1054
INCLUDING ABOVE
(08-4714)
SOLENOID VALVE 2/2 G1/8" N.C 2.4mm (x1)
02-4692
SOLENOID VALVE 2/2 G1/8M N.O 1.6mm (x2)
02-6000
COMPRESSOR ASSEMBLY (x4)
08-8069
COMPRESSOR RE-FIT (x4)*
06-5529
On Request
*Compressors can be re-fitted as an alternative to replacement up to a maximum of 3 times, this is a more cost effective solution, however a degree of technical expertise is required and can be time consuming.
16
Nitrogen N*10DR Nitrogen Generator Maintenance Log
UM – N*10DR – Rev 4
Maintenance Log for Serial Number _____________ Work Done
Remarks
Name
Date
17