PERCUSSIONAIRE
Impulstor User Manual 1st Edition Rev B July 2020
User Manual
40 Pages
Preview
Page 1
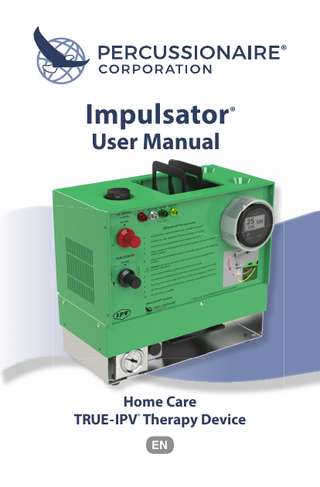
Impulsator® User Manual
Home Care TRUE-IPV® Therapy Device EN
Dear Customer, Congratulations on the purchase of your Impulsator®! Your new TRUE-IPV® therapy device is portable, self-contained and easy to use. It allows you the freedom to go where you want to go while complying with the treatment plan prescribed by your doctor. To make sure you receive maximum benefit from TRUE-IPV® therapy and to ensure your safety, please read the enclosed Impulsator® User Manual. It contains important SAFETY and TECHNICAL DATA that should be kept handy for easy reference. Your safety and satisfaction are important to us! For assistance setting up or using the Impulsator®, or to report unexpected operation or events, please contact Percussionaire® or your local distributor. With proper care, the Impulsator® will reward you with long, trouble-free service life. Thank you for placing your trust with us! Sincerely, Percussionaire® Corporation
© 2020 Percussionaire® Corporation ALL RIGHTS RESERVED 1st Edition First Printing July 2020 Percussionaire® is a registered trademark of Percussionaire Corporation. This work is the sole property of Percussionaire® Corporation. The information in this manual is confidential and may not be disclosed to third parties without the prior written consent of Percussionaire®. No part of this document may be copied, reproduced, transmitted, or stored in any electronic information system without the prior written consent of Percussionaire® Corporation. The devices and products contained in this manual may be covered by one or more patents. This manual was originally released and supplied in English. For a list of available translations, contact [email protected] All ventilators should be operated and serviced only by trained professionals. Percussionaire® Corporation’s sole responsibility with respect to its ventilators, accessories, components, and software, and their use, is as stated in the warranty provided in the manuals. The information set forth herein is believed to be accurate; it is not a substitute for the exercise of professional judgment.
II
Table of Contents Chapter 1: Introduction... 1 Intrapulmonary Percussive Ventilation (IPV®)... 1 Three Components of TRUE-IPV®... 2 Effects of TRUE-IPV®... 2 Chapter 2: Intended Use... 3 Indications for Use... 3 Patient Population... 3 Absolute Contraindications... 3 Relative Contraindications... 3 Possible Adverse Reactions... 3 Physiological Benefits of TRUE-IPV®... 3 Clinical Limitations/Restrictions ... 4 Document Symbols ... 4 Chapter 3: Setup... 5 Impulsator® Controller... 5 Phasitron®5 Breathing Circuit Setup... 6 Phasitron®5 Diagram ... 7 Configurations ... 7 Connecting to the Impulsator®... 8 Connecting the Tubing Harness to the Phasitron®5 ... 8 Adding Saline, Sterile Water, or Medication... 9 Timestrip® ...10 TRUE-IPV® In-Line Valve Setup...11 Adding Phasitron®5 to In-Line Valve...11 Percussionaire® Digital Multimeter PDM (Multimeter) Setup...12 Changing PDM Batteries ...13 Chapter 4: Controller Functions...14 Knob, Switch, Gauge ...14 Percussionaire® Digital Multimeter (PDM) ...15 Power-On Self-Test (POST) Mode ...15 Wake Mode ...16 Active Mode ...16 Report Mode...17 Sleep Mode ...17 Fault Mode ...18 Fault Logging...18 Fault Detection ...18 III
Chapter 5: Pre-Use Check... 19 Chapter 6: General TRUE-IPV® Therapy Protocol for Adults... 20 Chapter 7: Cleaning and Disinfection... 22 Controller... 22 Percussionaire® Digital Multimeter (PDM)... 22 Phasitron®5 Breathing Circuit... 22 Disassembly of the Phasitron®5... 23 Cleaning and Disinfecting Solutions... 24 Cleaning Phasitron®5... 24 Phasitron®5 Disinfection ... 25 Disinfection Solution... 25 Disinfection Procedure... 25 Dry Inside of Tubing... 25 Phasitron®5 Lubrication After Cleaning and Disinfection... 26 Reassembly of the Phasitron®5... 26 Chapter 8: Technical Specifications... 28 Impulsator® Specifications... 28 Percussionaire® Digital Multimeter (PDM) Specifications... 29 Phasitron®5 Technical Specifications... 29 Chapter 9: Maintenance... 30 Phasitron®5... 30 Air Intake Filter Replacement... 30 Cooling Fan Maintenance ... 31 Fuse Replacement ... 31 Chapter 10: Troubleshooting... 33 Chapter 11: Service and Repair... 34 Disposal of Equipment... 34 Chapter 12: Limited Warranty... 35
IV
Chapter 1: Introduction This chapter provides an overview of the Impulsator® device and TRUE-IPV® therapy.
Intrapulmonary Percussive Ventilation (IPV®) Designed specifically for non-continuous home and institutional use, the Impulsator® is a pressure-limited, flow-interrupted, and time-cycled ventilator which delivers TRUE-IPV® therapy, a modality of mechanical ventilation, “Intrapulmonary Percussive Ventilation.” The Impulsator delivers high-frequency percussive pulses approximately 60-400 cycles per minute. These high-frequency percussive pulses ramify throughout the airways and alveolar ducts, augmenting diffusive ventilation in the gas exchange regions of the lungs, allowing airway clearance and lung recruitment. The Impulsator® system also supplies a dense aerosol mist that is delivered into the lungs during therapeutic percussion, serving to reduce the adhesive and cohesive forces of retained airway secretions.
Impulsator® Control Functions i:e RATIO Used to adjust i/e percussion ratios. Kept in 12:00 position for patient use.
Calibration i:e RATIO Percussion
Percussion Determines frequency of delivered breaths.
Source Pressure
Source Pressure Determines amplitude of percussive subtidal breath deliveries. On/Off Switch
Power Plug
The Impulsator® home care device provides intrapulmonary percussive ventilation either invasively, through an artificial airway, or non-invasively, by mouthpiece or mask.
1
Three Components of Intrapulmonary Percussive Ventilation (IPV®) ThreeThe Components of TRUE-IPV®
70
• Diffusion O2
• Perfusion Vesicular Peristalsis
• Convection CO2
60 50 40
cmH2O hPa 30 20 10 0
Frequency = 300 Percussive Mechanical Mixing Diffusion f=300
Frequency = 150 Percussive Convective Ventilation With Diffusion f=150
Percussive Mechanical Mixing Diffusion
Frequency = 100 Percussive Perfusion Vesicularf=100 Peristalsis
Percussive Convective Ventilation with Diffusion
Percussive Perfusion Vesicular Peristalsis
Effects of TRUE-IPV®
Ventilation & Oxygenation Mobilization of Airway Secretions
Lung Recruitment
The effects of TRUE-IPV® therapy occur with or without the cooperation of the patient. TRUE-IPV® provides a percussive, subtidal gas exchange within the respiratory bronchioles with associated alveolar recruitment, maintaining a minimal mean intrathoracic expiratory pressure increase for peripheral lung stabilization. This allows for mechanical ventilation to provide for peripheral lung recruitment while minimizing the potential for induced barotrauma.
2
Chapter 2: Intended Use Indications for Use The Impulsator® is indicated for mobilization of secretions and raising of endobronchial secretions, bronchodilation, reducing mucosal edema, and the resolution of diffuse patchy atelectasis.
Patient Population The Impulsator® ventilator is for use on patient populations from pediatric through adult.
Absolute Contraindications • Untreated tension pneumothorax
• Untrained or unskilled operator
Relative Contraindications • History of pneumothorax
• Lack of patient cooperation
• Recent pneumonectomy
• Vomiting
• Pulmonary hemorrhage
• Pulmonary air leak (without functioning chest tube)
• Myocardial infarction
Possible Adverse Reactions • Decreased cardiac output
• Increased intracranial pressure
• Pneumothorax
• Increased air trapping
• Hyper-oxygenation
• Pulmonary air leak
• Pulmonary hemorrhage
• Hyperventilation
• Gastric distension
Physiological Benefits of TRUE-IPV® • Recruitment of atelectatic lung
• Mechanical bronchodilation
• Improved FRC
• May Improve breathing pattern
• Decreased work of breathing
• Increased secretion mobilization
3
Clinical Limitations/Restrictions Use of the Impulsator® is limited to patients, caregivers, respiratory therapists/clinicians who have received proper training and who have read and understand this manual. WARNING: When used on a patient with an artificial airway (i.e., endotracheal or tracheostomy tube), a clinician must be present so that a one-to-one relationship exists. These devices enhance secretion clearance. Patients must be assessed pre- and posttreatment for a reduced vital capacity/FRC or the need for assistance in clearing airway secretions. WARNING: Because pulmonary alveoli cannot be ventilated when their transmitting airways are obstructed, suction should be performed as necessary. NOTE: A WARNING icon indicates a risk of injury to patient or operator. A CAUTION icon indicates a risk of equipment damage.
Document Symbols Type BF Applied Part
WARNING CAUTION
D
Read the manual i before use
C CE marking
Prescription Only
h
Catalog Number Lot Number
M
Manufacturer
g
N
Manufacture Date
y European Representative
Non-Sterile
NON STERILE
DEHP
PHT DIBP DBP BBP
4
Single Patient Use
Does Not Contain the Phthalate Plasticizers DEHP, DIBP, DBP, or BBP
LATEX
Not Made with Natural Rubber Latex Disposal
Chapter 3: Setup Impulsator® Controller
Place the Impulsator® controller on the table or floor, in a place with good unrestricted airflow. Make sure the controller is away from curtains, sheets, bedspreads, or anything that might block the vents and airflow.
Plug the female end of the power cord into the back of the controller. Plug the male end of the power cord into a wall outlet.
5
Phasitron®5 Breathing Circuit Setup
The patented Phasitron®5 uses a unique venturi as a “clutch” mechanism to protect the lung from over pressure. By automatically adjusting to the resistance of the lung, the Phasitron®5 precisely and safely delivers the optimal amount and pressure of air required by the alveolar space. When lung resistance is low, as in a compliant lung, all the pulsed air from the Impulsator® enters the mouth of the venturi. Each air pulse draws up to four times as much additional air into the venturi tube. This low-pressure entrained air automatically fills the available space in the lung. The Phasitron®5 continuously and instantaneously adjusts to keep a gentle and safe air pressure, even in a compromised lung. NOTE: TRUE-IPV® therapy can only be achieved using the Phasitron®5.
6
Phasitron®5 Diagram
Corrugated Tubing Safety Valve
Exhalation Port
Entrainment Port Spring O-ring
Venturi Cap
Patient Port Phasitron® 5 Housing
Conical Connector
Nebulizer Cap
Mouthpiece Diaphragm
Nebulizer Bowl
Baffle
WARNING: Only use Percussionaire® parts and accessories Type BF D Single patient use
Configurations Phasitron®5 kit can be used with or without a mouthpiece or standard mask (as shown below). Connection sizes: 15mm ID or 22mm OD.
Hydrophobic Filter
Phasitron®5 without mouthpiece or mask 7
Phasitron®5 with mouthpiece (included)
Phasitron®5 with face mask (sold separately) 7
Connecting to the Impulsator®
CALIBRAT IO Gauge Ph asitron ® Re i:e RATIO N mote Ne bulizer Normal Not Used
Connect red, clear, and yellow tubing connectors to the Impulsator® Model F00012 controller device. WARNING: Green REMOTE connector is a vent; do not obstruct.
Connecting the Tubing Harness to the Phasitron®5
Connect yellow tubing quick-connect fitting to nebulizer bowl.
Press red tubing onto conical connector at rear of Phasitron® 5 body.
Connect the clear tubing quick-connect fitting to the cap at the rear of the Phasitron® 5 body.
8
Adding Saline, Sterile Water, or Medication
Twist clockwise to open nebulizer bowl. Add prescribed amount.
Reverse to close.
CAUTION: Ensure yellow nebulizer tubing is not bent. This may cause undue stress on connector.
CAUTION: Do not bend nebulizer bowl while holding the tubing. This may cause undue stress on the red line conical connector.
9
Timestrip® Using the Timestrip® It is very important to replace your Phasitron®5 kit every 6 months for the most effective treatments. Timestrip® is a visual indicator that makes it easy for you to remember when to replace your Phasitron®5. Activating Timestrip® Firmly squeeze the bubble between your finger and thumb. You may need to squeeze it more than once to ensure all the liquid has been emptied from the bubble. Verifying Timestrip® A red line will appear on the Timestrip® within 1 to 2 minutes, indicating activation. If you do not see the red line after 3 minutes, press the bubble again.
Attach Timestrip to Phasitron®5 Bag Remove the adhesive tab on the back of the Timestrip® and attach the Timestrip® to the front of your Phasitron®5 bag. NOTE: The Timestrip is only supplied with the Phasitron®5 home care kit. When the red bar reaches 6 months, it is time to replace your Phasitron®5 breathing circuit kit. Contact your home healthcare provider to order your new Phasitron®5 kit. Timestrip® does not monitor the condition of the Phasitron®5 kit. Timestrip® only records the passage of time after it is activated. If activated at the time of first using the Phasitron®5, it serves as a reminder that the kit needs to be replaced. The liquid inside the Timestrip® is not toxic. If tampered with, the Timestrip® may leak and will not function properly. WARNING: The Timestrip® may present a choking hazard to small children. Adult supervision is required. WARNING: If the liquid inside the Timestrip® contacts skin, wash with soap and water. If the liquid contacts eyes, rinse immediately with water for 15 minutes. If irritation develops, seek medical attention. Timestrip® is a registered trademark of Timestrip® Plc.
10
TRUE-IPV® In-Line Valve Setup WARNING: In-line valve setup and use are for physicians, respiratory clinicians/therapists only. Patient connection wye Phasitron® port connection
Pediatric to Adult Recommended to install as close to the patient wye as allowable Insert TRUE-IPV® In-Line Valve into inspiratory limb of ventilator circuit. WARNING: Ensure Pressure Relief valve is closed. WARNING: Allow ventilator to cycle with valve in place. WARNING: Ensure TRUE-IPV® In-Line Valve is inserted into inspiratory side of ventilator circuit.
Adding Phasitron® 5 to In-Line Valve Install provided blue cap (color may vary) onto the Phasitron®5 expiratory port. Port must be occluded for proper use and treatment. The cap is provided with TRUE-IPV® In-Line Valve kit.
Installation of TRUE-IPV® In-Line Valve with Phasitron®5
Press blue cap over Phasitron®5 expiratory port. Blue cap supplied with In-Line Valve kit.
Fill nebulizer with 15 to 20 cc normal saline or prescribed medication. Aerosol consumption approximately .75 cc per minute. WARNING: Blue cap must be removed when giving a direct treatment, either by mouth, mask, or directly connected to endotracheal tube.
11
Percussionaire® Digital Multimeter (PDM) Setup NOTE: To access battery pull tabs, turn the PDM counterclockwise and remove from Impulsator® device.
Pull up to remove both tabs
NOTE: To ensure correct atmospheric pressure calibration at start up, remove batteries, wait 30 seconds and reinstall. Allow 15 seconds for power-on self-test. When screen goes blank, the multimeter can be installed into the device.
Side view of PDM Install batteries into PDM
USB serial port only used for firmware upgrades
NOTE: The PDM has a USB serial port that is used for manufacturing, calibration and firmware upload. It is not enabled during normal operation.
12
Changing PDM Batteries 1.
Press on the PDM’s bezel and twist counterclockwise approximately 20 degrees.
2.
Gently pull on the multimeter to remove it from the housing.
3.
Remove the two old batteries.
4.
Install two new batteries. Note that the positive terminals face the same direction. Wait 30 seconds until screen turns off.
5.
Install the PDM back into the housing and twist clockwise until the stop is felt.
6.
See instructions on Power-On Self-Test (POST) Mode section, to verify display operation.
NOTE: Do not install PDM until the POST check is complete, and the screen is blank, indicating Sleep mode. A Low Battery indicator is displayed when battery capacity is nearing depletion.
13
Chapter 4: Controller Functions Knob, Switch, Gauge Knob, Switch, Gauge
Function
The red CALIBRATION knob is kept in the 12:00 position (straight up). WARNING: Do not use the device if the red knob can move counterclockwise from the 12:00 position (straight up). The PERCUSSION control knob adjusts frequency of pulses at a fixed i:e ratio. Controls the rate of high-frequency amplitudes delivered. Ranges from 100 to above 300 cycles per minute. Affects mean airway pressure. The Operational Pressure knob controls the peak operating pressure of the entire unit. The optimal pressure is between 30 psig (2.07 bar, 207 kPa) and 40 psig (3.4 bar, 345 kPa).
The Source Pressure gauge shows the operating pressure of the entire unit.
The Percussionaire® Digital Multimeter (PDM) has six different operating modes: POST, Wake, Active, Report, Sleep, and Fault. See Percussionaire® Digital Multimeter (PDM) section for detailed information on each mode. The device uses an inner white felt filter and an outer gray/black foam filter. The filters must be in place at all times when the device is operating. CAUTION: The foam inlet filters are required to protect the ventilator from dirt and dust. Wash both filters periodically. Replace every six months, or when damaged, for proper operation.
14
Percussionaire® Digital Multimeter (PDM)
The Percussionaire® Digital Multimeter (PDM) has six different operating modes: POST, Wake, Active, Report, Sleep, and Fault.
Power-On Self-Test (POST) Mode When batteries are installed in a system, the Percussionaire® Digital Multimeter (PDM) software displays the software revision, battery voltage, total usage time and serial number for 15 seconds. This Start-Up mode allows the software to perform additional tests on the hardware that are part of the Power-On Self-Test. If any errors are detected in POST, the PDM enters the Fault mode (see Fault Mode section).
NOTE: Do not install PDM until the POST check is complete, and the screen is blank, indicating Sleep mode.
System Information Display
Rear view of PDM Measuring port connection (Do not touch.) Reset button (only used for firmware upgrades)
15
Wake Mode To wake up the PDM, ensure the ventilator pressure is greater than 2 cmH₂O/hPa at the Phasitron® 5 patient delivery port for more than 1 second, with patient port blocked. The PDM remains on for the first 15 seconds, showing the Bar-Graph timer. If usage is stopped within 12 seconds, the PDM enters Report mode. After 15 seconds, the current session continues counting from 16 seconds, which turns into Active mode. The PDM display screen in Wake mode
NOTE: Display numbers are for reference only.
Model: Home IPV Device: Impulsator® Display Metrics: Pulse Frequency Rate, Pulse Amplitude Pressure
Active Mode
Pulse Amplitude (cmH2O/hPa) Usage Timer (minutes/seconds)
Pulse Frequency Rate (pulses per minute) Home IPV: Impulsator® Display
At 16 seconds, the PDM enters Active mode. The timer bar will change to a numeric display, showing the current usage Session Timer. Above the timer reading is the pulse amplitude display. This is calculated from the pressure measurements at the moment of instantaneous peak and trough amplitude, averaged over 5 seconds. The Active mode display also shows the currently measured percussion rate/pulse frequency. The PDM displays the usage Session Timer in minutes and seconds. The Session Timer is the total time of the current usage. The Session Timer can display a maximum of 59 minutes and 59 seconds. If usage has been stopped for more than 5 minutes, the Session Timer will reset and start over. NOTE: To display the most recent usage duration time, see Report mode.
16