Service Manual
30 Pages
Preview
Page 1
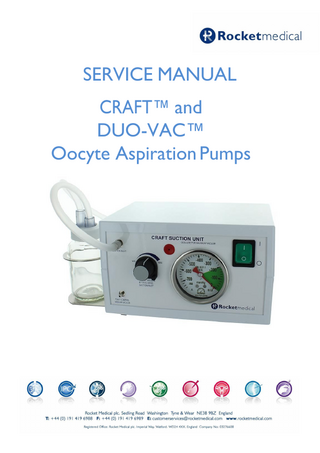
SERVICE MANUAL CRAFT™ and DUO-VAC™ Oocyte Aspiration Pumps
CRAFT™ and CRAFT™ DUO-VAC™ Suction Pumps – Service Manual
CONTENTS
1. GENERALASSEMBLY ... 3 CRAFT™ DUO-VAC™ SUCTION PUMP ... 3 CRAFT™ DUO-VAC™ SUCTION PUMP – INTERNAL VIEW ... 4 CRAFT™ SUCTION PUMP ... 5 CRAFT™ SUCTION PUMP – INTERNAL VIEW ... 6 2. GENERAL DESCRIPTION ... 7 3. GENERAL INFORMATION ... 8 3.1 COPYRIGHT ... 8 3.2 MODEL NUMBERS ... 8 3.3 MANUFACTURER ... 8 3.4 SERVICE AGENTS ... 9 4. ANNUAL SERVICE ... 10 4.1 REPLACING THE FILTER ELEMENT ... 11 4.2 REPLACING THE PUMP VALVE AND DIAPHRAGM SET ... 13 5. REPAIRS AND REPLACEMENTS ... 17 5.1 REPLACING THE CRAFT™ DUO-VAC™ FOOTSWITCH CONNECTORS ... 17 5.2 REPLACING THE GAUGE IN CRAFT™ DUO-VAC AND CRAFT™ SUCTION MODELS ... 18 5.3. BOTTLE BRACKET REPLACEMENT USING SERVICE KIT B02-190S ... 19 6. FINAL TESTING ... 20 7. FUSE REPLACEMENT ... 21 8. TROUBLESHOOTING ... 22 8.1 .DEVICE DOES NOT POWER ON ... 22 8.2. DEVICE DOES NOT PRODUCE SUCTION ... 22 9. CLEANING THE PUMP CASING ... 23 10. YEAR OF MANUFACTURE ... 23 11. RETURNING THE PUMP FOR REPAIR OR SERVICE ... 23 12. STORAGE... 24 13. TRANSPORTATION: ... 24 14. WARRANTY ... 25 15 TECHNICAL SPECIFICATIONS... 26 15.1 CLASSIFICATION ... 26 15.2 SPECIFICATIONS... 26 16. DRAWINGS ... 27 16.1 GENERAL ASSEMBLY ... 27 16.2 GENERAL ELECTRICAL ... 28 16.3 GENERAL INSTALLATION ... 29
2
Copyright© 2012-20222 Rocket Medical plc. .
All rights reserved.
ZDOCK226
Rev:16
2022-09-12
CRAFT™ and CRAFT™ DUO-VAC™ Suction Pumps – Service Manual
1. GENERAL ASSEMBLY CRAFT™ DUO-VAC™ SUCTION PUMP
5
1 2
6 4
3
7
CRAFT™ DUO-VAC™ Pump with footswitch supplied after 2018
1. Illuminated O/I Mains Power On/Off 2. Vacuum Control Dial – clockwise to increase the set value and anticlockwise to decrease 3. Vacuum Display (in mmHg) 4. Footswitch Connection Ports 5. Water Trap Connection Port – recommended for use with R57685 Water Trap Sets for CRAFT™ Suction Pumps 6. Disposable Water Trap Set 7. Dual Footswitch: BLACK: Standard: 0 to -200 mmHg and WHITE: High Vacuum -440 mmHg footswitch
3
Copyright© 2012-20222 Rocket Medical plc. .
All rights reserved.
ZDOCK226
Rev:16
2022-09-12
CRAFT™ and CRAFT™ DUO-VAC™ Suction Pumps – Service Manual
CRAFT™ DUO-VAC™ SUCTION PUMP – INTERNAL VIEW
7
5
6
3
1 2
4
1. Vacuum Gauge 0 to – 700 mmHg – normal range -50 to -440 mmHg 2. Illuminated O/I Mains Power On/Off 3. Motor 220VAC 50Hz OR 110VAC 60Hz – model dependent 4. Vacuum Outlet Port 5. Pump Head including Valve Housing 6. Internal Silencer with Filter Chamber 7. Mains Power Input
4
Copyright© 2012-20222 Rocket Medical plc. .
All rights reserved.
ZDOCK226
Rev:16
2022-09-12
CRAFT™ and CRAFT™ DUO-VAC™ Suction Pumps – Service Manual
CRAFT™ SUCTION PUMP
1
3
5
4
6
2
7
1. Illuminated O/I Mains Power On/Off 2. Vacuum Display (in mmHg) 3. High Vacuum (-440 mmHg) Control Button 4. Vacuum Control – clockwise to increase the set value and anticlockwise to decrease 5. Water Trap Connection Port – recommended for use with R57685 Water Trap Sets for CRAFT™ Suction Pumps 6. Disposable Water Trap Set 7. Footswitch Connection Port 8. Medium Vacuum 0 to -200 mmHg footswitch
5
Copyright© 2012-20222 Rocket Medical plc. .
Footswitch supplied on CRAFT™ Suction Pumps from 2013 onwards
All rights reserved.
ZDOCK226
Rev:16
2022-09-12
CRAFT™ and CRAFT™ DUO-VAC™ Suction Pumps – Service Manual
CRAFT™ SUCTION PUMP – INTERNAL VIEW
7
5 3
6
1 2
4
1. Vacuum Gauge 0 to -700 mmHg – normal range -50 to -440 mmHg 2. Illuminated O/I Mains Power On/Off 3. Motor 220VAC 50Hz OR 110VAC 60Hz – model dependent 4. Vacuum Outlet Port 5. Pump Head including Valve Housing 6. Internal Silencer with Filter Chamber 7. Main Power Input
6
Copyright© 2012-20222 Rocket Medical plc. .
All rights reserved.
ZDOCK226
Rev:16
2022-09-12
CRAFT™ and CRAFT™ DUO-VAC™ Suction Pumps – Service Manual
2. GENERAL DESCRIPTION The CRAFT™ and CRAFT™ DUO-VAC™ Suction Pumps have been developed to provide smooth, low volume vacuum at a pre-determined negative pressure. Vacuum is activated by a foot-operated, toggle air-switch, controlled by the surgeon performing the oocyte collection. The range of vacuum is infinitely variable from 0 to -200 mmHg in medium vacuum mode and at a pre-set -440 mmHg in high vacuum mode. The suction pumps require R57685 Water Trap Sets for CRAFT™ Suction Pumps, supplied separately, sterile and for single-use only. The following will also be required: • A suitable oocyte aspiration needle such as Rocket Medical SX Single Lumen Oocyte Aspiration Set (R57603-SX-90) • Suitable collection tubes for use with oocyte needle sets such as a Falcon® test tube, 17 x 100mm • Flushing media
7
Copyright© 2012-20222 Rocket Medical plc. .
All rights reserved.
ZDOCK226
Rev:16
2022-09-12
CRAFT™ and CRAFT™ DUO-VAC™ Suction Pumps – Service Manual
3. GENERAL INFORMATION 3.1 COPYRIGHT WARNING: READ THIS MANUAL CAREFULLY: Please familiarise yourself with the contents of this manual before attempting to use the device. Failure to observe these instructions may result in damage to the pump or cause injury to the patient or user.
This manual contains information that is subject to copyright. All rights reserved. This manual should not be photocopied, duplicated or distributed completely, or in part, without the written approval of Rocket Medical plc.
3.2 MODEL NUMBERS CRAFT™ Suction Pump (110V) CRAFT™ Suction Pump (240V)
R29654 R29655
CRAFT™ DUO-VAC™ Suction Pump (240V) CRAFT™ DUO-VAC™ Suction Pump (110V)
R29660 R29661
This device should only be used by suitably qualified personnel.
3.3 MANUFACTURER Rocket Medical plc Sedling Road WASHINGTON Tyne & Wear NE38 9BZ UK. WARNING: ELECTRIC SHOCK HAZARD. The equipment is to only be used with electrical systems complying with all IEC, CEC and NEC requirements.
CAUTION: Any adjustment, modification or repairs to the equipment should be carried out by authorised service agents.
Disposal of this device must be undertaken with regard to the WEEE directive (2002/96/EC).
8
Copyright© 2012-20222 Rocket Medical plc. .
All rights reserved.
ZDOCK226
Rev:16
2022-09-12
CRAFT™ and CRAFT™ DUO-VAC™ Suction Pumps – Service Manual
3.4 SERVICE AGENTS CRAFT™ Pumps typically require annual maintenance; however, it is recommended that they are serviced and calibrated annually at an approved Rocket Medical plc service facility. Failure to service the pump at the indicated intervals may invalidate the Warranty. UK & European Service Agents: IVF Synergy Ltd., Old School, Tresillian, Cornwall TR2 4BA Tel: +44 (0) 1872 487224 Email: [email protected] Website: www.ivfsynergy.co.uk UK Customer Services: Rocket Medical plc. Sedling Road WASHINGTON NE38 9BZ UNITED KINGDOM Tel: +44 (0) 191 419 6988 Fax: +44 (0) 191 419 6989 Email: [email protected] Australian Service Agent : Rocket Medical Pty Ltd Suite 6, 157 Gordon Street, Port Macquarie NSW 2444 Australia Email: [email protected] US Office: Rocket Medical 50 Corporate Park Drive. Suite 890. PEMBROKE. MA. 02359. USA Tel: +1 781 749 6223 Email: [email protected]
9
Copyright© 2012-20222 Rocket Medical plc. .
All rights reserved.
ZDOCK226
Rev:16
2022-09-12
Rocket CRAFT™ Oocyte Aspiration Pumps – Service Manual
4. ANNUAL SERVICE Service Kits: a. Filter Element:
b. Pump Service Kit:
Tools Required: a. Pozidriv 1 Screwdriver b. ½” Spanner c. 7mm Spanner
10
Copyright© 2012-2022 Rocket Medical plc. .
All rights reserved.
ZDOCK226
Rev:16 2022-09-12
CRAFT™ Oocyte Aspiration Pumps – Service Manual
4.1 REPLACING THE FILTER ELEMENT
1. Lay the pump on a clean surface, protecting the casing from scratches.
WARNING: ELECTRIC SHOCK HAZARD.
2. Remove the 4 screws from the casing underside and retain.
3. Carefully separate the case halves, ensuring that the front and rear fascia plates remain located in the lower shell.
4. Locate the filter housing (outlined in black in the right-hand image). Note that the location differs in the CRAFT™ Suction Unit.
11
Copyright© 2012-2022 Rocket Medical plc. .
All rights reserved.
ZDOCK226
Rev:16 2022-09-12
CRAFT™ Oocyte Aspiration Pumps – Service Manual
5. Using fingers, lift the top of the filter away from the chamber.
6. Remove the filter element from the cap. Replace with the new item from the service kit.
7. Replace the top of the filter in the housing, ensuring that the lid seats securely. Take care to avoid trapping or pinching the ‘o’-ring. IMPORTANT
12
Copyright© 2012-2022 Rocket Medical plc. .
All rights reserved.
ZDOCK226
Rev:16 2022-09-12
CRAFT™ Oocyte Aspiration Pumps – Service Manual
4.2 REPLACING THE PUMP VALVE AND DIAPHRAGM SET 1.
Locate the pump silencer housing and carefully remove with a gentle twisting movement.
2.
Unscrew the 4 screws from the pump head in a crosswise manner to prevent distortion of the pump head
3.
Lift the head assembly away from the pump body to reveal the diaphragm assembly. Note: if a plastic spacer ring is located on the diaphragm this must be retained and reused.
13
4.
Undo and remove the centre screw to release the head assembly.
5.
Remove the pipe from the inlet and separate the two head halves with a gentle twisting motion.
Copyright© 2012-2022 Rocket Medical plc. .
All rights reserved.
ZDOCK226
Rev:16 2022-09-12
CRAFT™ Oocyte Aspiration Pumps – Service Manual
6.
Note the valve and head orientation. Replace the valve element with the item from the service kit. Note the orientation of the valve cut outs to the head. This must be maintained.
VERY IMPORTANT
7.
Fit the valve to head lower, noting the orientation.
8.
Maintaining the valve and head orientation, refit the head upper. When the head is assembled, refit and tighten the screw to secure the head assembly.
14
Copyright© 2012-2022 Rocket Medical plc. .
All rights reserved.
ZDOCK226
Rev:16 2022-09-12
CRAFT™ Oocyte Aspiration Pumps – Service Manual
9.
Undo the centre screw to remove the diaphragm and top plate and thereby, to expose the piston.
10. Discard the old diaphragm. Retain the screw and plastic washer.
11. Refit the new diaphragm, reusing the old washer and screw. Ensure that the outer holes align with the crankcase. DO NOT OVERTIGHTEN THE SCREW IMPORTANT
15
Refit the spacer if fitted originally.
Copyright© 2012-2022 Rocket Medical plc. .
All rights reserved.
ZDOCK226
Rev:16 2022-09-12
CRAFT™ Oocyte Aspiration Pumps – Service Manual
12. Replace the valve head assembly onto the gasket. Ensure that the holes are correctly aligned and the gasket seated correctly.
13. Tighten the head screws
in crosswise fashion to avoid distorting the head.
DO NOT OVERTIGHTEN THE SCREWS IMPORTANT
Note the head alignment – connect the tube to the inlet.
14. Refit the pump silencer to the head outlet.
16
Copyright© 2012-2022 Rocket Medical plc. .
All rights reserved.
ZDOCK226
Rev:16 2022-09-12
CRAFT™ Oocyte Aspiration Pumps – Service Manual
5.REPAIRS AND REPLACEMENTS 5.1 REPLACING THE CRAFT™ DUO-VAC™ FOOTSWITCH CONNECTORS
Should they become damaged, the two front panel connectors can be replaced. The ‘Medium’ (or ‘Standard’) connector part number is: C01-179. The ‘High’ connector part number is: C01-178.
C01-179
17
1.
Remove the upper casing (see section 6).
2.
Lift the front panel out of the retaining groove in the lower case.
3.
Remove the tubing from the rear of the connector.
4.
Loosen and remove the securing nut.
5.
Replace the connector and tighten the securing nut.
6.
Re-fit the tubing by pushing over the connector barb.
Copyright© 2012-2022 Rocket Medical plc. .
All rights reserved.
C01-178
ZDOCK226
Rev:16 2022-09-12
CRAFT™ Oocyte Aspiration Pumps – Service Manual
5.2 REPLACING THE GAUGE IN CRAFT™ DUO-VAC AND CRAFT™ SUCTION MODELS 1. Remove the upper casing (see section 6). 2. Lift the front panel out of the retaining groove in the lower case.
3. Loosen and remove the screws / nuts (as applicable). 4. Remove the bracket from the rear of the gauge and draw the gauge through the panel. 5. Detach the gauge from the tube by carefully pulling the tube. 6. Replace the gauge, reconnect tubing and insert through the panel. 7. Replace the gauge mounting plate, refit the sprung washers and tighten the wingnuts.
18
Copyright© 2012-2022 Rocket Medical plc. .
All rights reserved.
ZDOCK226
Rev:16 2022-09-12
CRAFT™ Oocyte Aspiration Pumps – Service Manual
5.3. BOTTLE BRACKET REPLACEMENT USING SERVICE KIT B02-190S
1.
Undo the nuts securing the bracket. The design may differ depending on the model.
2.
Take care to remove the earth lead if fitted.
3.
Refit the new bracket with the fitted shakeproof washers. See exploded view for nut and washer order. Ensure that the earth lead is reattached where fitted.
4.
19
When fitting the bracket, ensure that the earth lead is secured to the stud using the arrangement shown below.
Copyright© 2012-2022 Rocket Medical plc. .
All rights reserved.
ZDOCK226
Rev:16 2022-09-12
CRAFT™ Oocyte Aspiration Pumps – Service Manual
6. FINAL TESTING 1.
Final testing should be completed with a validated and independently calibrated electronic vacuum gauge or similar device.
2.
Required operating scale: -10 to -500mmHg in 1mmHg increments.
3
Attach the vacuum test gauge to the external vacuum port, as indicated in the image below.
4
Attach the footswitch as for normal operation.
5
Power the device on.
6
Occlude the tube to the test gauge.
7
Activate the standard vacuum footswitch; observe the green light is illuminated.
8
Rotate the control knob clockwise to increase to the desired value on the gauge. (see table below).
9
To decrease the value: rotate anticlockwise.
10 When the desired value is reached, release the footswitch and tubing set occlusion. 11 Activate the standard vacuum footswitch.
WARNING: Ensure the vacuum levels are within the specified accuracy tolerance before returning the pump to clinical service.
20
12 Record the vacuum registered. 13 Repeat from #6 for each of the test values indicated in the table (right). Copyright© 2012-2022 Rocket Medical plc. .
Test Value mmHg
Indicated Vacuum
Test Gauge
-100 -150 -200
Specified accuracy: ±5% full scale (±10 mmHg) )
All rights reserved.
ZDOCK226
Rev:16 2022-09-12