Quick User Guide
15 Pages
Preview
Page 1
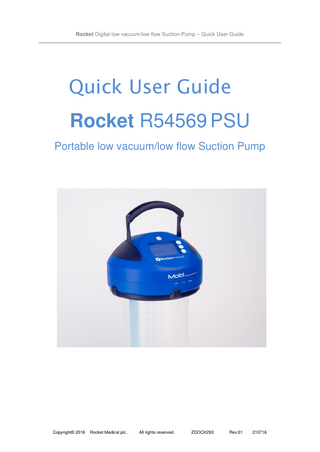
Rocket Digital low vacuum/low flow Suction Pump – Quick User Guide
Quick User Guide Rocket R54569 PSU Portable low vacuum/low flow Suction Pump
Copyright© 2016
Rocket Medical plc .
All rights reserved.
ZDOCK293
Rev:01
210716
Rocket Digital low vacuum/low flow Suction Pump – Quick User Guide
PSU quick user guide
For more information on the information provided here please consult the operators guide. Before following this guide please make sure the suction units battery is fully charged by connecting the power supply to the PSU, the power supply connection port is on the back of the device. It is protected, and is behind the door marked Charge the device for approximately. 3 hrs until the battery display is full.
IMPORTANT: The PSU may be connected to the power supply unit and remain in use while the battery is charging. If the PSU is switched on and in use, the power supply unit may be disconnected at any time and the PSU will remain in use. If the PSU is turned off while still connected to the power supply, the power supply MUST be disconnected before the PSU is switched on again.
Copyright© 2016
Rocket Medical plc .
All rights reserved.
ZDOCK293
Rev:01
210716
Rocket Digital low vacuum/low flow Suction Pump – Quick User Guide
When the battery is fully charged.
Press and hold
for longer than 2 seconds (s) to switch on the device.
A self-test will commence.
When the self-test has completed, follow the software instructions to set the time and date
When this has been completed turn the device off by pressing and holding for longer than 2s.
Press
Copyright© 2016
to shut down device.
Rocket Medical plc .
All rights reserved.
ZDOCK293
Rev:01
210716
Rocket Digital low vacuum/low flow Suction Pump – Quick User Guide
Attaching to the chest drain unit 1. After priming and setting up the R54500 or R54509 chest drain tubing set (R54502, R54539), by 2. Remove red bayonet sealing cap by rotating anticlockwise from "CLOSE" to "OPEN" position. 3. Fill bottle with fluid to prime level noted on label. 4. Open tubing package and attach tubing set to bottle by inserting straw and cap into aperture and twisting clockwise until clicked shut. Take care not to touch the straw. 5. Once underwater seal has been established, place bottle on the floor and connect drainage catheter to tubing connector. 6. Then remove the Blue handle and the Green venting cap from the chest drain.
7. Unwrap the filter from packaging.
8. Place filter on to the suction port of the R54500 or R54509 Chest Drainage bottle. 9. Ensure when placing the filter the location peg is placed in the aperture which the green venting cap was in.
The PSU can now be attached to the chest drain bottle. 10. Rocket Electronic Suction Unit Filters are for single patient use for up to a maximum of 7 days.
Copyright© 2016
Rocket Medical plc .
All rights reserved.
ZDOCK293
Rev:01
210716
Rocket Digital low vacuum/low flow Suction Pump – Quick User Guide
CAUTION: If the filter is contaminated by fluid, the level of suction could be compromised. The filter is designed to protect the pump mechanism from fluid ingress. If contaminated, the filter set MUST be replaced immediately.
Attaching the suction unit to the chest drain bottle Place the PSU over the filter unit, so the filter will fit in to the filter recess under the suction unit. Place the PSU on to the chest drain unit. With slight downward pressure rotate the locking ring Anti clockwise so that it locks into position.
Copyright© 2016
Rocket Medical plc .
All rights reserved.
ZDOCK293
Rev:01
210716
Rocket Digital low vacuum/low flow Suction Pump – Quick User Guide
OPERATING INSTRUCTIONS
1. Press
for longer than 2s to turn the device on.
The unit will begin a self-test If the self-test is unsuccessful see the trouble shooting instructions on page 24 in the Operators guide.
During the set you can confirm or cancel your decisions using the three buttons at the side of the screen.
2. Verify if the PSU is connected to a new patient.
This information is important for the data reading & recording. Yes – New patient number is issued. No – Patient number is unchanged: Recommended for continued treatment of the same patient. Data recording is continued.
Copyright© 2016
Rocket Medical plc .
All rights reserved.
ZDOCK293
Rev:01
210716
Rocket Digital low vacuum/low flow Suction Pump – Quick User Guide
If you press you will progress
If you press
you will be asked to
to the next screen.
confirm if you need to change the filter.
Please verify that you have changed the filter,
If you have changed the filter
by pressing decision.
press
or
to confirm your
you and will be taken to
the next set up screen. If you press
you will be taken If the filter requires replacing
to the next set up screen. press
you will be asked to
If you press you will be asked to change the filter and the unit will be shut down. change the filter and the unit will shut down.
Remove the suction unit and change the filter as per the instructions, re-fit the PSU to the chest drain bottle and switch on the unit again to restart the set up process.
Copyright© 2016
Rocket Medical plc .
Remove the suction unit and change the filter as per the instructions, re-fit the PSU to the chest drain bottle and switch on the unit again to restart the set up process.
All rights reserved.
ZDOCK293
Rev:01
210716
Rocket Digital low vacuum/low flow Suction Pump – Quick User Guide
3. Confirm your unit of measurement. The PSU can measure –ve pressure in KPa, cmH2O and mmHg.
4. You will be asked to confirm your decision.
5. Set the amount of suction required. Using increase or decrease buttons until you are at a level you deem satisfactory. The levels suction applied increase in 0.5KPa, -5cmH2O and 3.75mmHg increments.
When you are happy with the set level of suction press
6. You will be asked to confirm your decision.
Copyright© 2016
Rocket Medical plc .
All rights reserved.
ZDOCK293
Rev:01
210716
Rocket Digital low vacuum/low flow Suction Pump – Quick User Guide
If you press you will be taken back to the previous screen where you can confirm your preferred unit of measurement.
Pressing AND holding for over 2s will commence the application of suction to the chest drain unit and to the patient.
Changing suction levels
If at any time the level of suction required needs changing then press buttons 2 & 3 together for longer than 2s. This will return you to the suction level setting screen. Repeat instruction number 5 to change the level of suction required and instruction 6 to confirm.
When the suction unit is in situ and suction is applied 4 different display modes are available to view. Scroll through the 4 screens by pressing button number 1.
Copyright© 2016
Rocket Medical plc .
All rights reserved.
ZDOCK293
Rev:01
210716
Rocket Digital low vacuum/low flow Suction Pump – Quick User Guide
Screen 1 Suction level and flow rate The flow rate, is the volume of air being removed by the pump in L/min.
Screen 2 Suction level and time of suction applied.
Screen 3 Flow vs Time Graph. The graph shows the flow and pressure progression as a function of time. The screen shows 24 hours of use and is updated every 12 minutes. 4 hours are necessary to have a representative graph.
Screen 4 Air leak indicator, if the patient has a 4 hour period where the suction pump is not engaged, this is classed as the patient having no air leak, the indicator will change colour. This will scroll through as each 4 hour block passes. This is an indication only, further clinical checks should be performed; such as an x-ray prior to chest drain removal.
Copyright© 2016
Rocket Medical plc .
All rights reserved.
ZDOCK293
Rev:01
210716
Rocket Digital low vacuum/low flow Suction Pump – Quick User Guide
Changing the clock time The clock time can be changed in 2 ways: 1. On the new patient screen press button 1 and while holding button 1 press button 3.
2. By using the software program – see section 8.
Switching the unit off When this has been completed turn the device off by pressing and holding for longer than 2s.
Press
Copyright© 2016
to shut down device.
Rocket Medical plc .
All rights reserved.
ZDOCK293
Rev:01
210716
Rocket Digital low vacuum/low flow Suction Pump – Quick User Guide
Disconnecting the suction unit from the chest drain bottle With slight downward pressure rotate the locking ring clockwise. To dispose of the R54500 Chest Drain Bottle 1. Remove tubing set for disposal in the usual manner by turning the clear plastic bayonet closure cap anti-clockwise from "close" position to "open" position. 2. If suction has been applied, remove the fiter, tear/pull the red seal cap located on the bottle lid and marked seal, from its tether. 3. Push the red sealing cap firmly with a twisting action into the suction port on the lid of the bottle to seal. 4. Place the red bayonet cap and replace in hole vacated by the tubing set. 5. Seal cap in place by rotating the cap clockwise from “open” to “close”. 6. Should the red bayonet cap be mislaid, do not remove tubing set, but cut through the tubing and place the end of the tubing over the suction port on the lid of the bottle to create a seal. 7. Bottle is now ready for disposal.
Copyright© 2016
Rocket Medical plc .
All rights reserved.
ZDOCK293
Rev:01
210716
Rocket Digital low vacuum/low flow Suction Pump – Quick User Guide
Cleaning Guidelines Warning after each use the PSU should cleaned and disinfected and single use items such as the filter should be disposed of.
At the end of each patient use, turn off the device and disconnect from the Power Supply Unit. Using an aqueous 70% alcohol solution (eg. IMS or isopropyl BP) solution, moisten a cloth and wipe all external surfaces of the device. If the surface has become contaminated, remove with a light detergent solution before cleaning with an alcohol solution. Do NOT use a 100% alcohol or any other solvent to clean the device as this may cause damage to the casing surface and display. Prevent any fluid from entering the device. WARNING: ELECTRIC SHOCK HAZARD. Do not immerse the device.
WARNING: Do NOT attempt to sterilise the device
Copyright© 2016
Rocket Medical plc .
All rights reserved.
ZDOCK293
Rev:01
210716
Rocket Digital low vacuum/low flow Suction Pump – Quick User Guide
Alarm codes The PSU distinguishes between warnings, alarms and internal errors. If PSU detects any of these situations, an acoustic warning signal sounds and an error number will be displayed. The error number corresponds to the problem as shown below. Error
Problem Description
Trouble Shooting
Source of Error
Switch off unit and restart. If self-test fails again, rest the unit, by pressing the reset button on the rear of the device next to the USB port
Filter may not have been recognised, problem with sensor.
Plug in Power Supply to re-charge battery
Battery low on charge, approximately 30 mins of power remaining
Check to see if filter is in place. Remove pump from bottle to check filter in in position.
Unit may have been turned on without filter in place.
Data storage error
Turn unit off and back on. If error occurs please contact manufacturer for service.
Memory malfunction, failure in storage access
507
Battery empty Power Off
Battery has no charge, connect power supply to charge or use connected to power supply.
Battery charge has been left to discharge fully. The unit does not have enough power to function
Copyright© 2016
Rocket Medical plc .
Self-test failed 501 Sensor defect
Battery low 502 Connect power supply
No filter 504 Please insert filter
506
All rights reserved.
ZDOCK293
Rev:01
210716
Rocket Digital low vacuum/low flow Suction Pump – Quick User Guide
If the PSU has been switched off when still attached to a patient, remove the suction unit from the chest bottle and then reattach before turning back on.
If the PSU appears to be struggling to maintain pressure or the pump sounds like it is permanently on, check all connections to ensure they are sealed properly. Also check the connector tubing of the chest drain bottle is properly sealed. It may be worth trying to rotate the connection by a small amount to make sure the seal is properly seated.
Copyright© 2016
Rocket Medical plc .
All rights reserved.
ZDOCK293
Rev:01
210716