Smith & Nephew
DYONICS Handpieces Instructions for Use Rev E Feb 2010
Instructions for Use
16 Pages
Preview
Page 1
Instructions for Use
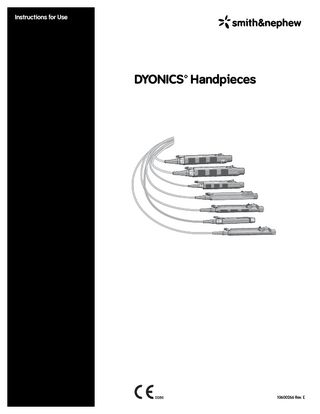
DYONICS™ Handpieces
10600266 Rev. E
Glossary of Symbols
Caution: U.S. Federal law restricts this device to sale by or on the order of a physician. EU: Not for general waste Humidity Forward - clockwise direction of rotation (distal view) Reverse - counterclockwise direction of rotation (distal view) Oscillate - alternating forward/reverse direction of rotation Suction On - fluid flow through handpiece unrestricted Suction Off - fluid flow through handpiece blocked
DYONICS™ Handpieces
Instructions for Use
10600266 Rev. E
3
Preface/Table of Contents Preface The Instructions for Use provide the information needed to operate and maintain the Smith & Nephew DYONICS™ Handpieces. It is essential to read and understand this document prior to using or maintaining the equipment.
Table of Contents Glossary of Symbols... 3 Preface... 4 Table of Contents... 4 Introduction... 5 Device Description... 5 Indications for Use... 5 Contraindications... 5 Warnings... 6 Precautions... 6 Instructions for Use... 8 Suction... 8 Hand-Control Handpieces... 9 Non-Hand-Control Handpieces... 9 Installing a Blade in a Handpiece...11 Installing a Blade in the Mini Motor Drive... 11 Blade Window Lock... 11 Forward/Reverse Speed Shift... 11
Cleaning and Sterilizing... 12 Cleaning... 12 Cleaning Verification... 12 Storage... 12
Sterilization Parameters... 12 Service... 13 Handpiece Cable Replacements... 13 Technical Specifications... 14 Environmental Conditions... 15 Warranty... Back Cover Service Replacement Units Warranty. . . Back Cover Service Replacement Program... Back Cover Repair Service Program... Back Cover For Further Information... Back Cover
4
10600266 Rev. E
DYONICS™ Handpieces
Instructions for Use
Introduction/Device Description/Indications for Use/Contraindications
DYONICS™ Handpieces Introduction Prior to using DYONICS Handpieces, all operating room staff should read and understand the Instructions for Use. All personnel should become familiar with the handpieces before they are set up for use in any procedure. Personnel trained should include, but not be limited to, central processing personnel, members of the surgical team, and the biomedical engineering department.
Device Description Smith & Nephew DYONICS Handpieces (also known as motor drive units or MDUs) can be used with a wide range of Smith & Nephew Disposable Endoscopic Blades for resection of soft and osseous tissue. DYONICS Handpieces can be used with the Smith & Nephew DYONICS POWER Shaver System (REF 7205841) and the Smith & Nephew DYONICS POWER II Control System (REF 72200873). For more information regarding the DYONICS POWER Shaver System, see the Operations/Service Manual (REF 1060801). For more information regarding the DYONICS POWER II Control System, see the Operations/Service Manual (REF 10600181).
Contraindications • Smith & Nephew DYONICS Handpieces and Blades should not be used with patients exhibiting ankylosis and also lacking adequate joint space or distention. Abrasion arthroplasty may not be effective in treating heavy patients or those with ankylosis, instability, or expectations beyond the relief of pain. • Varus or valgus deformity is not itself a contraindication in patients with a good range of motion and without gross instability or extreme malalignment (15° varus, 30° valgus). • Intracortical abrasion arthroplasty may be contraindicated in patients who do not qualify for high tibial osteotomy or total knee replacement. • Synovectomy is contraindicated when the disease has progressed beyond the phase of synovial proliferation and advanced rheumatoid arthritis, when erosion of the articular cartilage is present. • The 2.0 mm and 2.9 mm TURBOWHISKER™ Blades and 2.9 mm Mini Blade Cutter are contraindicated for the FESS application. • The POWERMINI™ Blades and all large blades are contraindicated for the FESS application.
Indications for Use The DYONICS Handpieces are indicated for use, when used with appropriate procedure-specific blades, for resection of soft and osseous tissue including, but not limited to, use in large articular cavities, small articular cavities, and for Functional Endoscopic Sinus Surgery (FESS). The FESS application is limited to small blades that are appropriate for the procedure.
DYONICS™ Handpieces
Instructions for Use
10600266 Rev. E
5
Warnings/Precautions
Warnings • This product is shipped non-sterile. It must be sterilized before the first use. It must be cleaned and sterilized before every subsequent use. • It is the surgeon’s responsibility to be familiar with the appropriate surgical techniques prior to use of this device. • Read these instructions completely prior to use. • Before using DYONICS™ Handpieces for the first time, review all available product information. Blades can injure healthy articular soft tissue and cartilage. Use every available means to avoid such injury. • Only Smith & Nephew DYONICS Disposable Endoscopic Blades can be used with the the DYONICS POWER Shaver System or the DYONICS POWER II Control System. The blades are intended for single use only. Do not resterilize. Do not lubricate blades. Discard all blades after use. • DYONICS Disposable Endoscopic Blades are packaged as a set. They must be used as supplied. Do not interchange blade components. • Periodic irrigation of the blade is recommended to provide adequate cooling of the blade and to prevent accumulation of excised materials in the surgical site. Ensure that suction of 128 mmHg minimum is flowing while the instrument is running. • When using a footswitch, ensure that the footswitch is not accidentally activated while inserting the blade or plugging the connector cable into the control unit.
Precautions U.S. Federal law restricts these devices to sale by or on the order of a physician. • Prior to each use, inspect the device to ensure it is functioning properly and not damaged. Do not use a damaged device. • In all cases, the judgment of the physician (in the best interest of the patient) may take precedence over the procedures described in these Instructions for Use. • Irreversible damage will result from any attempt to disassemble curved blades. • Irreversible damage to blades or burrs will result if they are run without the flow of irrigation (dry). • Do not allow the rotating portion of any blade or burr to touch any metallic object such as a cannula or arthroscope. Damage to both instruments is likely. Damage to the blade can range from a slight distortion or dulling of the blade edge to actual fracture of the tip in vivo. If such contact does occur, inspect the tip. If there are cracks, fractures or dulling, or if there is any other reason to suspect a blade is damaged, replace it immediately. • Do not operate the handpiece in the open air for an extended period. Lack of irrigation may cause the motor or blade to overheat and seize. • Excessive side-loading on the blade does not improve cutting performance and, in extreme cases, may result in wear and degradation of the inner assembly. • Dried blood, saline, and other deposits inside the handpieces are a major cause of equipment malfunction.
• Inadvertently depressing a footswitch while plugging in a handpiece will activate the handpiece.
• Take special care when making curved cuts to avoid locking the blade. Always keep the blade free to complete its stroke.
• To avoid patient burns, do not place the handpiece on the patient when it is not in use.
• Do not cool the handpiece by immersing it in cold water.
6
10600266 Rev. E
DYONICS™ Handpieces
Instructions for Use
Precautions (continued) • Do not use an ultrasonic cleaner or any other automated sterilizing or cleaning equipment. • To prevent damage to the control unit connector ports, do not plug in wet. Ensure that cleaned or sterilized cable connectors are completely dry prior to connecting to the control unit. • Electrical Interference: This equipment is designed and tested to minimize interference with other electrical equipment. However, if interference occurs with other equipment it may be corrected by one or more of the following measures: – Reorient or relocate this equipment, the other equipment, or both. – Increase the separation between the pieces of equipment. – Connect the pieces of equipment into different outlets or circuits. – Consult a biomedical engineer. • Environmental Protection: This equipment contains electronic printed circuit assemblies. At the end of the useful life of the equipment it should be disposed of in accordance with any applicable national or institutional policy relating to obsolete electronic equipment. • After use, this device may be a potential biohazard and should be handled in accordance with accepted medical practice and applicable local and national requirements.
DYONICS™ Handpieces
Instructions for Use
10600266 Rev. E
7
Instructions for Use Instructions for Use Prior to connecting handpieces to the DYONICS™ POWER Shaver System or DYONICS POWER II Control System, ensure that the system has been set up as defined in the Operations/Service Manual (REF 1060801 or REF 10600181, respectively). A variety of DYONICS handpieces can be used with the DYONICS POWER Shaver System or DYONICS POWER II Control Unit. All handpieces can be connected to the connection ports on the control unit front panel. The control unit automatically detects the type of handpiece connected. When a non-hand-control handpiece is connected to the control unit, the LCD screen on the control unit displays the warning message, “Footswitch Required” until a footswitch is connected to the footswitch port. The control unit retains set speeds for Forward/Reverse and Oscillate modes independently and in increments of 100 rpms. Each handpiece model and its cable are autoclavable (see “Cleaning and Sterilizing”). The handpiece cable is field-replaceable on all handpieces with the exception of the DYONICS POWERMAX™, DYONICS POWERMAX ELITE, and DYONICS POWERMINI™ handpieces, which must be returned to Smith & Nephew for replacement. The DYONICS POWERMINI Handpiece is not compatible with the DYONICS POWER Shaver System
Figure 1. Suction levers on the POWERMAX™ Handpieces
Figure 2. The DYONICS™ POWERMINI™ with hand controls and suction lever
Suction is connected to a portal on the proximal end of the handpiece and removes fluid and debris drawn through the blade window. In addition to removing fluids, the suction cools and lubricates the motor drive. Cutting takes place when the blade edge rotates across the blade’s outer window. The blade action alternately opens and closes the window to the suction flow. The Blade Window Lock feature sets the handpiece to stop the blade in a specific position. The window can be set to fully open, partially open, or closed, depending on what is required for the technique.
Figure 3. Suction lever on the standard handpiece
Suction CAUTION: Do not operate the handpiece in the open air for an extended period. Lack of irrigation may cause the motor or blade to overheat and seize. A lever on the distal end of the handpiece provides suction flow control. The lever can be adjusted from fully open to fully closed to provide immediate manual control of the suction rate.
Figure 4. Suction lever on the Mini Motor Drive Handpiece
• Push the lever toward the blade to increase suction (Figures 1, 2, and 3). • Move the lever away from the blade to decrease suction.
8
10600266 Rev. E
DYONICS™ Handpieces
Instructions for Use
Instructions for Use (continued) The suction lever on the Mini Motor Drive handpiece rotates to the left and the right (Figure 4). For maximum suction, position the lever so that it is in line with the handpiece. To reduce suction, rotate the lever away from the center position, in either direction.
Hand-Control Handpieces The hand-control handpieces (REF 7205354, REF 7209891, REF 72200616, REF 72200872, and REF 7210542) feature push-button controls for Forward, Reverse, Oscillate, Blade Window Lock, and Speed Shift on the distal end of the handpiece. With these models, blade action can be controlled with either the handpiece (Table 1) or the footswitch. The DYONICS™ POWERMINI™ (REF 72201500) features push-button controls for Forward, Reverse, Oscillate and Blade Window Lock (Figure 4). The distal button activates Forward and Reverse. The proximal button activates Oscillate and Blade Window Lock. Note: The DYONICS POWERMINI Handpiece uses only the DYONICS POWERMINI Blades.
Non-Hand-Control Handpieces The non-hand-control handpieces (REF 7205355, REF 72200617, REF 7210586, REF 7205357, REF 7205971, and REF 72201503) are hand-held motor drives that are electrically connected to the control unit via a 10-foot (3-meter) cable. The non-hand-control handpieces are activated by a footswitch. These handpieces run a variety of DYONICS Disposable Endoscopic Blades. The handpieces are designed to sense the blade type installed and communicate that information to the control unit, which sets the appropriate operating parameters for the blade. The DYONICS POWER Ultralight Motor Drive (REF 7205971) is designed for optimum weight reduction and does not sense blade type. The Smith & Nephew Ultra Series Curved Blades and the Ultra Series TURBOWHISKER™ Blade are required for curved blade applications using the Ultralight Handpiece. Standard curved blades and the standard TURBOWHISKER Blade will not operate in the Ultralight Motor Drive. When using the Ultralight Motor Drive, footswitch operation is the same as with the standard handpiece. The DYONICS Mini Motor Drive (REF 7205357), activated by a footswitch, is designed for arthroscopic procedures on small joints and for FESS applications. Note: The DYONICS Mini Motor Drive Handpiece uses only the DYONICS Mini Blades. Note: The DYONICS POWERMINI Handpiece uses only the DYONICS POWERMINI Blades.
DYONICS™ Handpieces
Instructions for Use
10600266 Rev. E
9
Instructions for Use (continued) Table 1. Button Operation for Hand-Control Handpieces Handpiece/REF
Forward
Reverse
Oscillate
Blade Window Lock
Speed Shift
DYONICS™ POWER (REF 7205354)
Press >>
Press <<
Press <>
Press and hold <>
Press and hold >> or <<
DYONICS POWERMAX™ (REF 7209891, 7210542)
Press >>
Press <<
Press <>
Press and hold <>
Press and hold >> or <<
DYONICS POWERMAX ELITE (REF 72200616, 72200872)
Press >>
Press <<
Press <>
Press and hold <>
Press and hold >> or <<
Press distal button
Press and hold distal button
Press proximal button
Press and hold proximal button
N/A
Three-button handpieces
Two-button handpieces DYONICS POWERMINI™ (REF 72201500)
Table 2. Programmed Blade Speeds Handpiece
Blade Type
Forward (RPM)
Reverse (RPM)
Oscillate Mode 1 (RPM)
Oscillate Mode 2 (RPM)***
Range
Default
Range
Default
Range
Default
Range
Default
DYONICS POWER (REF 7205354, 7205355)
Long Blades (Straight and Curved), TURBOWHISKER™
100–3000
2000
100–3000
2000
500–3000
2000
1–9 (1 Rev) 1–8 (2 Rev)
8 (2 Rev)
DYONICS POWERMAX (REF 7210542, 7210586, 7209891)
3.5 mm Curved Blade
100–3000
2000
100–3000
2000
500–3000
2000
1–9 (1 Rev) 1–8 (2 Rev)
8 (2 Rev)
DYONICS POWERMAX ELITE (REF 72200616, 72200617)
Curved HELICUT™ and Orbit™ Curved Blades
100–5000
2000
100–5000
2000
500–3000
2000
1–9 (1 Rev) 1–8 (2 Rev)
8 (2 Rev)
Straight ELECTROBLADE™
100–5000
2000
100–5000
2000
500–3000
2000
1–9 (1 Rev) 1–8 (2 Rev)
8 (2 Rev)
Burrs, Long Burrs, and BONECUTTER™ Blades
500–8000
4000
500–8000
4000
500–3000
2000
1–9 (1–2 Rev)
9 (2 Rev)
ELITE Burr*
500–10000
5000
500–10000
5000
500–3000
2000
1–9 (1–2 Rev)
9 (2 Rev)
Curved
100–5000
3500
100–5000
3500
500–3000
3000
1–9 (1–2 Rev)
9 (2 Rev)
Straight
100–5000
3500
100–5000
3500
500–3000
3000
1–9 (1–2 Rev)
9 (2 Rev)
Burr and BONECUTTER Blades
500–6000
6000
500–6000
6000
500–3000
3000
1–9 (1–2 Rev)
9 (2 Rev)
Ultra Series
100–5000
3000
100–5000
3000
500–3000
1000
N/A
N/A
Burrs and Blades
100–3500
2000
100–3500
2000
500–3000
1000
N/A
N/A
DYONICS POWERMINI (REF 72201500, 72201503)
DYONICS POWER Ultralight (REF 7205971)**
* ELITE burrs run only in POWERMAX ELITE Handpieces (REF 72200616, 72200617). ** All standard burrs run at 5000 rpm when used in the Ultralight handpiece (REF 7205971). *** Oscillate 2 Mode is not available in the DYONICS POWER Shaver System.
10
10600266 Rev. E
DYONICS™ Handpieces
Instructions for Use
Instructions for Use (continued) Installing a Blade in a Handpiece
Blade Window Lock
1. Remove the blade from the sterile package and insert the collar into the handpiece.
Blade Window Lock, which can be set from the DYONICS POWER shaver control unit, the DYONICS POWER II control unit, footswitch, or hand-control handpieces, determines the stop position of the inner blade relative to the opening at the top of the outer blade.
Note: The Ultra Series curved blades and the Ultra Series TURBOWHISKER™ Blades may be used in all Smith & Nephew handpieces, with the exception of the DYONICS™ POWERMINI™ and the DYONICS Mini Motor Drive. Note: Standard curved blades and the standard TURBOWHISKER blade will not fit DYONICS Ultralight Handpieces. Note: DYONICS POWERMINI Blades can only be used with the DYONICS POWERMINI Handpieces. Note: The DYONICS Mini Blades can only be used with the DYONICS Mini Motor Drive. 2. To insert a blade, align the key slot (A) on the handpiece and the key (B) on the blade (Figure 5). Insert the blade into the handpiece so that the key goes into the slot. Push the key in proximally as far as possible for a positive lock.
Hand-Control Operation: Press and hold the <> (Oscillate) button on the hand-control handpieces for one second. Footswitch Operation: Press and hold the Window Lock button on the footswitch to rotate the blade. When the blade is in the best stopping position for the procedure, release the Window Lock button. Control Unit Operation: Simultaneously press the SLOWER and FASTER buttons on the DYONICS POWER shaver control unit. Press and hold the Window Lock button that appears on the DYONICS POWER II Control screen.
Forward/Reverse Speed Shift Speed Shift enables the user to alternate between preset low and high speeds by pressing and holding the Reverse or Forward buttons on the hand-control handpieces.
Figure 5. Key slot (A) and key (B)
3. Press the Forward button and observe the blade action to verify that it is properly installed.
Installing a Blade in the Mini Motor Drive The Mini Motor Drive handpiece has a locking sleeve on the blade end of the handpiece. The mini blades have four ridges that key the blade to one of four positions, that is, the blade window faces up, down, right or left relative to the handpiece. 1. Pull the locking sleeve back, insert the blade, and release the sleeve when the blade clicks into position. 2. Press the Forward button and observe the blade action to verify that it is properly installed. Note: The DYONICS Mini Motor Drive Handpiece uses only the DYONICS Mini Blades.
DYONICS™ Handpieces
Instructions for Use
Press and hold the Forward or Reverse button on the handpiece for one second to alternate between the two preset speeds (high and low) in the forward or reverse direction. Use the SLOWER or FASTER buttons on the front panel of the DYONICS POWER shaver control unit to adjust the high and low speeds. Use the Up and Down buttons on the DYONICS POWER II Control screen to adjust the high and low speeds. The high speed setting can be adjusted only when the control unit is in high speed mode. The low speed setting can be adjusted only when the control unit is in low speed mode. If the high and low speeds are not preset, then Speed Shift will not activate. Note: Speed Shift is not applicable in Oscillate mode and does not work through any footswitch. Note: Speed Shift is not available on the DYONICS POWERMINI Handpiece. Set Forward and Reverse Blade Speed: 1. On the handpiece, press the Forward or Reverse button. 2. On the DYONICS POWER II Control screen, press the Up button once to increase the speed by one increment. Press the Down button once to decrease the speed by one increment. Press and hold an Up or Down button to quickly make large adjustments to set speed. 10600266 Rev. E
11
Cleaning and Sterilizing Cleaning and Sterilizing Cleaning CAUTION: Dried blood, saline, and other deposits inside the handpieces are a major cause of equipment malfunction. CAUTION: Do not use an ultrasonic cleaner or any other automated sterilizing or cleaning equipment. 1. Dispose of the blade(s) used during the operation following standard procedures for disposal of biohazardous waste. WARNING: Only Smith & Nephew DYONICS™ Disposable Endoscopic Blades can be used with the DYONICS POWER Shaver System or the DYONICS POWER II Control System. The blades are intended for single use only. Do not resterilize. Do not lubricate blades. Discard all blades after use.
2. Disconnect the handpiece cable from the front panel by pulling back the locking collar on the connector, then unplugging it from the control unit. Do not disconnect the cable from the handpiece. 3. Place the protective cap on the connector end of the cable. 4. Set the suction control lever to the fully open position. 5. Rinse thoroughly with warm tap water for a minimum of two minutes, making sure to irrigate all features of the device. 6. Immerse the handpiece and soak for a minimum of five minutes using a neutral pH enzymatic detergent. 7. After immersion of the device into the enzymatic cleaner, agitate the device to ensure all of the air is removed from the device lumen.
8. While the unit is immersed, clean using the specified brushes from Brushes Corp. (or equivalent) in Table 3. – With the suction control lever in the open position, insert the lumen brush in the device spigot (proximal end of the device) and clean the lumen using twisting and in/out movements of the brush for a minimum of 30 seconds. – Reinsert the lumen brush from the distal end of the device end and clean the lumen from the opposite direction using twisting and in/out movements of the brush for a minimum of 30 seconds. – Using the blade port brush clean the nose cavity using twisting and in/out movements for a minimum of 30 seconds. – Using the fork area brush clean the drive fork area for a minimum of 30 seconds. Table 3. Brush Identification Handpiece REF
Lumen Brush
Blade Port Brush
Fork Area Brush
7205354, 7205355, 7205971, 7209891, 7210542, 7210586, 72200616, 72200617, 72200872, 72202546
Brush 1
Brush 2
Brush 3
7205357, 72201500, 72201503
Brush 4
Brush 5
Brush 3
Brush 1 Bristles: Nylon, 3.5" area length, 0.35" diameter (no taper) Brushes Corp. PN 86-0516-1212, or equivalent* Brush 2 Bristles: Nylon, 2.25" area length, 0.75" diameter (tapered to 0.60") Brushes Corp. PN 86-1234-0006, or equivalent* Brush 3 Bristles: Nylon, 0.75" area length, 0.5" diameter (no taper) Brushes Corp. PN 99-9986-9999, or equivalent* Brush 4 Bristles: Nylon, 1.25" area length, 0.28" diameter (no taper) Brushes Corp. PN 86-00004-0009, or equivalent* Brush 5 Bristles: Nylon, 1.55" area length, 0.5" diameter (tapered to 0.35") Brushes Corp. PN 86-0212-1234, or equivalent* * Equivalent must include bristle material, bristle area length, and bristle diameter as specified.
9. Scrub crevices and around hinged/mating surfaces with the blade port brush. 10. Rinse thoroughly with warm tap water for a minimum of 30 seconds, making sure to irrigate all features of the device. Ensure that the suction control lever is opened and closed repeatedly while rinsing the device lumen.
12
10600266 Rev. E
DYONICS™ Handpieces
Instructions for Use
Service Cleaning Verification 1. After cleaning, inspect devices under normal lighting to ensure that all visible soil has been removed. 2. If not visibly clean, repeat cleaning and reinspect. 3. For difficult-to-view areas, 3% hydrogen peroxide may be applied (bubbling is evidence of the presence of blood). Note: Rinse instruments thoroughly with warm tap water following any hydrogen peroxide testing.
Storage Medical devices that will be stored between cleaning and sterilization should be dried with a low-linting, non-abrasive soft cloth to prevent microbial contamination that could result from wet instruments. Devices should ALWAYS be thoroughly cleaned prior to storage.
Sterilization Parameters DYONICS™ Handpieces must be sterilized by steam, using one of the following methods only: High Temperature Prevac Steam: Steam, pre-vacuum, at 270°–275° F (132°–135° C) for 4 minutes. High Temperature Gravity Steam: Steam, gravity method, at 270°–275° F (132°–135° C) for 10 minutes. World Health Organization (WHO) Steam Cycle: Steam, 273°–280° F (134°–138° C) for 18 minutes. CAUTION: Do not cool the handpiece by immersing it in cold water. CAUTION: To prevent damage to the control unit connector ports, do not plug in wet. Ensure that cleaned or sterilized cable connectors are completely dry prior to connecting to the control unit.
Service Repairs and adjustments are to be performed only by Smith & Nephew authorized service centers. If service becomes necessary, call Smith & Nephew Customer Service prior to returning the device and request a Return Authorization (RA) number. Customer Service can also explain the available Service Replacement and Repair Programs. Service items should be carefully disinfected and packaged and returned postpaid to Smith & Nephew. Smith & Nephew Customer Service can provide additional instructions. Product returned that has been serviced by an unauthorized third party repair shop and/or sterilized with a sterilization method other than one approved DYONICS™ Handpieces
Instructions for Use
by Smith & Nephew and/or damaged by contact with other mechanical devices (such as shavers) may incur additional costs, regardless of warranty status. It is not necessary to include accessory items (i.e., power cords, etc.) when returning a device for service. There are no user-serviceable components, adjustments, or repairs other than those specifically described in this manual.
Handpiece Cable Replacements The following are replacement parts for the DYONICS™ Handpieces: REF
Description
7208207
Shaver handpiece cable
7209071
Ultralight Motor Drive cable
7208208
Mini Motor Drive cable
The handpiece cable replacement is supplied in a kit with a set of installation instructions. A standard adjustable wrench and alcohol wipes will be required to clean the connector pins. Note: The Smith & Nephew DYONICS POWERMAX™, POWERMAX ELITE Handpieces (REF 7209891, REF 72200616, REF 72200617, and REF 7210542) and DYONICS POWERMINI™ (REF 7221500 and REF 7221503) do not have field-replaceable cables, and must be returned to Smith & Nephew for cable replacement.
To replace the handpiece cable: 1. Using a standard adjustable wrench, loosen the stainless steel locking nut at the proximal end of the handpiece. Remove the nut from the old cable. 2. Ensure that the REF number on the replacement cable is identical to the REF number on the old cable. 3. Clean and dry the connector pins and baseplate of the handpiece. 4. Carefully align the pins to the sockets on the replacement cable and join the two pieces. 5. Tighten the locking nut securely to ensure a good electrical ground connection. 6. Connect the handpiece to the control unit and verify operation of the handpiece using the new power cable. Note: The Mini Motor Drive cable and the Ultralight Motor Drive cable are very similar. The threads on the locking nut are different for each type of cable. If cable replacement is difficult, recheck the REF number to ensure it is the correct cable.
10600266 Rev. E
13
Technical Specifications Technical Specifications* Standard Handpiece (REF 7205355)
Length: 7.7" (19.4 cm) Weight: 16.2 oz. (453 grams) Equipped with 10-foot (3-meter) autoclavable, replaceable power cable. Suction Control Lever
Hand Control Handpiece (REF 7205354)
Length: 7.7" (19.4 cm) Weight: 16.2 oz. (453 grams) Standard handpiece with push-button motor controls: Forward, Reverse, Oscillate, Blade Window Lock and Speed Shift. Equipped with 10-foot (3-meter) autoclavable, replaceable power cable. Suction control lever
DYONICS™ POWERMAX™ Handpiece (REF 7209891)
Length: 7.1" (18.0 cm) Weight: 7.5 oz. (223 grams) Lightweight handpiece with push-button motor controls: Forward, Reverse, Oscillate, Blade Window Lock and Speed Shift. Equipped with 10-foot (3 meter) autoclavable power cord (not field replaceable). Suction control lever
DYONICS POWERMAX and POWERMAX ELITE Handpieces (REF 7210542, REF 72200616, REF 7220617)
Length: 7.1" (18.0 cm) Weight: 7.5 oz. (223 grams) Lightweight handpiece with push-button motor controls: Forward, Reverse, Oscillate, Blade Window Lock and Speed Shift. Equipped with 10-foot (3 meter) autoclavable power cord (not field replaceable). Suction control lever Allows for shaver blades to be inserted with the blade window aligned to the suction control lever or 180° opposite the lever.
Ultralight Motor Drive (REF 7205971)
Length: 7.5" (19 cm) Weight: 12.4 oz. (319 grams) Equipped with 10-foot (3 meter) autoclavable, replaceable power cable. Suction control lever
*Specifications subject to change without notice.
14
10600266 Rev. E
DYONICS™ Handpieces
Instructions for Use
Technical Specifications (continued)
DYONICS™ Mini Motor Drive (REF 7205357)
Length: 5.25" (13.3 cm) Weight: 5.5 oz. (154 grams) Equipped with 10-foot (3 meter) autoclavable, replaceable power cord. Suction control lever
DYONICS POWERMINI™ (REF 72201503)
Length: 5.25" (13.3 cm) Weight: 5.0 oz. (142 grams) Equipped with 10-foot (3 meter) autoclavable power cord (not field replaceable). Suction control lever Allows for shaver blades to be inserted with the blade window aligned to the suction control lever or 180° opposite the lever.
DYONICS POWERMINI (REF 72201500)
Length: 5.25" (13.3 cm) Weight: 5.0 oz. (142 grams) Standard handpiece with push-button motor controls: Forward, Reverse, Oscillate, Blade Window Lock. Equipped with 10-foot (3 meter) autoclavable power cord (not field replaceable). Suction control lever Allows for shaver blades to be inserted with the blade window aligned to the suction control lever or 180° opposite the lever.
*Specifications subject to change without notice. Handpiece date of manufacture: Date is on box label. Serial number is also traceable to the date of manufacture by Smith & Nephew.
Environmental Conditions Condition Temperature Humidity Atmospheric Pressure
DYONICS™ Handpieces
Instructions for Use
Transport and/or Storage
Use
-20º to 60º C
-20º to 60º C
10% to 90% (no condensation allowed)
10% to 90% (no condensation allowed)
415 to 760 mmHg
415 to 760 mmHg
10600266 Rev. E
15
Warranty Smith & Nephew products are guaranteed to be free from defects in material and workmanship for the warranty period for a particular product, beginning from date of invoice. Refer to the current Smith & Nephew Product Catalog or contact Smith & Nephew Customer Service for specific warranty information.
Smith & Nephew York Science Park Heslington, York YO10 5DF United Kingdom
This limited warranty is restricted to repair or replacement by Smith & Nephew, at its option, of any product found to be defective during the warranty period. Damage inflicted to a product by the user that causes it to be unsuitable for refurbishment may result in additional charges, regardless of warranty status. All warranties apply to the original buyer only. In no event shall Smith & Nephew be liable for any anticipated profits, consequential damages, or loss of time incurred by the buyer with the purchase or use of any product. NO OTHER WARRANTY, EXPRESSED OR IMPLIED, IS GIVEN.
Service Replacement Units Warranty Smith & Nephew service replacement units are warranted to be free from defects in material and workmanship for the warranty period for a particular product, beginning from date of invoice. Refer to the current Smith & Nephew Product Catalog or contact Smith & Nephew Customer Service for specific warranty information.
Service Replacement Program Smith & Nephew offers a 24-hour Service Replacement Program for its products to minimize downtime in your operating room. Our goal is to ship you a service replacement unit within 24 hours** of your call (during normal business hours). For a Return Authorization (RA) number or for additional information on this program, call Customer Service at +1-800-343-5717 in the U.S., or contact your authorized representative. **24-hour shipment is not offered in all countries.
Repair Service Program For devices no longer under warranty, repairs can be made by Smith & Nephew or by an authorized agent. Non-warranty repairs will be made at the list price of replacement parts, plus labor. If requested, we will provide an estimate of repair cost and time required for the repair before any work is done. Repair items should be carefully decontaminated, repackaged, marked with the Return Authorization (RA) number, and returned postpaid to the appropriate Smith & Nephew Service Center. Smith & Nephew Customer Service or your local authorized representative can provide shipping information.
For Further Information If further information on this product is needed, please contact Smith & Nephew Customer Service at +1-800-343-5717 in the U.S., or your authorized representative.
™Trademarks of Smith & Nephew. Certain marks registered U.S. Patent & Trademark Office. Covered by one or more of the following U.S. patent numbers: Re. 34,556; 5,270,622; 5,322,505; 5,510,070; 5,563,481; 5,602,449; 5,620,447; 5,630,826; 5,672,945; 5,707,350; 5,712,543; 5,745,647; 5,749,885; 5,804,936; 5,833,692; 5,871,493; 5,913,867; 6,090,122; 6,328,752; Des. 381,425; Des. 390,955; Des. 390,956; other patents pending.
Endoscopy Smith & Nephew, Inc. Andover, MA 01810 USA
www.smith-nephew.com +1 978 749 1000 Telephone +1 978 749 1108 Fax +1 800 343 5717 U.S. Customer Service
©2007, 2010 Smith & Nephew, Inc. All rights reserved. 02/2010 10600266 Rev. E