Quick Guide
2 Pages
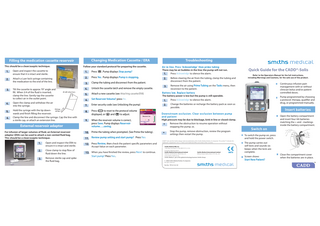
Preview
Page 1
Changing Medication Cassette / ERA
Filling the medication cassette reservoir This should be a clean/aseptic technique.
1. 2.
3.
Open and inspect the cassette to ensure that it is intact and sterile.
1.
Press T. Pump displays Stop pump?
Attach a Luer lock syringe containing the medication to the end of the line.
2.
Press Yes. Pump displays Pump is stopping.
3.
Clamp the tubing and disconnect from the patient.
Tilt the cassette to approx 70° angle and fill. When 3/4 of the fluid is inserted, clamp the line. Gently tap the cassette to collect air in the outlet point.
4.
Open the clamp and withdraw the air into the syringe.
5.
Hold the syringe with the tip downwards and finish filling the reservoir. Clamp the line and disconnect the syringe. Cap the line with a sterile cap, or attach an extension line.
6.
Follow your standard protocol for preparing the cassette.
External reservoir adaptor For infusion of larger volumes of fluid, an External reservoir adaptor (ERA) can be used to attach a non-vented fluid bag. This should be a clean/aseptic technique.
1.
Open and inspect the ERA to ensure it is intact and sterile.
2.
Close clamp to stop flow of fluid down the line.
3.
Remove sterile cap and spike the fluid bag.
Troubleshooting Air in-line. Press ‘Acknowledge’ then prime tubing There may be air bubbles in the line; the pump will not run. Press Acknowledge to silence the alarm. 1.
2.
Before clearing the air from the tubing, clamp the tubing and disconnect from the patient.
3.
Remove the air using Prime Tubing on the Tasks menu, then reconnect to the patient.
4.
Unlock the cassette latch and remove the empty cassette.
5.
Attach a new cassette (see Attaching cassette/ERA)
Batter y low. Replace batter y
6.
Set Reservoir Volume? press Yes.
1.
Press Acknowledge to silence the alarm.
7.
Enter security code (see Unlocking the pump)
2.
Change the batteries or recharge the battery pack as soon as possible.
8.
Press S to reset to the protocol volume displayed, or U and D to adjust.
9.
When the reservoir volume is correct, press Save. Pump displays Reservoir volume…..saving.
10. Prime the tubing when prompted. (See Prime the tubing).
13. When you have finished the review, press Nex t to continue. Start pump? Press Yes.
Refer to the Operators Manual for the full instructions, including Warnings and Cautions, for the safe use of this product.
Continuous infusion pain management with or without clinician bolus and/or patient controlled doses.
The battery power is low but the pump is still operable.
Pump programmed by choosing a protocol: therapy, qualifier and drug, or programmed manually.
Insert batteries
Downstream occlusion. Clear occlusion between pump and patient
Open the battery compartment and insert four AA batteries matching the + and - markings inside the battery compartment.
High pressure may be due to blockage, kink in line or closed clamp.
*
Remove the obstruction to resume operation without stopping the pump. or,
*
Stop the pump, remove obstruction, review the program settings then restart the pump.
11. Review pump setting and start pump? Press Yes 12. Press Review, then check the patient specific parameters and Accept Value on each parameter.
Quick Guide for the CADD®-Solis
CADD®-Solis and the Smiths design mark are trademarks of the Smiths Medical family of companies. The symbol ® indicates the trademark is registered in the U.S. Patent and Trademark Office and certain other countries. Smiths Medical MD, Inc. 1265 Grey Fox Road, St. Paul, MN 55112, U.S.A. European Representative: Smiths Medical International Limited Smiths Medical International Limited Military Road, Hythe, Kent, CT21 6JL, U.K. Watford, Hertfordshire, WD24 4LG, U.K. www.smiths-medical.com Smiths Medical - part of the global technology business Smiths Group © 2008 Smiths Medical family of companies. All rights reserved. Part No. TPF-01132-101
Switch on To switch the pump on, press and hold the power switch. The pump carries out self-tests and sounds six beeps when the tests are complete. Screen shows
Start New Patient?
Close the compartment cover when the batteries are in place.
Set up the pump for a new patient
Change the program with the pump stopped
Ensure you have the pump, a fresh set of 4 AA batteries, a filled medication cassette (or ERA and fluid bag). You also need to know the Keyboard Access code for the pump, or have the pump key.
You can change settings when the pump is stopped. Before you restart the pump, the screen displays all the patient specific parameters which you must review and accept.
1.
Insert batteries and press the power switch to turn pump on.
2.
Do you want to start a new patient? Press Yes.
3.
Unlock the keypad.
4.
Choose a Therapy and press S, Qualifier and press S and a Drug and press S.
5.
Are these correct? Verify the chosen protocol and press Yes .
6.
Review pump settings. Press Review .
7.
Carefully check the patient specific parameters. Press Accept Value on each parameter, or press S to change.
8.
When you have finished the review, press Nex t to continue.
9.
Cassette not attached. Attach cassette before starting pump. Attach, latch and lock cassette to the pump.
10. Prime Tubing? Press Prime . Press Stop Priming when complete. 11. Continue Priming? Press No . 12. Start Pump? Press Yes when you have connected the tubing to the patient, and are ready to start the infusion.
1.
2.
Use U and D to highlight the patient specific parameter you want to change, for example, Continuous Rate and press S
Attaching the cassette / ERA
1. 3.
Unlock the keypad. The screen shows the current setting of your selected parameter. For rates, the range of soft limits for the protocol are shown in green, and the range of hard limits are in amber.
3.
Use U and D to set the new value and press Confirm .
4.
If a soft limit is exceeded, you see the message Confirm soft limit override? Press Yes .
5.
When the change is complete, press T
6.
Review pump settings. Press Review.
7.
Carefully check the patient specific parameters. Press Accept Value on each parameter, or press S to change.
8.
When you have finished the review, press Nex t
9.
Start Pump? Press Yes to start the infusion. The Home screen is displayed, showing the Repor ts and Tasks menu keys.
2.
Clamp tubing and check that the cassette lock is in the open postion.
Insert the cassette hooks into the hinge pins on the bottom of the pump.
Push down on the latch as you move the cassette up into position. You feel a click as the cassette engages with the pump.
4.
Lift the latch up into the closed position.
5.
Insert the pump key and turn it clockwise to lock the cassette.
Prime the tubing
Unlocking the pump You can start and stop the pump, and deliver a PCA dose (if one is programmed) without unlocking the pump. For all other tasks, you must enter the security code. When the security code is required, the pump displays Enter code to continue
1.
Use U and D until the first digit of the code is shown on the screen.
2.
Press S to advance to the next digit.
3.
Repeat with the second and third digits, then press S or Accept Value to finish entering the code.
Reports The Reports function is on the Home screen and also appears as an option on the Tasks menu. Reports can be displayed when the pump is running, or when it is stopped.
Ensure that the pump is stopped, the tubing is disconnected from the patient, and the clamp is open on the patient tubing.
1.
Press Repor ts to display the Select Report menu.
1.
From the Tasks menu, use U and D to highlight the Prime Tubing option, then press S
2.
2.
When prompted, unlock the pump.
Use U and D to highlight a report title and press S. The report is displayed on the screen. Examples: PCA Dose Graph
3.
Press Prime to start priming.
4.
Press Stop Priming when the air is removed, or the delivery will stop automatically at 10 ml.
3.
Delivery History & Pie Chart
Press Back to return to the Select Report menu.