Technical Service Manual
89 Pages
Preview
Page 1
Graseby 3100 Syringe Pump
Technical Ser vice Manual
Part Number 00SM-0131-7 August 2004 © 2004 Smiths Medical International Ltd.
Smiths Medical International Ltd.
Address
Published by Smiths Medical International Limited. All possible care has been taken in the preparation of this publication, but Smiths Medical International Limited accepts no liability for any inaccuracies that may be found. Smiths Medical International Limited reserves the right to make changes without notice both to this publication and to the product which it describes. © Smiths Medical International Limited 2004 No part of this publication may be reproduced, transmitted, transcribed, or stored in a retrieval system or translated into any human or computer language in any form by any means without the prior permission of Smiths Medical International Limited.
SMITHS MEDICAL INTERNATIONAL LTD., COLONIAL WAY, WATFORD, HERTFORDSHIRE, UNITED KINGDOM, WD24 4LG TEL: (+44) (0)1923 246434 FAX: (+44) (0)1923 231595 WEB: www.smiths-medical.com REGISTERED IN ENGLAND. COMPANY No. 362847.
Trademarks and acknowledgements Graseby and Smiths are registered trademarks of Smiths Group plc. All other trademarks are acknowledged as the property of their respective owners.
3100 Service Manual
Issue 7 (August 2004)
Page i
Smiths Medical International Ltd.
Issue Record
ISSUE RECORD Issue No.
Reason for change
Pages affected
Date
4
Reformatted revision
All
April 3 1995
4.1
Amendment to three pages
iii, 6-4 and 8-1
Nov. 24 1995
4.2
Amendment to seven pages
Cover, iii, vii, 4-8, 5-6, 7-8, 7-9
March 1996
5.0
Reissue of entire Manual
All
Dec. 1999
6.0
Reissue of entire Manual
All
July 2000
6.1
Amendment to two pages
ii and 5-11
August 2000
7.0
Reissue of entire manual
All
August 2004
1 2 3
Page ii
Issue 7 (August 2004)
3100 Service Manual
Smiths Medical International Ltd.
Contents
Contents CHAPTER 1
Page
INTRODUCTION, FEATURES and SPECIFICATION Introduction ... 1-1 Security cover ... 1-2 Features ... 1-2 Specification ... 1-3 Brief history of Graseby bedside syringe pumps ... 1-4
CHAPTER 2 CONFIGURATION MODE, DIAGNOSTICS MODE and OCCLUSION MEASUREMENT Configuration mode ... 2-1 Calling up the Configuration mode ... 2-1 Syringe brand selection ... 2-1 Language setting ... 2-2 Setting the AC voltage ... 2-2 Disassembly and assembly of casing ... 2-2 AC voltage and fuse adjustment ... 2-3 Diagnostic mode ... 2-3 Keying in the diagnostic mode ... 2-4 Occlusion measurements ... 2-4 Thrust measurements ... 2-4 Syringe stiction ... 2-4 Thrust checks ... 2-5 Thrust adjustments ... 2-6
CHAPTER 3 FUNCTIONAL DESCRIPTIONS Functional descriptions ... 3-1 Drive system ... 3-1 Occlusion sensing system ... 3-2 Clutch assembly and opto sensor ... 3-2 Occlusion detection ... 3-2 Electro/mech. control system ... 3-2 Sensing (alarm) systems ... 3-3 Syringe nearly empty ... 3.3 End of infusion/occlusion ... 3-3 AC power failure ... 3-3 Battery voltage low ... 3-3 Self tests/pump malfunction ... 3-3 Drive disengaged/syringe not fitted ... 3-3 Syringe size sensors ... 3-3 Software ... 3-4
3100 Service Manual
Issue 7 (August 2004)
Page iii
Contents
Smiths Medical International Ltd.
CHAPTER 4 Page CIRCUIT DESCRIPTIONS Circuit descriptions ... 4-1 Main board circuit ... 4-1 Processor core circuit ... 4-2 Motor interface circuit ... 4-2 Power control circuit ... 4-2 Sensors interface circuit ... 4-2 Communications processor circuit ... 4-3 Regulator board circuit ... 4-3 Plug PL11 outputs ... 4-4 Setting RV1 ... 4-4 Syringe size sensors ... 4-5 Opto sensors ... 4-5
CHAPTER 5 FAULT CODES, MAINTENANCE and REPAIR PROCEDURES Fault codes ... 5-1 Faults code, 0 to 92 ... 5-1 Faults code, 100 to 112 ... 5-2 Maintenance ... 5-3 Cleaning ... 5-3 Fuse renewal ... 5-3 Repair procedures ... 5-3 Main board renewal ... 5-4 Regulator board renewal ... 5-4 Opto sensors board renewal ... 5-5 AC transformer renewal ... 5-5 Plunger clamp and half nut assembly renewal ... 5-6 Pole clamp assembly renewal ... 5-6 Leadscrew assembly renewal ... 5-7 Motor and gearbox assembly renewal ... 5-8 Occlusion clutch and disc assembly renewal ... 5-8 Membrane switch panel renewal ... 5-9 Super nut renewal ... 5-10 Syringe size sensors board renewal ... 5-10 Plunger clamp repair ... 5-11 Batteries. Checks and replacement ... 5-11 Front and/or rear case repair ... 5-11
Page iv
Issue 7 (August 2004)
3100 Service Manual
Smiths Medical International Ltd.
Contents
CHAPTER 6 Page FUNCTIONAL TESTS Functional tests ... 6-1 Plunger clamp alarm checks ... 6-4 Ramp check procedures ... 6-4 Linear accuracy ... 6-5 Test procedures ... 6-5 Plunger clamp alignment ... 6-5 Test procedures ... 6-5
CHAPTER 7 ILLUSTRATED PARTS LIST General assembly ... 7-1 Plunger clamp assemblies ... 7-6 Pole clamp assembly ... 7-7 Rotating pole clamp assembly ... 7-8 Leadscrew assembly ... 7-9 Main board assembly ... 7-10 Regulator board assembly ... 7-11
CHAPTER 8 BRAUN PERFUSOR CONVERSION Syringe conversion procedures ... 8-1 Nearly empty flag ...8-1 Spacer tube fitment ...8-1 Plunger clamp plate ...8-1 Braun Perfusor selection ... 8-1 ‘P’ label fitment ... 8-1 Reselecting ‘various’ syringe brands ...8-2 Mechanical procedures ...8-2 Programming procedures ...8-2
APPENDIX Fitment of New Modified Size Sensor Flag ... A-1 Introduction ... A-2 Fitment of modified SSF ... A-2 Final testing ... A-3 Setting the size sensor flag ... A-4
3100 Service Manual
Issue 7 (August 2004)
Page v
Figures and Tables
Smiths Medical International Ltd.
LIST OF FIGURES Figure Page 1.1 General views of the 3100 pump ... 1-1 2.1 Rear case screw fixing order ... 2-3 2.2 Thrust measuring set up ... 2-5 4.1 Overall block diagram ... 4-7 4.2 Main board block diagram ... 4-9 4.3 Processor core circuit diagram ... 4-10 4.4 Motor interface circuit diagram ... 4-11 4.5 Power control circuit diagram ... 4-12 4.6 Sensors interface circuit diagram ... 4-13 4.7 Communications processor circuit diagram ... 4-14 4.8 Regulator board circuit diagram ... 4-15 4.9 Syringe size sensors circuit ... 4-17 4.10 Opto sensors circuit ... 4-17 4.11 Membrane switch panel circuit ... 4-18 5.1 Half nut (obsolete)/ Super nut ... 5-10 5.2 Strengthened rear case moulding ... 5-11 6.1 Outline of dual ramp gauge ... 6-4 6.2 Size sensor flags ... 6-4 6.3 Linear accuracy gauge ... 6-5 6.4 Taper gauge ... 6-5 7.1 General assembly ... 7-3 7.2 Plunger clamp assemblies ... 7-6 7.3a Pole clamp assembly ... 7-7 7.3b Rotating pole clamp assembly ... 7-8 7.4 Leadscrew assembly ... 7-9 7.5 Main board assembly diagram ... 7-11 7.6 Regulator board assembly ... 7-12 8.1 Braun Perfusor conversion: parts required ... 8-2 A.1 New modified Syringe Size Sensor flag ... A-1 A.2 Case fixing screw tightening order ... A-3 A.3 Size Sensor Flag: general details ... A-5
LIST OF TABLES Table Page 4.1 Plug PL11 outputs ... 4-4 4.1 Temperature/voltage range for setting RV1 ... 4-5 5.1 Main processor faults code ... 5-1 5.2 Slave processor faults code ... 5-2 5.3 Front case spares kit ... 5-12 5.4 Size Sensor Flag spares kit ... 5-12 5.5 Rear case spares kit ... 5-13 6.1 Functional testing of 3100 ... 6-1 A-1 3100 syringe size sensor gauge ... A-5
Page vi
Issue 7 (August 2004)
3100 Service Manual
Warnings and cautions
Smiths Medical International Ltd.
Introduction This Technical Service Manual for the 3100 together with the Instruction Manual for the pump, contains all the information that is needed in order to operate, maintain and repair the pump. The contents of this Technical Service Manual is primarily intended to be read and used by suitably qualified personnel. Only qualified personnel should repair and maintain the pump.
AC input power connecting socket/cable The AC input power socket that connects to the rear of the pump has three connections (live, neutral and earth) provided by a 3-way power cable. As the casing is doubly insulated, the AC input connector situated on the pump only utilises two connections (live and neutral), there is no third earth pin. This method of AC input enables similar AC input sockets (if required) to that supplied by Smiths Medical International to be used.
Warnings and cautions Warnings tell you about dangerous conditions that could lead to death or serious injury to the user or patient that can occur if you do not obey all of the instructions in this manual. WARNINGS 1. WARNING: To avoid over- or under- infusion, always verify that the brand and size of the loaded syringe are the same as the brand and size displayed on the screen before starting an infusion. Failure to do so may result in an inaccurate delivery of medication, resulting in patient injury or death. 2. WARNING: To avoid incorrect or inappropriate configuration of the pump, the Configuration menu must only be selected by qualified persons or authorised personnel. Incorrect pump configuration could lead to inappropriate infusion resulting in patient injury or death. 3. WARNING: This equipment is not suitable for use in the presence of flammable anaesthetics, oxygen-enriched or explosive atmospheres. The use of the device in such atmospheres may lead to explosion or fire. 4. WARNING: To avoid possible malfunction of the pump, do not expose the pump to X- rays, gamma rays or ionizing radiation, or to the RF interference or strong electric/magnetic fields emitted (for example) by diathermy equipment or mobile telephones. If the pump is used in the presence of, or in combination with Magnetic Resonance Imaging (MRI) machines it must be protected from the magnetic field emitted by such equipment. Malfunction of the pump can cause incorrect infusion or loss of infusion resulting in patient injury or death. 5. WARNING: Operation of the pump outside the temperature limits defined in the specification may result in erroneous operation. Ensure that the temperature is within the specified limits. Failure to do so may result in patient injury or user injury. 6. WARNING: In order to ensure that the intended infusion is performed, data must be entered correctly. Likewise before confirming any displayed data the user should ensure that it is correct. Failure to do so may result in compromised function of the product, patient injury or user injury. 7. WARNING: Failure to respond promptly to an alarm may result in patient injury or death. 8. WARNING: Failure to follow the Service Manual’s maintenance schedule recommendations may result in compromised function of the product and lead to patient injury or death. 9. WARNING: It is essential that clinical staff remain within visual and audible range of the pump so that critical alarms can be seen or heard and responded to. 10. WARNING: The user should ensure that the performance offered by the pump is fit for the intended purpose. Failure to do so may result in compromised function of the product, patient injury or user injury. 11. WARNING: When the pump is carrying out an infusion, to ensure that electrical safety is maintained only items of equipment that conform to EN60950 are to be connected to the RS232 connector situated at the base of the pump, otherwise patient safety may be compromised. 12. WARNING: Correct management of battery charging is essential to ensure that the pump can operate on batteries for the time specified. Failure to do so may lead to impaired functioning of the pump, resulting in patient injury or death. 13. WARNING: Do not use a faulty pump. If the pump develops a fault then an alarm will sound; the display will indicate a FAULT condition and the pump will fail to infuse. Incorrect performance of the pump can cause complications resulting in patient injury or death. If the pump develops a fault then it must be referred to a suitably qualified engineer or returned to Smiths Medical in order to have the fault rectified. 14. WARNING: Failure to use the mains lead clamp means that the pump may be accidentally or erroneously disconnected from the mains. Although there is battery backup in case this happens, the battery may not be sufficiently charged. Consequently there is a risk of the pump not functioning, which could lead to patient injury or death.
3100 Service Manual
Issue 7 (August 2004)
Page vii
Smiths Medical International Ltd.
Warnings and cautions
15. WARNING: If an occlusion alarm occurs, immediately clamp the line to eliminate the possibility of a bolus being delivered to the patient. Then inspect the fluid pathway for kinks, clogged catheter, etc. in order to remove the occlusion prior to restarting the infusion. An unintentional bolus of medication can result in patient injury or death. 16. WARNING: Use only the syringes and administration sets listed in the Specification (Chapter 1). Failure to do so may result in an inaccurate delivery. Smiths Medical does not guarantee performance of the pump if syringes other than those listed are used. Incorrect function or performance of the pump can cause complications resulting in patient injury or death. 17. WARNING: The volume of fluid contained in the connecting tubing is a residual amount and will not be infused. Hence this extra volume of fluid must be allowed for when initially filling the syringe and purging the system. Under-delivery of medication can cause complications resulting in patient injury or death. 18. WARNING: To avoid patient embolism, ensure that the patient tubing is purged of all air bubbles before administering any medication. The pump provides a purge facility to assist with this process. The presence of air within the medication can result in complications leading to patient injury or death. 19. WARNING: To avoid syphoning of the syringe contents (free flow), ensure that the syringe is correctly loaded into the pump, that the syringe plunger is properly engaged by the pump’s actuator and that the pump is placed not more than 80cm above the infusion site. Syphoning can result in over-infusion leading to patient injury or death. 20. WARNING: To avoid over-infusion, do not purge the infusion line when the administration set is connected to the patient. Over-infusion of medication can result in patient injury or death. 21. WARNING: To avoid the pump becoming detached from an IV pole always make sure that the pump is securely fixed to the pole. Always check the security and stability of the assembly with the pump mounted. 22. WARNING: Following a significant liquid spill onto the pump, it should be wiped dry and inspected by service personnel before being returned to service. Failure to do so may result in compromised functioning of the pump, leading to patient or user injury or death. 23. WARNING: When using a syringe smaller than 50/60 ml the occlusion pressure will increase as the diameter of the syringe decreases, i.e. the smaller the syringe the higher the pressure. 24. WARNING: The patient history is lost when the clock is reset. 25. WARNING: Only adequately qualified personnel should maintain and repair the pump. 26. WARNING: The pump must be disconnected from the AC power supply before the case is opened. 27. WARNING: The Configuration and Diagnostic mode must only be used by personnel who are adequately qualified and have previous training in the use of the pump. 28. WARNING: The safety and reliability of the pump may be compromised by the use of parts other than those specified in this Manual. 29. WARNING: When a new Syringe Size Sensor Flag has been fitted to the pump (see Appendix), then the pump must be tested using the new syringe size sensor gauges available from Smiths Medical (part number 0131-0202). Page 3 of the Appendix gives details of the Final Testing procedures. 30. WARNING: The pump must be set to display the brand and the size of syringe that is going to be used. Using a different brand or size of syringe to that being displayed could lead to the incorrect amount of drug being administered, that could result in injury or death. 31. WARNING: The internal pump batteries must be disposed of in accordance with the manufacturers instructions. Lead acid batteries must NOT be placed in the normal waste stream.
Page viii
Issue 7 (August 2004)
3100 Service Manual
Smiths Medical International Ltd.
Warnings and cautions
CAUTIONS Cautions tell you about dangerous conditions that can occur and cause damage to the pump if you do not obey all of the instructions in this manual. 1. CAUTION: Refer all service, repair and calibrations only to qualified technical personnel. Unauthorised modifications to the pump must not be carried out. 2. CAUTION: When turning the pump on if screens similar to those illustrated are not displayed, do not use the pump. Send the pump to a suitably qualified engineer or return it to Smiths Medical in order to have the fault rectified. 3. CAUTION: Do not use cleaning and disinfecting agents other than the approved ones specified here. 4. CAUTION: The pump must not be immersed in any liquids or exposed to strong organic solvents. Wipe off spills immediately, and do not allow fluid or residues to remain on the pump. Additionally, the pump is not designed to be autoclaved, steam-sterilised, ETO-sterilised or subjected to temperatures in excess of 45° C (113° F). Failure to observe this caution may cause serious damage to the pump. 5. CAUTION: During the removal and replacement of a pump's components, strict observance to Electro Static Discharge (ESD) rules must be observed at all times, i.e. an earthing strap must be worn. Failure to apply ESD protection may result in serious damage to the product and possible malfunction. Ensure that any replacement printed circuit board or other ESD sensitive items are stored in an anti-static container.
3100 Service Manual
Issue 7 (August 2004)
Page ix
Smiths Medical International Ltd.
Abbreviations Abbreviations used
Page x
The following list shows the abbreviations that have been used at various places throughout this Manual. Abbreviation
Full name
A to D AC C COP cm cNm csk DC deg. dia. µg Fig. g Hg Hz IC IM Kg Khz KVO LCD LED mA mg ml mm No. PCA PCB Pl R RAM ROM V VFD
Analogue to digital Alternating current Capacitor or Centigrade Computer operating properly Centimetre Centinewton meter Countersunk Direct current Degrees Diameter Micro gramme Figure Gramme Mercury symbol Hertz Integrated circuit Instruction manual Kilogram Kilo Hertz Keep vein open Liquid crystal display Light emitting diode Milliampere Milligramme Millilitre Millimetre Number Patient controlled analgesia Printed circuit board Plug Resistor Random access memory Read only memory Volts Vacuum fluorescent display
Issue 7 (August 2004)
3100 Service Manual
CHAPTER 1 INTRODUCTION, FEATURES and SPECIFICATION
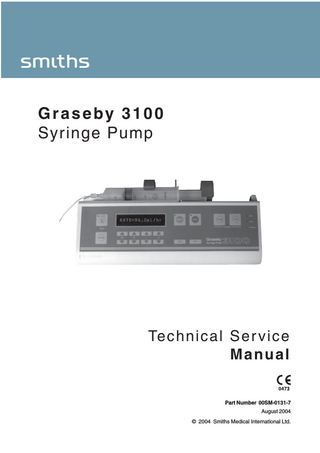
Graseby 3100 Syringe Pump
Smiths Medical International Ltd.
Introduction
CHAPTER 1 INTRODUCTION, FEATURES and SPECIFICATION Introduction
The 3100 syringe pump is microcomputer controlled and has been purpose developed for administering sterile liquids. All the controls are clearly marked and easy to use. The user is provided with a constant indication of the 3100’s operation; the dot matrix Vacuum Fluorescent Display (VFD) presents the display in any one of seven major European languages. The 3100 is a compact robust pump that can operate from a table top or a pole clamp. The pump can be programmed by the user to work with a range of different makes of syringe and automatically senses the diameter of the syringe installed and hence its volume. The syringe sizes that the pump caters for are 20 ml, 30 ml and 50/60 ml.
Figure 1.1 General view of the 3100 pump
3100 Service Manual
Issue 7 (August 2004)
1-1
Introduction
Smiths Medical International Ltd.
Introduction
The 3100 is easily configured to dispense liquids at rates between 0.1 ml/hour and 199.9 ml/hour in increments of 0.1 ml. The pump keeps a running total of the volume of infused liquid even when the infusion has been stopped and then restarted.
(contd.)
The pump can be operated from AC power or from three internally fixed rechargeable batteries. When running on battery power, the pump gives more than three hours of continual use. The pump contains a battery recharging circuit and the batteries will be fully charged when the pump has been connected to the AC power for up to 14 hours (see Note below) - even when the pump is switched OFF. Note: The battery charging period may have to be slightly increased above 14 hours if the pump is infusing during the charging period. Safety features have been built into both the software and the hardware. The pump carries out a self-testing routine each time it is switched on. The user is warned of incidents such as a power failure or an occlusion by both visual and audible alarms. Two micro-controllers are installed in the pump and are used to combine the following facilities: • non-volatile Random Access Memory (RAM), •
analogue to digital conversion,
•
communications circuitry, and
•
internal watchdog, COP (Computer Operating Properly).
The above facilities are usually provided by up to six separate silicon chips. The use of highly integrated micro-controllers greatly increases the reliability of the 3100. The motor within the pump is under the direct control of the primary micro-controller. For added security, the primary micro-controller’s actions are monitored by the slave processor. Security cover
Features
1-2
An optional security cover kit is available (part number 0131-0277). The kit includes all the items required to modify the pump, including comprehensive fitting instructions. When fitted, the kit protects the syringe from tampering only; it provides no other security. It does not lockout the keypad or give audible or visual alarms when opened. The main features of the 3100 are: • simple to use, • ergonomic styling, • easy to service, • AC powered or internal battery powered, • advanced safety features, • caters for different brands of syringe, • automatic syringe size sensing, • clear text display, • comprehensive range of alarms, • designed in consultation with users, • drip proof (IPX1) • state-of-the-art electronics, and • numerous Warnings accompanied by an audible and visual alarm, including a three minute nearly empty syringe warning, • all materials used in this product are latex free.
Issue 7 (August 2004)
3100 Service Manual
Smiths Medical International Ltd. Specification
Features
Graseby instruments are subject to continual development and may, therefore, differ from the following specification: Dimensions:
325 mm (long) x 195 mm (high) x 115 mm (deep), with a pole clamp, and the plunger clamp closed.
Weight:
Not exceeding 3.5 kg including batteries and pole clamp.
Supply voltage:
220 V to 240 V AC at 50/60 Hz 15 VA or, 100 V to 120 V AC at 50/60 Hz 15 VA.
Battery type:
Sealed lead acid, rechargeable (Cyclon, 3 off). The batteries should be checked at least annually (see page 5-11).
Battery life:
More than 3 hours of normal pump operation when the batteries are fully charged. With the AC supply connected, up to 14 hours will be required to fully recharge low voltage batteries.
Useable syringes:
BD Plastipak ... Braun Omnifix ... Monoject ... Terumo ... Injectomat 50 ml ... Braun Perfusor ...
Flow rate:
0.1 to 199.9 ml/hour in 0.1 ml increments.
Volume infused counter:
0 to 999.9 ml in 0.1 ml increments.
Size 20; 30 or 50/60 ml. Size 20; 30 or 50/60 ml. Size 20, 30/35 or 50/60 ml. Size 20; 30/35 or 50/60 ml. Size 50/60 ml. 50 ml (conversion kit required, refer to Chapter 8).
Adjustable 250 mm Hg to 600 mm Hg. occlusion pressure:
Temp. range:
Operating conditions: -5° to +40°C, 30 to 75% Rh, 700 to 1060 hPa. Storage conditions: -40° to +70°C, 30 to 90% Rh, 700 to 1060 hPa.
3100 Service Manual
Drive accuracy:
+/– 2%.
Design standards:
BS 5724 Part 1. IEC 601 Part 1. VFG 1046/I984.
Elec. safety:
Class II; Type CF; Drip proof.
Language versions:
English, Dutch, French, German, Italian, Portugese and Spanish.
Issue 7 (August 2004)
1-3
Specification
Smiths Medical International Ltd.
Brief history of Graseby bedside syringe pumps MS2000 The first Graseby bedside syringe pump was the MS2000. This was a basic syringe pump capable of infusions within the range of 0.1ml/hr to 99.9ml/hr. It had a totaliser, a limited infusion capability, a built in pole clamp and was designed for vertical operation. The MS2000 was powered by an AC supply or its internal DC batteries. This pump is no longer manufactured. PCAS The PCAS pump was developed from the MS2000 to satisfy the growing interest in Patient Controlled Analgesia (PCA). The PCAS was very similar to the MS2000 in both appearance and mechanical design, but utilised a different microprocessor with the capability of running the extra features required for PCA and was eventually replaced by the 3300 pump. A printer port was also incorporated. This pump is no longer manufactured. 3000 The first pump in the 3000 Series of syringe pumps was the 3000 itself. This pump was designed as a low-cost alternative to the MS2000 and satisfied the need for a horizontally mounted pump. The 3000 did not have an internal battery supply. This pump is no longer manufactured. 3100 The 3100 syringe pump was developed from the 3000. It is very similar mechanically but the electronic design is superior. Dual processors were incorporated along with a vacuum fluorescent text display and internal batteries. The maximum infusion rate was increased to 199.9 ml/hr and different syringe sizes were able to be used (automatically sensed). Extra software features, such as the intelligent ‘near end’ alarm, were also incorporated. 3300 The next bedside syringe pump to be developed was the 3300. This was similar in mechanical and electronic design to the 3100 but the features were specifically for the now more mature PCA market. A lockable syringe cover was added for security against drug theft, a four line LC display was added, and internal history recording with printout was also added. With the growth in PCA knowledge in the medical community, many more software features were incorporated into the 3300 to aid PCA administration. 3400 The 3400 was developed (again from the 3100) to satisfy the need for a high speed infusion pump for intravenous anaesthesia. Advances in micro-controller technology allowed the use of a single device to control all the pumps features. The maximum infusion rate was raised to 1200.0 ml/hr and bolusing facilities were also added. Later, an infusion rate calculation facility was added to the software. A larger liquid crystal display was used on the 3400 with the ability to display text in different sizes, also ‘softkeys’ were used to make the user interface simpler. The range of syringe sizes that could be used was also increased. For more advanced applications the pump could be controlled by a computer. 3200 The 3200 was developed as a high end general purpose syringe pump. In-line pressure sensing, intermittent infusion capabilities and computer interfacing were added. The In-line occlusion pressure monitoring made the pump particularly suitable for use in intensive care baby units. A large text vacuum fluorescent display was added and the range of increased syringe sizes of the 3400 remained. 3500 There are two versions of the 3500, as detailed below: • a Manually Controlled Infusion (MCI) only pump, • a MCI plus a Target Controlled Infusion (TCI) pump. The 3500 was developed from the 3400 and retains all the 3400 facilities. The ‘MCI plus TCI’ pump carries out a TCI using the Diprivan drug. This version of the 3500 incorporates a Diprifusor module manufactured by Zeneca Pharmaceuticals. A new main circuit board and new software allows the 3500 to interface with the Diprifusor module. 3150 The 3150 is very similar to the 3200 general purpose pump. The main difference being that the In-line pressure sensing system is not available on the 3150, i.e. the pressure transducer is not fitted.
1-4
Issue 7 (August 2004)
3100 Service Manual
CHAPTER 2 CONFIGURATION MODE, DIAGNOSTIC MODE, and OCCLUSION MEASUREMENT Graseby 3100 Syringe Pump
Configuration mode
Smiths Medical International Ltd.
CHAPTER 2 CONFIGURATION MODE, DIAGNOSTIC MODE and OCCLUSION MEASUREMENT Configuration mode Calling up the Configuration mode
The Configuration mode allows both the syringe brand and the language required to be displayed and entered before using the pump. CAUTION The Configuration mode procedures must only be undertaken by suitably qualified medical personnel. 1.
When in the Set-up mode (refer to the 3100 Instruction Manual), simultaneously hold down ... either of the extreme right hand 0.1 arrow buttons ( ▲ or ▼ ) and the PURGE button. The display will show the following: CONFIGURATION?
2.
Within five seconds, press the START button to confirm that the Configuration mode is required. If the START button is not pressed within five seconds the pump will revert back to its Set-up mode.
Note: The pump has been designed so that the Configuration mode will not be called up accidentally. Syringe brand selection
WARNING The 3100 must be set to operate with the selected syringe. Using the wrong selection could lead to the incorrect amount of drug being administered. With the pump in its Configuration mode (as detailed above), complete the following procedures in order to select the syringe brand required. 1. Use either of the two extreme left hand 100 arrow buttons ( ▲ or ▼ ) to display the last syringe brand that was used. 2.
Use either of the two extreme right hand 0.1 arrow buttons ( ▲ or ▼ ) in order to scroll to the syringe brand required (see below). The brand of syringe selected will be retained by the pump until the Configuration mode is called up again and a different brand is selected. • • • • •
BD Plastipak. Terumo. Braun Omnifix. Monoject. Injectomat 50 ml.
Note: The Braun Perfusor 50 ml syringe can only be used when the pump has been converted to accept this particular syringe (see Chapter 8). 3.
3100 Service Manual
Press the STOP button in order to exit the Configuration mode.
Issue 7 (August 2004)
2-1
Configuration mode
Language setting
Smiths Medical International Ltd. With the pump in its Configuration mode (as detailed previously), complete the following procedures to select the required language. 1.
Use either of the two extreme left hand 100 arrow buttons ( ▲ or ▼ ) to scroll and display the last language that was used.
2.
Use either of the extreme right hand 0.1 arrow buttons ( ▲ or ▼ ) in order to scroll and display the language required (see below). The language selected will be retained by the pump until the Configuration mode is called up again and a different language is selected: • • • • • • •
3.
Setting the AC voltage
English Dutch French German Italian Portuguese Spanish
To exit the Configuration mode, press the STOP button.
WARNINGS 1. The following procedures must only be carried out by qualified technicians. 2. ELECTRIC SHOCK HAZARD. The pump must be disconnected from the AC power supply before opening the casing. CAUTION If the AC supply voltage settings are altered the label on the underside of the pump and also the AC fuse rating must be changed to indicate and cater for the new AC voltage. The pump can be set to operate on a 100 to 120 V or a 220 to 240 V AC 50/60 Hz supply. To change the AC operating voltage settings (as fully detailed in the following sections) the pump casing has to be opened and two push-on connectors on the Regulator board have to be adjusted. The AC supply fuse rating must also be changed.
Disassembly and assembly of casing
2-2
Each time the case is taken apart, the Syringe size sensor tests (see page 6.1) must be completed. 1. Disconnect the AC power connector and using a scratch free flat surface, turn the pump over in order to gain access to its base. 2.
Undo and retain the six screws that hold the casing halves together. One of the six screws is situated in a channel in the rear cover.
3.
From the top of the pump carefully ease the casing halves apart, taking care not to put any strain on the internal connecting cable looms that form a hinge between the two halves.
4.
Being careful not to trap any leads, assemble the casing by reversing steps (2) and (3) above. Ensure that the front and rear mating edges are equal and parallel. The screws should be tightened to a torque of between 70 and 75 cNm and in the order shown Figure 2.1.
Issue 7 (August 2004)
3100 Service Manual
Setting the AC voltage
Smiths Medical International Ltd. 3
1
GM0595-B
5
2
4
6
Rear view of pump Figure 2.1 Rear case screw fixing order AC voltage and fuse adjustment
1. Take the casing apart (see page 2-2). 2. Check/ alter the position of the two push-on connectors situated on the Regulator board (these connectors are attached to a black and a grey wire). The alternative settings are as follows: 220-240 V
100-120 V
Grey: PL4 Black: PL8
Grey: PL7 Black: PL3
3. Move the two blank insulated connectors so that they cover the two unused alternative voltage terminals. 4. Remove the cover that is placed over fuse FS2. If required fit the correct time delay fuse, as shown below: •
T 50 mA for 220-240 V.
•
T 100 mA for 100-120 V.
5. Fit the fuse cover ensuring that the cover goes outside all of the spring connectors. 6. Assemble the casing (see page 2-2). 7. If necessary stick a new voltage label over the existing label on the underside of the pump. The new label must correctly specify the pump's present AC voltage.
Diagnostic mode
The pump has a Diagnostic mode which enables the four following parameters to be checked: •
the version of software that is installed in the Main processor,
•
the software Cyclic Redundancy Check (CRC),
•
the version of software that is installed in the Slave processor, and
•
the voltage from the power supply to the Main board, or with the AC removed will display the battery voltage.
The pump has been designed so that the Diagnostic mode has to be specifically keyed in. It will be very unlikely that this mode will appear on the display accidentally.
3100 Service Manual
Issue 7 (August 2004)
2-3