TekMed
HTW Series Operation Instruction Ver 7
Operation Instruction
13 Pages
Preview
Page 1
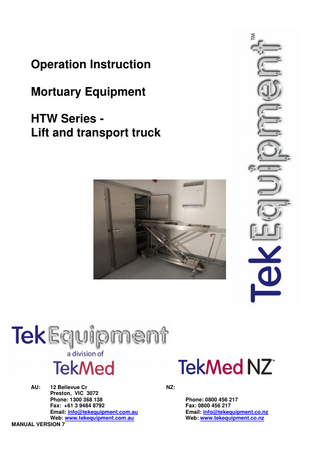
Operation Instruction Mortuary Equipment HTW Series Lift and transport truck
AU:
12 Bellevue Cr Preston, VIC 3072 Phone: 1300 368 138 Fax: +61 3 9484 8792 Email: [email protected] Web: www.tekequipment.com.au MANUAL VERSION 7
NZ: Phone: 0800 456 217 Fax: 0800 456 217 Email: [email protected] Web: www.tekequipment.co.nz
This page is intentionally blank.
Page 2 of 13
SAFETY MESSAGE
Use The lift and transport truck is designed solely for transporting, loading and unloading of a body tray and/or coffin plate.
DO NOT use the lifting trolley for any other purpose, e.g.:
• Transporting persons • Using as a climbing aid • Using as a support • Using as a lifting device for other loads Warranty will be void if trolley is used for other purposes.
Operating the lift and transport truck Place the body tray or the coffin plate on the lift and transport truck and engage the locking mechanism to stop it from moving
Engage
Disengage
On uneven ground, gradients etc. always drive backwards in a downwards direction in order to make sure that the body tray or coffin plate does not roll off. The lift and transport truck should only ever be raised or lowered on a Flat,
level surface. Lock the rear wheels whenever you park, raise or lower the lift and transport truck. When raising or lowering the lift and transport truck, make sure the area is clear and it does not knock against any other object. When lowering the lift and transport truck, make sure there are no persons or objects in the area of the scissors mechanism, the frame or delivery point. Page 3 of 13
Switch the main switch on the control panel in case of danger or if the lift and transport truck is not used. Use the battery charger approx. every 2 weeks at a minimum, the trolley may be left on charge when not in use. DO NOT climb under or place any part of your body underneath the lift and transport truck. Keep clothing and long hair away from moving parts. The manual lift trolley is operated by pumping the foot pedal down to raise the truck, to lower the truck the foot pedal is to be raised from underneath.
Foot Pedal
The lift and transport truck is raised by pressing on the right foot pedal or the up button on the control panel. Lower truck by pressing the left foot pedal or the down button on the control panel.
Up button – to raise truck
Down button – to lower truck
Left Pedal – to lower truck
Right Pedal – to raise truck
Page 4 of 13
A safety valve is integrated to ensure a uniform lowering speed - regardless of the load. It also acts as safety device in case there is a hose breakage.
DO NOT exceed safe working load eg. 250kg – check label.
Do not store truck in a cool room. For handling of truck on uneven surfaces or with heavy loads we suggest 2 operators move the truck.
Charging the Battery 1. Connect battery charger to the control unit via the charger socket located on the end. 2. Plug charger into any mains power outlet and leave to charge. 3. Chargers supplied are smart chargers and automatically shut off when the battery is fully charged. Plug charging socket into HTW Mortuary trolley Ensure power point is ON Ensure “Power Lamp” lamp on charger is illuminated Ensure “AGM” lamp on charger is illuminated. (If “AGM” lamp not illuminated, press “Mode” button until “AGM” mode is reached.) If “Error (!)” lamp is illuminated, reset charger by: Turn power point OFF, remove charging socket from HTW Mortuary trolley, wait 30 seconds. Re-install charging socket to HTW Mortuary trolley and turn power point ON. Battery is fully charged when solid white battery lamp is illuminated. Do not attempt to use trolley whilst connected to charger! This may cause CTEK charger to enter an Error Mode which will prevent charging of HTW Mortuary trolley until charger is reset.
Error Lamp Mode Button Power Lamp AGM Lamp
Page 5 of 13
Lift and transport truck HTW with digital scale Use the lift and transport truck as described above. The weight can be displayed in kg/g or lb/oz. Changing the weighing unit: When the scale is switched off, press key for about 5 second. Change from kg/g to lb/oz display and back by pressing the key/button for a short time. Key has to be pressed for about 5 second in order to store the required weighing unit. Weighing: Switch the scale on. Test figure 8888 appears on the display, then 0, Additive weighing o Press button to automatically re-zero. Add next item, which will be weighed separately and so on, until max. capacity is reached. Total weight o Press the bottom. The display will be show 0,0. Remote the item to be weighed. o The total weight will then be displayed with a minus sign. Alarms Overload: Please consider the capacity of the scale. Under load: Switch scale off and on again When "C 100" or "C 0" appears in the display please wait approx. one minute until scale will into the weighing mode. Please do not load the platform during this time. Scale cannot be switched on: 1. Change the batteries in the battery back. Switching off 2. Press button while display shows 0,0.
Page 6 of 13
Traction Drive Unit (FAT-HTW24) The traction drive unit is designed to assist the movement of the lift and transport truck forwards-and backwards only The system is not designed as a full automatic drive unit and must be operated by trained and authorized personnel only. Using the Traction Drive unit: 1. Engage drive unit, by firmly pressing the engage latch with your foot.
Drive Unit Engage latch
2. Ensure the main switch on the control panel is on. 3. Turn on the drive unit.
Flashes in fault condition Drive unit switch Drive unit Direction Control Drive unit Speed Control Main switch
4. Select the direction on using the switches on the direction control. A blue light will illuminate next to the direction selected. 5. Ensure a suitable speed is selected – If you are new to the trolley it is suggested you turn the speed down (anti-clockwise) and turn it up (clockwise) while using the trolley to a speed you are comfortable with. 6. The unit is best operated by standing behind the end of the trolley and squeezing the throttle lever to start the movement; you can control the speed from 0-100 % of the maximum set speed with the throttle lever.
Page 7 of 13
Drive unit throttle lever
Note: Take care that there are no person or any other objects in the direction of travel of the trolley. Take care when driving the unit backwards to avoid pinning yourself against a wall. In the event of this the trolley is fitted with an emergency belly switch that will be pressed and shut the power instantly to the trolley. To re-activate the trolley the main switch needs to be turn off and on again. Before moving the trolley sideways, disengage the traction drive unit by firmly pressing the disengage latch with your foot.
Drive Unit disengage latch
Stopping 1. By releasing lever (either forward or reverse) the trolley will come to a halt, the power driven wheels will be in electromagnetic brake mode. 2. Depress either brake lever on swivel castors and trolley will be fully locked and stable. Troubleshooting Drive unit won’t operate – turn main switch off and on. Press the power button on traction drive controller. Note: the drive unit is fitted with a time out system for safety, it requires the main power to be cycled before operation. PLEASE NOTE:
Only authorized and trained person are allowed to use the traction drive unit Page 8 of 13
Automatic Tray Loading System (ATLS) The automatic loading system is design for loading and unloading stainless steel body trays (LM 80/100 series) to/from a shelf device to the HTW lift and transport truck. Operating the ATLS: Loading a tray on to the trolley: 1. Align the trolley with the racking both vertically and horizontally; ensure thegn the top deck (blue rollers) is in line with the rollers of the racking system using the height adjust buttons. 2. Ensure the hook engage/disengage lever is in the engage position.
Engaged
Disengaged
3. Press the forward button on the control panel; the hook will move forward and engage on to the tray in the racking. 4. Once engaged, press the backward button and the tray will be pulled onto the trolley. 5. Once the tray is fully loaded onto the trolley, move the trolley back from the racking before lowering. Note: The hook is also the securing mechanism for the tray when the trolley is being moved.
ATLS control
Trolley height adjust
Page 9 of 13
Loading a tray in to the racking: 1. Once again align the trolley with the racking both vertically and horizontally. 2. Press the forward button on the loading device and the tray will move forward into the racking. The tray will stop against the locked roller in the racking. 3. Disengage the hook and press the backwards button to bring the hook back. 4. Move the trolley back from the racking before lowering.
Page 10 of 13
Motorised Roller Loading System (MRLS) The motorised roller loading system is design for loading and unloading stainless steel body trays (LM 80/100 series) to/from a shelf device to the HTW lift and transport truck. Operating the MRLS: Loading a tray on to the trolley: 1. Use the hook on the front of the trolley to pull the tray out from the racking. This is performed by a. Coming in lower than the tray, the front hook can lightly touch against the front of the racking. b. Raising the trolley so the hook catches under the tray handle. c. Pull the trolley back so the tray over hangs by about 20cm. Note: if the trolley is fitted with a drive unit, it is advised that you use the drive unit to pull the tray out to minimise the manual handling.
a.
b.
2. Lower the trolley and once again move the trolley forward so the front hook lightly touches the front of the racking. 3. Press and hold the backwards button on the control panel. 4. Raise the trolley until the front roller engages with the tray, and the tray begins to load. 5. Release the backwards button and use the tray lock to ensure the tray is locked in place by engaging the red leaver.
MRLS control
Trolley height adjust
Page 11 of 13
Loading a tray in to the racking: 1. Align the trolley with the racking both vertically and horizontally. 2. Disengage any tray locks. 3. Press the forward button on the loading device and the tray will move forward into the racking. 4. The tray will stop against the locked roller in the racking. If it does not you can use the front hook on the trolley to lightly push the tray into place.
Maintenance of the lift and transport truck The following points should be checked by the end user at regular intervals (approx. every 3 months) o Smooth operation of all moving parts. o Working order of the wheels and parking brakes. o Hydraulic hoses (small leakage rates are acceptable and have no effect on the trolley's working condition). o Clean the lift and transport truck with soapy water. o Avoid cleaning actuator shaft - lower the truck to minimum stroke for cleaning. o DO NOT use strongly acid/alkaline, corrosive or abrasive cleaners. o If batteries are used, check the acid level (12V Systems Only). o Do not modify the truck without written permission. To be performed yearly by a qualified service person: o Check the oil-level, approx. 1 cm underneath the top.
DO NOT USE PRESSURE OR STEAM CLEANER WARRANTY WILL BE VOID
Maintenance of the 12/24 Volt Hydraulic unit • Check the acid level of the battery • For refill use only distilled water • Check the oil-level, approx. 1 cm underneath the top • Disconnect the cable of the battery or take out the fuse before working at the electrical wiring (disconnect first the negative pole and then the positive pole) • In case of disconnecting and connecting of any wiring check the polarity! • Use only a 12 Volt DC batteries • Use only 24 Volt DC recharger with overload protection The lift- and transport truck was subjected to a function test at the factory.
Page 12 of 13
PARTS No. 1 2 3 4 5 6 7 8 9 10 11
Description Main switch Switch UP / DOWN Appliance plug Magnetic contactor Hydraulic unit Fuse holder Fuse 50 Amp Fuse 5 Amp Recharge control Recharge socket Battery Recharger 240V/24V DC
Article no. 050.050.026 050.050.016 050.050.034 050.050.028 050.050.013 050.050.020 050.050.021 050.050.033 050.050.019 050.050.018 050.050.022
No. 1 2 3 4
Description Hydraulic cylinder Brake valve Appliance plug Hydraulic unit
Article no. 050.010.024 050.010.030 050.050.034 050.050.013
Safety Instructions - battery charger Read the operating instructions (supplied separately) carefully before switching on the battery charger. Keep the operating instructions for future reference. Operate the battery charger in accordance with the attached instructions. Caution!
Caution! Don’t use the lift and transport truck during the recharge process. Voltage: 240 Volt 50-60 Hz Battery voltage: 2 x 12 Volt DC in series to provide 24V DC
Page 13 of 13