Service Manual
118 Pages
Preview
Page 1
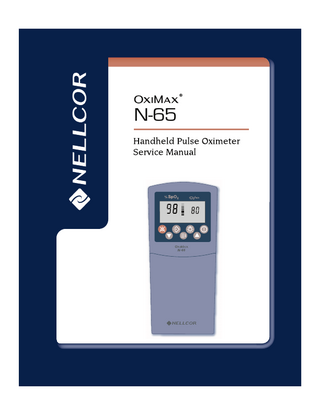
N-65
Nellcor Puritan Bennett Incorporated is an affiliate of Tyco Healthcare. Nellcor, Oxiband, Durasensor, OxiCliq, Dura-Y, MAX-FAST, and OXIMAX are trademarks of Nellcor Puritan Bennett Incorporated or an affiliate. Cet appareil ISM est conforme à la norme NMB-001 Canada. To obtain information about a warranty, if any, contact Nellcor’s Technical Services Department, or your local representative. Purchase of this instrument confers no express or implied license under any Nellcor Puritan Bennett patent to use the instrument with any sensor that is not manufactured or licensed by Nellcor Puritan Bennett. Covered by one or more of the following U.S. Patents and foreign equivalents: 4,802,486; 4,869,254; 4,928,692; 4,934,372; 4,960,126; 5,078,136; 5,485,847; 5,743,263; 5,865,736; 6,035,223; 6,298,252; 6,463,310; 6,591,123; 6,675,031; 6,708,049; 6,801,797; and Re.35,122.
Contents Introduction...1 Warnings...1 Cautions...2 Notes...2 Manual Overview...3 Description of OXIMAX N-65...4 Front Panel Description...4 Front Panel Symbols...8 Rear Panel Symbols...8 Label Symbols...9 Menu Parameters...10 Set Menu Parameters...11 Set Time/Date Parameters...12 Related Documents...14
Routine Maintenance...15 Cleaning...15 Periodic Safety Checks...15 Functional Checks...15 Battery Installation...16
Performance Verification...17 Introduction...17 Equipment Needed...17 Performance Tests...17 Power-On-Self-Test...17 Discussion...17 Procedure...18 Operational Setup...22 Setting the Time and Date...22 Discussion...22 Procedure...22 General Operation...26 Operation with a Live Subject...26 Pulse Oximetry Functional Tests...28 Test Setup...31 Test 1: BPM...32 Test 2: SpO2...33 Test 3: Modulation Level...34
OXIMAX N-65 Service Manual
i
Contents
Test 4: Light Level...36 Safety Tests...37
Troubleshooting... 39 Introduction...39 How To Use This Section...39 Who Should Perform Repairs...39 Troubleshooting Guide...39 Error Codes...42
Disassembly Guide... 47 Introduction...47 Tools Required...47 Replacement Level Supported...47 Prior to Disassembly...48 Separating the Front and Back Cases...48 SpO2 PCB or User Interface PCB Replacement...50 Front Case Assembly Replacement...54 Rear Case Assembly Replacement...57 Battery Compartment Door Replacement...59
Spare Parts... 61 Introduction...61 Obtaining Replacement Parts...61 Parts List and Accessories...61
Packing for Shipment... 65 Introduction...65 Returning the Monitor...65 Repacking in Original Carton...65 Packing in a Different Carton...67
Specifications... 69 Performance...69 Electrical...73 Environmental Conditions...74 Physical Characteristics...75 Compliance...75 Manufacturer’s Declaration...75
Technical Discussion... 81 Oximetry Overview...81 Functional versus Fractional Saturation...82 Measured versus Calculated Saturation...82 OXIMAX Technology...83
ii
OXIMAX N-65 Service Manual
Contents
Block Diagram Theory...84 SpO2 Printed Circuit Board...85 Patient Interface...85 Power Supply...85 Power Monitoring...85 User Interface Printed Circuit Board...85 Keypad...86 Backlight...86 CPU and Flash...86 Real-Time Clock...86 Audio...86 LCD...87 IrDA...87 Power Supply...87 Power Supply Monitoring...87
Index...109
OXIMAX N-65 Service Manual
iii
Contents
Blank Page
iv
OXIMAX N-65 Service Manual
Introduction Warnings
Warnings are identified by the WARNING symbol shown above. Warnings alert the user to potential serious outcomes (death, injury, or adverse events) to the patient or user. WARNING: The sensor uses the date and time provided by the OXIMAX N-65 handheld pulse oximeter when the sensor event record is recorded by the sensor. The accuracy of the date/time is dependent on the date/time already set in and provided by the monitor.
WARNING: Explosion hazard. Do not use the OXIMAX N-65 in the presence of flammable anesthetics mixed with air, oxygen, or nitrous oxide.
WARNING: Do not spray, pour, or spill any liquid on the OXIMAX N-65, its accessories, connectors, switches, or openings in the enclosure as this may damage the monitor.
WARNING: Chemicals from a broken LCD display panel are toxic when ingested. Use caution when the OXIMAX N-65 has a broken display panel.
WARNING: The use of accessories, sensors, and cables other than those specified may result in increased emission and/or create invalid readings of the OXIMAX N-65.
WARNING: Do not silence the OXIMAX N-65 audible alarm or decrease its volume if patient safety could be compromised.
WARNING: To ensure patient safety, do not place the monitor in any position that might cause it to fall on the patient.
OXIMAX N-65 Service Manual
1
Introduction
WARNING: As with all medical equipment, carefully route patient cabling to reduce the possibility of patient entanglement or strangulation.
WARNING: To ensure accurate performance and prevent device failure, do not expose the monitor to extreme moisture such as rain.
Cautions
Cautions are identified by the CAUTION symbol shown above. Cautions alert the user to exercise care necessary for the safe and effective use of the OXIMAX N-65. Caution: Observe ESD (electrostatic discharge) precautions when working within the unit. Caution: Observe ESD (electrostatic discharge) precautions when disassembling and reassembling the OXIMAX N-65 and when handling any of the components of the monitor. Caution: When reassembling the OXIMAX N-65, tighten the screws that hold the cases together to a maximum of ten inch-pounds. Over-tightening could strip out the screw holes in the front case, rendering it unusable.
Notes
Notes are identified by the Note symbol shown above. Notes provide useful helpful information.
2
OXIMAX N-65 Service Manual
Introduction
Manual Overview This manual contains information for service personnel who will service the Nellcor model OXIMAX N-65 handheld pulse oximeter, herein referred to as the monitor. Only qualified service personnel should service this product. Read the operator's manual carefully and thoroughly understand the operation of the monitor.
OXIMAX N-65 Service Manual
3
Introduction
Description of OXIMAX N-65 The OXIMAX™ N-65 handheld pulse oximeter is indicated for continuous or spot check monitoring of functional arterial oxygen saturation (SpO2) and pulse rate of adult, pediatric and neonatal patients in hospital, hospital-type facilities, transport and mobile environments as well as in the homecare environment.
Front Panel Description This section identifies the symbols, controls, displays, and indicators on the OXIMAX N-65. Refer to the OXIMAX N-65 Operator’s Manual for a complete description of all buttons, symbols, controls, displays and indicators.
1 - %SpO2 area of display 2 - Measured %SpO2 3 - Pulse beats per minute (BPM) area of display 4 - Measured BPM
4
OXIMAX N-65 Service Manual
Introduction
5 - %SpO2 Lower Alarm Limit indicator 6 - %SpO2 Upper Alarm Limit indicator 7 - Pulse Amplitude indicator (Blip bar) 8 - Time Colon time/date field separator 9 - Adjust Time mode indicator 10 - Adjust Volume mode indicator 11 - Set Limit mode indicator 12 - BPM Upper Alarm Limit indicator 13 - BPM Limit Changed indicator 14 - Sensor Off Patient indicator 15 - Sensor Disconnected indicator 16 - %SpO2 Limit Changed indicator
OXIMAX N-65 Service Manual
5
Introduction
17 - Low Battery indicator 18 - Data In-Sensor indicator 19 - Alarm Volume Adjust indicator 20 - Pulse Beep Tone Volume Adjust indicator 21 - BPM Lower Alarm Limit indicator 22 - Print indicator 23 - Interference indicator 24 - Pulse Search indicator 25 - Data indicator 26 - Alarm Silenced indicator
6
OXIMAX N-65 Service Manual
Introduction
27 - Power button 28 - Up Arrow button 29 - Backlight button 30 - Menu button 31 - Data (Record/Print) button 32 - Down Arrow button 33 - Alarm Silence button
OXIMAX N-65 Service Manual
7
Introduction
Front Panel Symbols The follow two symbols are located on the front panel of the monitor.
Displays the measured percent of oxygen saturation. Displays the measured pulse beats per minute.
Rear Panel Symbols The following symbols are located on the rear panel of the monitor.
1 - Label 2 - Battery Cover
See Instructions for Use Type BF Applied Part - Not defibrillator proof Resistant to liquid ingress Prescription only 8
OXIMAX N-65 Service Manual
Introduction
Date of Manufacture European union approval
Canadian/USA certification mark (electrical safety) Russian regulatory approval Serial number
Label Symbols These symbols display on the monitor’s labels. Keep away from heat Temperature limitation Protect from moisture Fragile Keep upright Humidity limitation
OXIMAX N-65 Service Manual
9
Introduction
Menu Parameters This section contains information on how to set monitor parameters and limits using the menu structure. See Set Menu Parameters on page 11 to set the following parameters: •
high and low SpO2 limits
•
high and low BPM limits
•
alarm volume
•
pulse beep volume
•
data printing
See Set Time/Date Parameters on page 12 to set the following parameters:
10
•
Hour
•
Minute
•
Day
•
Month
•
Year
OXIMAX N-65 Service Manual
Introduction
Set Menu Parameters To set menu parameters, press the Menu button repeatedly during normal operation to display the parameters to set. Use the Up Arrow button or Down Arrow button to adjust the parameter limit. Press the Menu button to return to the default monitoring display.
Table 1: Menu Structure # of Presses
OXIMAX N-65 Service Manual
Parameter
Press
Function
1
%SpO2 Low
Adjust limit
2
%SpO2 High
Adjust limit
3
BPM Low Limit
Adjust limit
4
BPM High Limit
Adjust limit
5
Pulse Beep Volume
Adjust volume. Indications on blip bar.
6
Alarm Volume
Adjust volume. Indications on blip bar.
7
Print Data
Print summary and/or stored snap-shot and sensor-event data.
Limit
Limit
11
Introduction
WARNING: Do not silence the OXIMAX N-65 audible alarm, or decrease its volume, if patient safety could be compromised.
Set Time/Date Parameters To access the Time/Date settings menu, press the Menu button during start-up Power-On-Self-Test (POST). Press the Menu button repeatedly to display the time/date parameters to set. Use the Up Arrow button and Down Arrow button to adjust time/date settings. Press the Menu button to return to the POST display. When the month entry is made, the monitor checks the day selection to see if it is valid. If the day selection is not valid for the month selected the menu display returns to the day selection display. When the year entry is made, the monitor checks the day and month selections to see if they are valid. If the day or month selection is not valid for the year selected the menu display returns to the day selection display. Examples of invalid dates are:
12
•
30 February
•
31 February
•
31 April
•
31 June
•
31 September
•
31 November
•
29 February on a non-leap year
OXIMAX N-65 Service Manual
Introduction
Table 2: Time Set Menu # of Presses
POST.
OXIMAX N-65 Service Manual
Parameter
Press
Function
The Menu button must be pressed during the
1
Hour
Adjust 1 to 23
2
Minute
Adjust 1 to 59
3
Day
Adjust 1 to 31
4
Month
Adjust 1 to 12
5
Year
Adjust 2003 to 2099
13
Introduction
Related Documents To perform test and troubleshooting procedures and to understand the principles of operation and circuit analysis sections of this manual, you must know how to operate the OXIMAX N-65. Refer to the OXIMAX N-65 Operator's Manual. To understand the various Nellcor approved OXIMAX sensors that work with the monitor, refer to the individual OXIMAX sensor's Directions For Use. The latest version of the operator’s manual and the service manual are posted on the Internet at: http://www.mallinckrodt.com/respiratory/resp/Serv_Supp/ProductManuals.html
Spare Parts and Accessories are posted on the Internet at: http://www.mallinckrodt.com/respiratory/resp/Serv_Supp/Apartweb/main/PartAcceMenu.html
14
OXIMAX N-65 Service Manual