Vitalograph
micro Model 6300 User Training Manual Issue 1
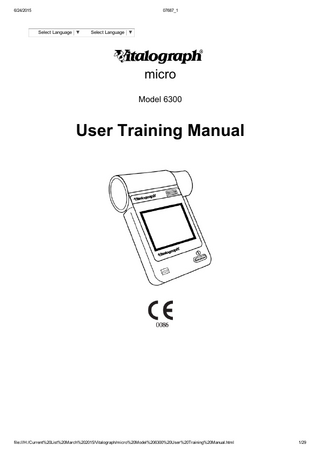
User Training Manual
29 Pages
Preview
Page 1
6/24/2015
07687_1
Select Language ▼
Select Language ▼
micro Model 6300
User Training Manual
file:///H:/Current%20List%20March%202015/Vitalograph/micro%20Model%206300%20User%20Training%20Manual.html
1/29
6/24/2015
07687_1
Vitalograph Ltd. UK Maids Moreton, Buckingham, MK18 1SW, England Phone: (01280) 827110 Fax: (01280) 823302 email: [email protected] www.vitalograph.co.uk Vitalograph Ltd. Export Maids Moreton, Buckingham, MK18 1SW, England Phone: +44 1280 827120 Fax: +44 1280 823302 email: [email protected] www.vitalograph.eu Vitalograph Ltd. Hong Kong Unit 230, Corporation Park, 11 On Lai Street, Shatin, Hong Kong Phone: +852 2117 2678 Fax: +852 2117 2679 Email: [email protected] www.vitalograph.hk Vitalograph GmbH Rellinger Straße 64a, D20257 Hamburg, Germany Phone: (040) 5473910 Fax: (040) 54739140 email: [email protected] www.vitalograph.de Vitalograph Inc. 13310 West 99th Street, Lenexa, Kansas, 66215, USA. Toll Free: 800 255 6626 Phone: (913) 730 3200 Fax: (913) 730 3232 email: [email protected] www.vitalograph.com Vitalograph (Ireland) Ltd. Gort Road Business Park, Ennis, Co. Clare, Ireland Phone: +353 65 6864100 Fax: +353 65 6829289 email: [email protected] www.vitalograph.ie © Copyright Vitalograph 2015 Current Edition (Issue 1) Cat. No. 07687 is a registered trademark
file:///H:/Current%20List%20March%202015/Vitalograph/micro%20Model%206300%20User%20Training%20Manual.html
2/29
6/24/2015
07687_1
Table of Contents 1. Description of the Vitalograph micro 2. Main Components of the Vitalograph micro 3. Features of the Vitalograph micro 4. Getting the Vitalograph micro ready for use 5. Power Management in the Vitalograph micro 1. Battery Pack 2. Battery Low Detect 3. Power Save Mode 6. Operating the Vitalograph micro 1. New Subject Information 2. Performing a Test Session 3. Performing a Post Test Session 4. Configuration Menu 5. Reports and Printing 6. Storing Results 7. Accuracy/Calibration 7. Cleaning Instructions 1. Cleaning and Disinfecting the Vitalograph micro 2. Disassembling the Fleisch Flowhead 3. Reassembling the Fleisch Flowhead 8. Fault Finding Guide 9. Customer Service 10. Consumables and Accessories 11. Explanation of Symbols 12. Technical Specifications 13. CE Notice 14. FDA Notice 15. Declaration of Conformity 16. Guarantee
file:///H:/Current%20List%20March%202015/Vitalograph/micro%20Model%206300%20User%20Training%20Manual.html
3/29
6/24/2015
07687_1
1. Description of the Vitalograph micro The Vitalograph micro is a handheld spirometer designed for use by trained professionals in the doctor's office, clinic, hospital department, etc. for measuring and archiving tests on human subjects. Demographic data is entered via a keypad and stored, together with spirometry test data. Current test data can be viewed on the LCD and downloaded/printed via a PC. There are a variety of configuration options available. Information about the device can be obtained from the About box. This information can be used if any queries are made to Vitalograph or a service agent. To access the About box: 1. Press the Configuration button from the Main Menu . 2. Press the About button.
2. Main Components of the Vitalograph micro The main components for the Vitalograph micro are shown below.
file:///H:/Current%20List%20March%202015/Vitalograph/micro%20Model%206300%20User%20Training%20Manual.html
4/29
6/24/2015
07687_1
A
PC Software
B
Flowhead
C
Flowhead Release Button
D
LCD/Touch Panel Display
E
Mini USB Port
F
On/Off Button
G
LED
H
Battery compartment (4 x 1.5V AAA Batteries)
3. Features of the Vitalograph micro The Vitalograph micro features include: Very high accuracy, linearity and stability Printing to the Vitalograph Report Utility Storage of tests and demographic information Fleisch pneumotachograph Integral and removable flowhead Touch screen color display Clear sounds for audio feedback Choice of predicted values Realtime test quality prompts Vitalograph PC software included (Vitalograph Reports)
4. Getting the Vitalograph micro Ready For Use 1. Insert 4 x 1.5V AAA batteries into the battery compartment on rear of device. Alternatively the Vitalograph micro device may be powered from the USB cable supplied with the device. Connect one end of the USB cable into an available USB connection on a PC and the other end into the USB connection on the device. 2. Connect a BVF/SafeTway to the flowhead. 3. Operate the On/Off switch on the front face of the instrument and the Vitalograph micro is ready for use.
5. Power Management in the Vitalograph micro The Vitalograph micro can be powered from the PC via the USB cable or from the internal batteries. The LED on the front face of the device and the battery power icon show the power status of the device. When powered from USB power this icon
will be dispalyed on the status bar at the top of the screen.
5.1 Battery Pack The Vitalograph micro uses 4 x 1.5V nonrechargeable AAA batteries. This allows the device to be used without the USB cable connected to the USB connector located on the bottom of the device.
5.2 Battery Low Detect The Vitalograph micro has a number of battery power detect messages: file:///H:/Current%20List%20March%202015/Vitalograph/micro%20Model%206300%20User%20Training%20Manual.html
5/29
6/24/2015
07687_1
When the batteries are full the Green Battery full Icon is displayed on the Main Menu screen device. When the USB power is connected a Plug Icon is displayed. The LED will stay Green for both full batteries and USB power. .
When the batteries start to run low the Battery Low Icon is displayed and both it and the LED will turn orange. You will be allowed to continue to use the device. It is advised that you prepare to change the batteries or plug in the USB cable connected to a computer and continue testing.
When the batteries are approaching fully discharged the Battery Discharged icon will be displayed on the full screen on power up and on the main screen status bar and both it and the LED will turn red. It is advised that you change the batteries or attach to a PC using a USB cable to continue testing
5.3 Power Save Mode In order to improve battery life, when powered by batteries only and left unused the screen on the Vitalograph micro device will dim after 30 seconds, go blank after 60 seconds and the device will auto power down if left unused for 2 minutes. When running off of the USB the screen on the Vitalograph micro device will go blank if left unused for 5 minutes. The device will not auto power down if powered by USB. Pressing the On/Off button will bring the device out of power save mode.
6. Operating the Vitalograph micro After turning on the device for the first time you are presented with the Setup screen for the Date and Time.
Enter the current time and date using the up/down buttons.
Press the enter button to save these settings and continue onto the Main Menu screen.
file:///H:/Current%20List%20March%202015/Vitalograph/micro%20Model%206300%20User%20Training%20Manual.html
6/29
6/24/2015
07687_1
6.1 Main Menu The Main Menu screen includes the following options New Subject, VC Test, FVC Test and Post Test.
When turning the device on for the first time the test screen icons will appear greyed out and can't be selected until a subject is created. The Post Test icon will stay greyed out until an FVC pretest is performed. In addition to displaying the time and the battery icon the status bar at the top on the screen will show various icons to idicate the following: 1. V indicates a VC test has been performed 2. F indicates an FVC has been performed 3. P indicates post mode The icons will only appear after the test has been completed.
6.2 New Subject Information
1. Select the New Subject button on the Main Menu, to bring you into the New Subject screen
.
2. The Subject information fields available are as follows Age
Height
Gender
Weight
Population
3. Age, Height and Gender are on the first screen and are enabled by default. Weight and Population Group are on the second screen and are not enabled by default. They have enable options in the configuration menu
Subject Options
.
4. To enter information for Age, Height and Weight just touch on the box and type in the information using the touch panel keypad. Units willl automatically switch between cm/kg and in/lbs. The Gender is selected by pressing the appropriate option male
or female
.
The Population Group is selected
from a list by pressing the appropriate option on screen. To access additional Population Groups select the arrow on the right of the screen. 5. Press the Enter button to save the subject to the database and return to the Home Menu. 6. If a value is not entered for Age, Height or Gender then an Error Icon
will appear next to the
empty field when the enter button is pressed, this is to indicate that the predicted values will not appear in the results of any testing done. To exit the new subject screen press the enter button again. Note: With the exception of the first use of the device or after clearing the memory, when the user enters the New Subject Screen the details will appear greyed out. If the user hits the Age, Height or Weight box it will jump into the Data Entry screen and will clear the data to allow the user to enter new data. When the user returns to the New Subject screen all the other fields will be cleared. The user will need to enter all subject details or an errot icon will appear.
6.2 Performing a Test Session file:///H:/Current%20List%20March%202015/Vitalograph/micro%20Model%206300%20User%20Training%20Manual.html
7/29
6/24/2015
07687_1
6.2.1 Checks to Make before Performing a Test Session Before starting a test session, there are a number of checks which should be made: 1. Ensure that the accuracy of the Vitalograph micro unit was checked recently. (Refer to the section on Checking Accuracy) 2. Ensure a subject is created and the required demographic information is entered for the subject. A test session can be performed without filling in any details for the subject but is advised to do so. 3. Fit a disposable BVF or SafeTway mouthpiece. The use of a disposable noseclip is also recommended.
6.2.2 Performing a VC Test Perform the VC test as follows: 1. Select the ‘VC Test’ option
from the Main Menu .
2. Wait for the ‘Exhale to Begin’ icon to appear
.This indicates that the Vitalograph
micro unit is ready to accept a blow. 3. The results may be viewed as either a Volume/time (V/t) or Volume Bar graph by pressing the graph button on the side of the test screen. These are not enabled during test.
(V/t)
Volume/time
Volume
4. The graph may be changed to a full screen graph by using the zoom button on the side of the test screen. To return to normal mode select the zoom in button. These are not enabled during test.
5. Perform VC test. Additional guidance on performing Spirometry Manoeuvres can be found on the Vitalograph website. 6. Repeat the blow three times or more to obtain good test quality. 7. The results summary on the bottom of the screen shows the VC of the last blow. The number of blows is shown in a separate box next to the last test VC. 8. If you wish to delete the current blow you can do this as follows: a. Following completion of the blow you wish to clear, select the Delete option from the menu on the side of the test screen. b. Two Delete icons will appear in the same area on the side of the test screen, one Delete with a green tick and the other Delete icon with a red 'X'. To confirm the deletion of the blow press the Delete icon with the green tick. To cancel the deletion select the Delete icon with the red 'X'. c. If you wish to clear/delete all the sessions on the device you may connect to Vitalograph Reports as outlined in section 6.5 and move all data to Vitalograph Reports and clear it from the device. 9. After performing the VC tests press the enter button to exit the VC Test screen. This brings you back to the Main Menu. file:///H:/Current%20List%20March%202015/Vitalograph/micro%20Model%206300%20User%20Training%20Manual.html
8/29
6/24/2015
07687_1
6.2.3 Performing an FVC Test 1. Select the ‘FVC Test’ option
from the Main Menu.
2. Wait for the ‘Exhale to Begin’ icon to appear
. This indicates that the Vitalograph
micro unit is ready to accept a blow. 3. The results may be viewed as either a Volume/time (V/t) or Flow/Volume (F/V) graph by pressing the graph button on the side of the test screen. These are not enabled during test.
Volume/time (V/t)
Flow/Volume (F/V)
4. The graph may be changed to a full screen graph by using the zoom button on the side of the test screen. To return to normal mode select the zoom in button. These are not enabled during test.
5. Perform FVC test. Additional guidance on performing Spirometry Manoeuvres can be found on the Vitalograph website. 6. Repeat the blow three times or more to obtain good test quality. 7. The results summary on the bottom of the screen shows the FVC and FEV1 of the last blow. 8. The number of usable blows and bad blow indicator (!) are shown in a separate box next to the last test FVC and FEV1. There will also be an audible sound at the end of test to indicate a bad blow. 9. The best three tests are shown on the graph in order of rank (best 1, 2, 3...). A legend is shown on the top of the graph to explain the order of the tests. 10. To view results select the results button
on the side of the test screen.
a. You can select the test results you want to view by using the left/right arrows. b. You can scroll though the results for each test by using the up/down arrows. The number of parameters displayed will depend on the configured parameters. c. The tests are shown in order of rank (best is ranked number 1 then 2, 3...). d. The results screen has several different colums, arranged in a similar manner to the prinout. The first column will display the parameter name, the second displays the units, the third the test value and the fourth column shows the %Pred or Z value depending on the configuration. 11. If you wish to delete the current blow you can do this as follows: a. Following completion of the blow you wish to clear, select the Delete option from the menu on the side of the test screen. b. Two Delete icons will appear in the same area on the side of the test screen, one Delete with a green tick and the other Delete icon with a red 'X'. To confirm the deletion of the blow press the Delete icon with the green tick. To cancel the deletion select the Delete icon with the red 'X'. c. If you wish to clear/delete all the sessions on the device (with the exception of the latest FVC Pretest), you can connect to Vitalograph Reports as outlined in section 6.5 and move all data to Vitalograph Reports and clear it from the device. file:///H:/Current%20List%20March%202015/Vitalograph/micro%20Model%206300%20User%20Training%20Manual.html
9/29
6/24/2015
07687_1
12. After performing the FVC tests press the enter button to exit the FVC Test screen. This brings you back to the Main Menu. Note: The measurements obtained from a lung function test form part of the various findings of a physician in the detection, diagnosis and control of chest diseases. Spirometry may support or exclude diagnosis, but it cannot make one. Note: Different tests conducted during the same session i.e VC, FVC, Post will be treated as a single session and will be printed as one report. If more than one test is required for the same subject the device should be switched off and on again between tests so that they are registered as separate sessions and separate reports can be generated. Note: A session ends and is saved when one of the following occur turn off the device, create a new subject, connect to Vitalograph Reports.
6.3 Performing a Post Test Session A Post test session can be performed on the last FVC pretest session performed. The device will retain the last pretest even when it is turned off and on again and/or the data has been transmitted to Vitalograph Reports. To perform a Post test: 1. Select ‘Post Mode’ from the Main Menu
.
2. A Post test session can be performed on the last FVC pretest session performed. 3. Perform the Post FVC test as outlined in section 6.2.3 Performing an FVC Test. Note: A Post Test may only be selected if a FVC Pretest has been completed. When you leave the Post FVC test screen and return to the main menu you will not be able to select either the VC or FVC test as you are still in Post mode. These options will be greyed out.
6.4 Configuration Menu To access the Configuration menu press the
icon on the top right corner of the main screen.
In the Configuration menu there are four options as shown. These are for the 1. Subject options (top left icon), 2. Device settings (top right icon), 3. Accuracy and Calibration (bottom left icon) and the 4. About box (bottom right icon).
1. The Subject option allows you to configure the following a. Posture sets the Posture recorded for the session, sitting or standing. b. Weight turn on to enable the option to enter Weight in the subject screen. c. Population Group turn on to enable the option to enter Population Group in the subject screen.
file:///H:/Current%20List%20March%202015/Vitalograph/micro%20Model%206300%20User%20Training%20Manual.html
10/29
6/24/2015
07687_1
By default Posture will be set to sitting, Weight and Population Group are set to Off. 2. The Device settings allow you to configure the following Device Option
. Select this to confiigure
a. Select % Predicted or Zscore the parameter selected will then be displayed in the results screen. b. Audio you can put the device in silent mode by turning this option Off. c. User Passcode you can turn this on to lock the device and will be prompted for a passcode. d. Set Temperature (up to 2 decimal places) you can enter the temperature here. The default setting is 23'C.
e. Parameters
. Choose the Parameters option to select what parameters you want to
display on the results screen, use the left/right arrowes to navigate between the screens. A maximum of 8 parameters can be selected. f. Date/Time.
. Select this option to set or change the Date and/or Time. Date format is
YYYY/MM/DD, the Time is fixed at 24Hr format. Use the up/down arrows to edit these fields. g. Service mode/Technician
. This option is for servicing and technicians, an 8 digit
passcode is required to enter this mode. h. The following is a list of all available parameters and definitions of the parameters:
Parameter
Definition
VC
Vital capacity (L)
FVC
Forced vital capacity (L)
FEV1
Forced expiratory volume after 1 second (L)
FEV1R
FEV1 divided by the largest VC from the VC or FVC manoeuvre.
PEF L/s
Peak expiratory flow (L/sec)
file:///H:/Current%20List%20March%202015/Vitalograph/micro%20Model%206300%20User%20Training%20Manual.html
11/29
6/24/2015
07687_1
PEF L/min
Peak expiratory flow (L/min)
FEF2575
Maximal mid expiratory flow: the mean FEF in the time interval between 25% and 75% of the FVC (L/sec)
FEF7585
Forced late expiratory flow: the mean FEF in the time interval between 75% and 85% of the FVC (L/sec)
EVC
Expiratory vital capacity (L)
IVC
Inspiratory vital capacity (L)
FIVC
Forced inspiratory vital capacity (L)
FIVC/FVC
Ratio FIVC of FVC
FEV.5
Forced expiratory volume after 0.5 seconds (L)
PIF L/s
Peak inspiratory flow (L/sec)
FMFT
Forced midexpiratory flow time (sec)
FET
Forced expiratory time (sec)
FEV.5/FVC
Ratio FEV 0.5 of FVC
FEV.75
Forced expiratory volume after 0.75 seconds (L)
FEV.75/FVC
Ratio FEV 0.75 of FVC
FEV1/VC
Ratio FEV1 of VC
FEV1/IVC
Ratio FEV1 of IVC
FEV1/FVC
Ratio FEV1 of FVC
FEV1/FIVC
Ratio FEV1 of FIVC
FEV1/FEV6
Ratio FEV1 of FEV6
FEV1/PEF
Ratio FEV1 of PEF
FEV3
Forced expiratory volume after 3 seconds (L)
FEV3/FVC
Ratio FEV3 of FVC
FEV6
Forced expiratory volume after 6 seconds (L)
FEF25
Forced expiratory flow at 25% of the FVC (L/sec)
FEF50
Forced expiratory flow at 50% of the FVC (L/sec)
file:///H:/Current%20List%20March%202015/Vitalograph/micro%20Model%206300%20User%20Training%20Manual.html
12/29
6/24/2015
07687_1
FEF75
Forced expiratory flow at 75% of the FVC (L/sec)
FEF0.21.2
Mean forced expiratory flow in the volume interval between 0.2 and 1.2 L of the test (L/sec)
FEF 2575/FVC
Ratio FEF2575 of FVC
FIV1
Forced inspiratory volume after 1 second (L)
FIV1/FIVC
Ratio FIV1 of FIVC
PIF L/min
Peak inspiratory flow (L/min)
FIF25
Forced inspiratory flow at 25% of the FVC (L/sec)
FIF50
Forced inspiratory flow at 50% of the FVC (L/sec)
FIF75
Forced inspiratory flow at 75% of the FVC (L/sec)
FIF50FEF50
Ratio FIF 50% of FEF 50%
FIF50FEF50
Ratio FEF 50% of FIF 50%
MVVind
Maximum voluntary ventilation indirectly calculated from the FEV1 (L/min)
Rind
Airways Resistance Indirect measurement.
Vext
Extrapolated volume (L)
Vext/FVC
Ratio Vext to FVC
FEV1/EVC
Ratio FEV1 to EVC
3. Accuracy/Calibration. Spirometry standards recommend checking the accuracy of lung function measuring devices at least daily with a 3L syringe to validate that the instrument is measuring accurately. See section 6.8 for full details on performing an Accuracy Check/Calibration.
4. About Box.
Information about the software can be obtained from the About box. This information can be used if any queries are made to Vitalograph or a service agent. This information includes the Model number (6300), Serial number of the device, the Software reference number, the date of the last Accuracy check and the file:///H:/Current%20List%20March%202015/Vitalograph/micro%20Model%206300%20User%20Training%20Manual.html
13/29
6/24/2015
07687_1
Service Due date.
6.5 Reports and Printing The Vitalograph micro can print pdf reports by connecting it to a PC running the Vitalograph Reports application. The micro has to be in the home screen to connect. 1. To produce PDF reports from the micro, ensure that the software is installed on the PC you wish to report to by running the Vitalograph Reports CD supplied with the micro and following the onscreen instructions. 2. The micro can be connected to the PC either using the USB cable supplied with the device, or for the Bluetooth version a Bluetooth dongle may be used. 3. Ensure that Vitalograph reports is open and the micro is switched on and in the home screen. 4. Additional guidance on using Vitalograph Reports can be found in the Vitalograph Reports help menu or in the 07339 User Training Manual on the supplied CD. Note: When the micro is connected to Vitalograph Reports it will move, not copy, the stored sessions with the exception of the latest FVC Presession. Note: Different tests conducted during the same session i.e VC, FVC, Post will be treated as a single session and will be printed as one report. If more than one test is required for the same subject the device should be switched off and on again between tests so that they are registered as separate sessions and separate reports can be generated.
6.6 Storing Results The Vitalograph micro has the capacity to store 750 subject entries with the corresponding session data. It is possible to perform up to 20 blows per session, however only a maximum of the best 3 blows will be stored with each session. The session information will also include the subject details and the best pretest if it is a Post test session. The Vitalograph micro is intended to be used as a temporary storage device. The Vitalograph micro can be connected to Vitalograph Reports to produce pdf reports of the session data, this will move all subject/sessions to Vitalograph Reports and flag them as deleted on the device with the exception of the last FVC Pretest done. This is outlined in more detail in section 6.5. If more than 750 subject/session entries are stored on the device the existing subject/sessions entries will be deleted on a First In First Out (FIFO) basis i.e the first session entered will be the first to be deleted. Any subjects/sessions previously flagged as deleted by Vitalograph Reports will be counted in the total storage available.
6.7 Accuracy/Calibration The Vitalograph micro should never be outside accuracy limits unless damaged or in a fault condition. In this event, see the faultfinding guide. In normal use, calibration traceability certification is recommended as a part of the routine annual service. It is recommended that you perform an accuracy check on the device and check the temperature daily. ISO26782 recommendations require that the difference between the volume measured by the spirometer and the volume pumped into the spirometer from a syringe is within 3%. Follow these steps to check the accuracy of the unit. 1. Select the Configuration button on the top right corner of the main menu screen. 2. Select the Accuracy/Calibration icon. 3. Enter the Syringe volume and reference using the touch panel keypad. 4. Enter the ambient temperature using the touch panel keypad. 5. Pump air through the flowhead to bring it to ambient temperature. If the flowhead has very recently been used for testing or has come from a cold environment, its temperature should be equilibrated with ambient by pumping air through it from the syringe several times. 6. Press the ‘Enter’ key to bring you into the Accuracy Check screen and follow the onscreen
file:///H:/Current%20List%20March%202015/Vitalograph/micro%20Model%206300%20User%20Training%20Manual.html
14/29
6/24/2015
07687_1
instructions.
7. The Accuracy Check result is shown in % in the top right corner of the screen. If it is reproducible and within 3% a green tick pass icon will be shown and pressing the Enter key will return you to the main Configuration menu and the Accuracy pass is recorded. 8. In the unlikely event the Accuracy Check result is outside 3% the error icon will be shown and pressing the enter key proceeds to the Calibration Update routine to update the Calibration. 9. The Calibration Update screen will show the volume (L) on the top left corner of the screen, next to the number of strokes. 10. The procedure is the same as for the Accuracy Check. If two of the stokes are within 3% of the reference volume pressing the Enter key will return you to the Configuration menu and the Calibration factor is not updated and a pass is recorded. If outside 3% the error icon is shown and pressing the Enter key will return you to the Configuration menu, the Calibration factor is updated and the Calibration update is recorded. Note: To exit the Accuracy Check screen without performing a check, press the Enter key again to return to the Configuration Menu screen. The accuracy check will not be logged to the Vitalograph micro memory in this case. When to check accuracy 1. In accordance with your own established procedures 2. After annual maintenance checks 3. After cleaning or disassembling spirometer for any reason 4. After adjusting calibration 5. If the flowhead or device has been dropped
7. Cleaning Instructions 7.1. Cleaning and Disinfecting the Vitalograph micro A new mouthpiece (either SafeTway or BVF) should be used for each subject. A delay of at least 5 minutes should be allowed between subjects to allow settling of previously aerosolized particles in the measuring device. It is recommended that the flowhead be regularly cleaned according to the guidelines of the user's facility. In the event of visible contamination of the flowhead it should be cleaned or disinfected as described in the accompanying table. The frequency of cleaning and disinfecting is dependent on the Facility's Risk Assessment, usage, and test environment, but it should be at least monthly or every 100 subjects (500 blows). It is recommended that the flowhead be replaced annually. If a remote flowhead adaptor kit is used, it is recommended that the connection tube be replaced annually. Table of Materials Used & Cleaning/Disinfection Methods
file:///H:/Current%20List%20March%202015/Vitalograph/micro%20Model%206300%20User%20Training%20Manual.html
15/29
6/24/2015
07687_1
Part
Material
Clean/ Disinfect
Autoclave Possible?
Recommended Disinfectants
Case Exterior PC/ABS
Clean
No
White Flowhead Tube (not supplied as standard)
Silicone Rubber
Clean
Viable
Wiping with a 70% isopropyl alcohol impregnated cloth provides a suitable form of cleaning and lowlevel disinfection. This may be preceded by cleaning with an antistatic foam cleaner if necessary.
Remote Flowhead Attachments (not supplied as standard)
PC/ABS, Silicone Rubber
Clean
No
Screen
Electrode with Clean AntiNewton Ring Treatment
No
Flowhead
PC/ABS, Stainless Steel
Clean
No
Flowhead Cone
PC/ABS
Clean
No
Disinfect by immersion in sodium dichloroisocyanurate solution at 1000 ppm concentration of free chlorine for 15 minutes.
Note: Always follow the safety guidelines given by the manufacturer of cleaning and disinfectant chemicals. All external parts of the Vitalograph micro require cleaning, i.e. the removal of visible particulate contamination. The parts of the Vitalograph micro that make up the flowhead, which comes into contact with subjects being tested, also require disinfecting. A spirometer is not designed as a ‘sterile' device. Definitions of cleaning and disinfection are as defined in "Sterilization, Disinfection and Cleaning of Medical Equipment: Guidance on Decontamination from the Microbiology Committee to Department of Health Medical Devices Directorate, 1996". Recommendations for chemical disinfectants are derived from the PHLS publication "Chemical Disinfection In Hospitals 1993".
7.2. Disassembling the Fleisch Flowhead 1. Hold the device body firmly in your left hand. 2. Hold the flowhead with your right hand, at the same time press and hold the button firmly on the front of the fleisch flowhead. 3. Slide the flowhead away from the device from left to right. 4. Remove the flowhead cone from the flowhead, by twisting and pulling it away from the flowhead. 5. Clean the flowhead by washing in a mild detergent and removing particulate contamination. To clean the fleisch element, swill vigorously in water with mild detergent or use an ultrasonic bath. Do not attempt to “rub†or “scrub†at capillaries. 6. Rinse all parts in clean water. 7. Disinfect by immersion in sodium dichloroisocyanurate (NaDCC) solution at 1,000 ppm concentration of free chlorine for 15 minutes. Prepare disinfectant solution as directed in the manufacturer’s guidelines. file:///H:/Current%20List%20March%202015/Vitalograph/micro%20Model%206300%20User%20Training%20Manual.html
16/29
6/24/2015
07687_1
8. Leave to dry completely before reassembling. Drying the fleisch element components may require placing them in a warm place overnight. A drying cabinet is ideal. Note: Always follow the safety guidelines given by the manufacturer of cleaning and disinfectant chemicals.
7.3. Reassembling the Fleisch Flowhead 1. Examine the fleisch element to ensure that no liquid or particles remain in the holes, grooves or pressure tappings. 2. Examine the rubber grommets at the top of the device to ensure no liquids or particles remain in the holes. Also ensure the grommets are not damaged. 3. Fit a new flowhead cone to the flowhead. 4. Slide the flowhead into the grooves in the top cover. The Vitalograph logo and button on the flowhead should be on the same face as the LCD when assembled. 5. It is recommended that an accuracy check is carried out following reassembly to verify correct operation and accuracy. Note: If replacement parts are required, a list of spares, consumables and accessories may be found in section 10 and ordered using the contact details on page 2 of this User Training Manual.
8. Fault Finding Guide
file:///H:/Current%20List%20March%202015/Vitalograph/micro%20Model%206300%20User%20Training%20Manual.html
17/29
6/24/2015
07687_1
Problem Fault Symptoms:
Accuracy check variations > +/3% False readings suspected
Possible Causes: (In probable order)
Recheck Accuracy/Calibration Was the correct syringe volume selected? An accuracy check is required after cleaning/disinfecting the flowhead assembly. Flowhead cone fleisch element filter mesh missing or blocked. Flowhead body pressure port holes blocked. Flowhead fleisch element not dried thoroughly. Flowhead fleisch element assembly blocked. Flowhead body tubing from pressure ports to main PCB blocked – contact support. Main PCB failure – contact support.
Problem Fault Symptoms:
Test begins automatically Volume accumulates automatically without the subject blowing. Very small VC or FVC test displayed
Possible Causes: (In probable order)
Flowhead and/or tubing not stationary at the start of test. Hold them steady until the ‘Blow Icon’ appears. Return to Main Menu and reenter the test routine.
Problem Fault Symptoms:
Reversed or no volume measurements.
Possible Causes: (In probable order)
Ensure that the flowhead connecting tube is not pinched or trapped.
Problem Fault Symptoms:
Cannot print to PC (Vitalograph Reports Application). Corrupt or missing data on printout.
Possible Causes: (In probable order)
Check USB cable is connected between Vitalograph micro and the PC. Check to ensure the Vitalograph Reports Application is correctly installed. Check to ensure the required software drivers are installed on the PC. Main PCB failure – contact support.
Problem Fault Symptoms:
Cannot read screen.
Possible Causes: (In probable order)
The batteries may be low. Plug in the USB cable and switch on the device. LCD failure – contact support. Main PCB failure – contact support.
file:///H:/Current%20List%20March%202015/Vitalograph/micro%20Model%206300%20User%20Training%20Manual.html
18/29
6/24/2015
07687_1
9. Customer Service Service and repairs should be carried out only by the manufacturer, the approved importer or by Service Agents specifically approved by Vitalograph. For the names and addresses of approved Vitalograph Service Agents or to arrange spirometry workshops, please refer to the contact information at the start of this manual.
10. Consumables and Accessories Cat. no
Description
20242
SafeTway Mouthpieces (200)
20303
Nose Clips (200)
28350
BVF Bacterial/Viral Filters (50)
36020
3L Precision Syringe
79158
Flow Cone (10)
41422
1M USB Cable
79159
5V DC PowerSAFE
79160
5V DC Input Module Spare Set.
79191
Flowhead Complete
79192
Flowhead Connection Tube
79163
Remote Flowhead Adaptor Kit
65030SPR Vitalograph Reports Application
79166
Stylus (2)
11. Explanation of Symbols
file:///H:/Current%20List%20March%202015/Vitalograph/micro%20Model%206300%20User%20Training%20Manual.html
19/29
6/24/2015
07687_1
Type BF equipment Class II VA
Power rating (in Watts) Voltage DC Attention (reference relevant section in manual) Manufacturer Year of Manufacture Attention (reference relevant section in manual)
micro Icons
Subject
VC Test
FVC Test
Post Test
Settings
Enter
Subject Options
Device Settings
Accuracy / Calibration
About
Age
Height
Gender Male
Gender Female
Posture Sitting
Posture Standing
Weight On
Weight Off
Population Group On
Population Group Off
file:///H:/Current%20List%20March%202015/Vitalograph/micro%20Model%206300%20User%20Training%20Manual.html
20/29