W & H Dentalwerk
Contra-angle Handpieces without light
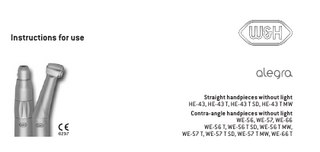
Alegra Straight and Contra-Angle Handpieces Without Light Instructions for Use
60 Pages
Preview
Page 1
Instructions for use
Straight handpieces without light HE-43, HE-43 T, HE-43 T SD, HE-43 T MW Contra-angle handpieces without light WE-56, WE-57, WE-66 WE-56 T, WE-56 T SD, WE-56 T MW, WE-57 T, WE-57 T SD, WE-57 T MW, WE-66 T
Contents Symbols... 4 1. Introduction... 6 2. Safety notes... 9 3. Product description... 12 4. Operation... 14 Assembly/Removal...14 Assembly/Removal of the external coolant supply...16 To change rotary instruments... 18 Test run... 24
5. Hygiene and maintenance... 25 General notes... 25 Limitations on processing... 27 Initial treatment at the point of use... 28 Manual cleaning... 29
2
Manual disinfection... 32 Automated cleaning and disinfection... 33 Drying... 35 Inspection, Maintenance and Testing... 36 Packaging...41 Sterilization... 42 Storage... 45
6. Servicing... 46 7. Maintenance... 47 8. W&H Accessories and spare parts... 49 9. Technical data... 51 10. Disposal... 56 Explanation of warranty terms... 57 Authorized W&H service partners... 59 3
Symbols
WARNING! (risk of injury)
4
in the Instructions for use
ATTENTION! (to prevent damage occurring)
General explanations, without risk to persons or objects
Do not dispose of with domestic waste
Symbols XXXX
on the medical device / packaging
CE marking with identification number of the Notified Body
DataMatrix Code for product information including UDI (Unique Device Identification)
Data structure in accordance with Health Industry Bar Code
Catalogue number
Sterilizable up to the stated temperature
UL Component Recognition Mark indicates compliance with Canadian and U.S. requirements
Serial number
Medical Device
Date of manufacture Thermo washer disinfectable
Caution! Federal law restricts this device to sale by or on the order of a dentist, physician, veterinarian or with the descriptive designation of any other practitioner licensed by the law of the State in which the practitioner practices to use or order the use of the device. 5
1. Introduction Customer satisfaction has absolute priority in the W&H quality policy. This medical device has been developed, manufactured and subjected to final inspection according to legal regulations, quality and industry standards. For your safety and the safety of your patients Prior to initial use please read the Instructions for use. These explain how to use your medical device and guarantee a smooth and efficient operation. Observe the safety notes. Intended use / indications for use (only for USA) The dental handpiece/contra-angle is intended for the following applications: Removal of decayed materials, cavities and crown preparation, removal of fillings, finishing and polishing of tooth and restoration surfaces. Misuse may damage the medical device and hence cause risks and hazards for patient, user and third parties. 6
Qualifications of the user We have based our development and design of the medical device on the dentists, dental hygienists, dental employees (prophylaxis) and dental assistants target group.
Responsibility of the manufacturer The manufacturer can only accept responsibility for the safety, reliability and performance of the medical device when it is used in compliance with the following directions: >> The medical device must be used in accordance with these Instructions for use. >> Only the components approved by the manufacturer may be replaced (contra-angle head). >> Modifications or repairs must only be undertaken by an authorized W&H service partner (see page 59).
7
Skilled application The medical device is intended only for skilled application according to the intended use as well as in compliance with the valid health and safety at work regulations, the valid accident prevention regulations and in compliance with these Instructions for use. The medical device should be prepared for use and maintained by staff who have been trained in procedures for infection control, personal safety and patient safety. Improper use, (e.g., through poor hygiene and maintenance), non-compliance with our instructions or the use of accessories and spare parts which are not approved by W&H, invalidates all claims under warranty and any other claims. Any serious incident that has occurred in relation to the medical device should be reported to the manufacturer and the competent authority!
8
2. Safety notes
General/Spray clip
>> Always ensure the correct operating conditions and cooling function. >> Always ensure that sufficient and adequate cooling is delivered and ensure adequate suction. >> In case of coolant supply failure, the medical device must be stopped immediately. >> Use only filtered, oil-free and cooled air supplied by dental compressors to operate the medical device. >> Check the medical device for damage and loose parts each time before using (e.g., push-button). >> Do not operate the medical device if it is damaged. >> Perform a test run each time before using. >> Avoid overheating at the treatment site. >> Do not touch the soft tissue with the head of the medical device. Risk of burning if the medical device overheats! >> It is imperative to comply with the concentrations and exposure times specified by the manufacturer of the treatment water decontamination system, as well as its handling.
9
Safety notes
General
>> Before using the medical device for the first time, store it at room temperature for 24 hours. >> The operation of the medical device is permitted only on supply units which correspond to the standards IEC 60601-1 (EN 60601-1) and IEC 60601-1-2 (EN 60601-1-2).
10
Hygiene and maintenance prior to initial use >> The medical device is sealed in PE film and not sterilized when delivered. >> The PE film and the packaging are non-sterilizable. >> Clean, disinfect and lubricate the medical device. >> Sterilize the medical device, the nozzle cleaner, the bur limit stop and threaded pin.
11
3. Product description
Straight handpiece
Handpiece head Chuck ring Sheath Bur extension Threaded pin
Accessories External coolant supply Spray clip Coolant hose i Nozzle cleaner 12
Product description
Contra-angle handpiece
Contra-angle head Push-button Sheath
Accessories External coolant supply Spray clip Coolant hose Nozzle cleaner 13
4. Operation
Assembly/Removal ISO connection / Midwest® connection Do not assemble or remove the medical device during operation! Push the medical device onto the motor. Verify full engagement Pull the medical device [or press the locking sheath (Midwest®)] to remove it from the motor.
14
StarDental® connection Do not assemble or remove the medical device during operation! Push the medical device onto the motor. Verify full engagement Pull the retention sleeve of the handpiece back to remove the medical device from the motor.
15
Operation
Assembly/Removal of the external coolant supply Spray clip / Coolant hose (accessories)
Attach the spray clip. Insert the coolant hose onto the coolant tube of the spray clip.
or
Remove the spray clip. Remove the coolant hose.
16
Rotary instruments >> Use only rotary instruments which are in perfect condition. Follow the operating instructions of the manufacturer. >> Insert the rotary instrument only when the medical device is stationary. >> Never touch the rotary instrument while it is still rotating. >> Do not activate the chucking system of the medical device during operation. This leads to detachment of the rotary instrument, damage to the chucking system and/or heating up of the medical device. Risk of burning! >> Do not lift the cheek or tongue with the head of the medical device. Risk of burning due to the push-button heating up!
17
Operation
To change rotary instruments Straight handpiece >> Handpiece bur >> Instrument shaft diameter 2.35 mm To open the chucking system: Turn the chuck ring to the left To close the chucking system: Turn the chuck ring to the right
Open the chucking system. Insert the rotary instrument until back stop. Close the chucking system.
18
Operation
To change rotary instruments
Verify full engagement or
Open the chucking system. Remove the rotary instrument. Close the chucking system
19
Operation
To change rotary instruments Straight handpiece >> Contra-angle bur >> Instrument shaft diameter 2.35 mm To open the chucking system: Turn the chuck ring to the left To close the chucking system: Turn the chuck ring to the right
Open the chucking system. Insert the bur extension. Insert the rotary instrument until back stop. Close the chucking system. 20