Directions for Use
45 Pages
Preview
Page 1
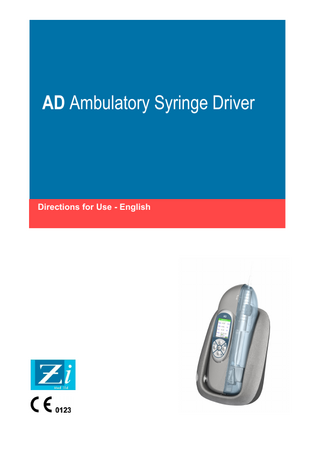
AD Ambulatory Syringe Driver
Directions for Use - English
Contents
About this Manual...3 Introduction...3 Applications...3 Accessories...3 Label and Serial Number Description...4 Symbol Definitions...4 Product Description...5 Operating Precautions...7 Infusion Precautions...7 Configuration of the Syringe Driver in a System...7 General Precautions...8 Operating Environment...8 Hazards...10 Patient Protection...10 Preparing the Syringe Driver for Use...10 Removing and Replacing the Syringe Cover...12 Syringe Driver Start-up Sequences...13 Switching On the Syringe Driver...15 Removing and Loading Syringes...16 Purging the Syringe...18 Setting up an Infusion...18 Running an Infusion...19 Stopping an Infusion / Placing On-Hold...23 Syringe Driver Settings...24 Warnings/Alerts...30 Alarms...31 Battery Status...33 Cleaning and Maintenance...35 Warranty and Service Information...38 Specifications...39 Performance Data...40 Appendix A. Testing Standards...42 Document History Revision First Issue Issue 2 Issue 3 Issue 4 Issue 5
ZI-4-TM-001-5
Change Number 4089 4123 -
Reason for Change P7, caution added, reduced accuracy at low flow P34, software version now 1.29 P9, addition of Pre-Use checks Version for AD1 Timed only, software version 2.12
2 of 45
Date July 2006 August 2006 December 2006 May 2007 February 2008
About this Manual The operator must be thoroughly familiar with the AD Ambulatory Syringe Driver (hereinafter referred to as the Syringe Driver or AD) described in this Manual prior to use, and in particular must read and understand any precautions stated herein. If a software change occurs and the operation/specification for the Syringe Driver changes, new or additional operating instructions will be issued, if needed. All illustrations used in this Manual show typical settings and values that may be used in setting up the functions of the Syringe Driver. These settings and values are for illustrative use only. The complete range of settings and values are specified in the Specifications section of this Manual. This Directions for Use document has been developed with consideration to the requirements in relevant Harmonised Standards. Data presented in the Technical Specifications reflect specific test conditions defined in this standard. Other external factors such as varying back pressure, temperature, head height, set usage, fluid restrictions, solution viscosity, syringe characteristics or combinations of these factors, may result in deviations from the performance data enclosed.
Introduction The AD Syringe Driver is an ambulatory device that may be worn or carried with the patient. It is intended for medical use only. The intended operator can include any patient from paediatric to aged persons. Other operators include skilled clinical staff and bio-medical technicians. Patients can be trained to operate the Syringe Driver for home use, or the Syringe Driver can be configured for the patient by a nurse or other trained person. In all cases, training is required for configuring the Syringe Driver. The AD Syringe Driver accepts disposable syringes from 5 ml to 30 ml in size. It uses a simple 5 key control pad, which simplifies programming and makes the Syringe Driver easy to use. The AD Syringe Driver is portable and has a battery power supply capable of operating the Syringe Driver for up to 72 hours without recharge. To re-charge the Syringe Driver, it is placed in the AD charging cradle, which also contains a communications interface allowing connection to a PC for data to be exchanged.
Applications The Syringe Driver is designed to meet the fluid and drug delivery requirements of today’s changing clinical environment, either in the hospital or in the home care setting. The Syringe Driver is intended for infusion via intravenous (IV), intra-arterial (IA), or subcutaneous routes of administration. It delivers solutions precisely and economically. Infusion rates are programmable from 0.1 to 200 ml/h (depending on syringe size). The Syringe Driver is designed to follow the patient into a variety of care areas, including, but not limited to the following environments: • • • • •
• • • • •
General Floor Medical Surgical Critical/Intensive Care Areas Maternity
Community Cardiac Catheter Lab A and E Burn Unit Oncology
Note: in all applications, time to alarm under occlusion or other fault conditions will depend on the infusion rate and levels of alarm settings. It is recommended to consider these parameters when using drugs requiring infusion stability or low flow rates, and therefore a quick time to alarm, e.g. Ionotropes.
Accessories The Syringe Driver is supplied with the following: Charger cradle with power supply, part number ZI-3-AF-005 Key, part number ZI-3-BA-023 (2 off) The following items may be purchased on request: A soft carry case with belt attachment, part no. ZI-3-AF-014 (Pack of 5, part no. ZI-3-AF-011) A transit case for the Syringe Driver and Charger plus extras, part no. ZI-3-AF-013 A waterproof bag for the Syringe Driver (available soon), part no. ZI-3-AF-017 Spare lid for 5-10ml syringes, part no. ZI-3-BA-004 (Pack of 5, part no. ZI-3-AF-009) Spare lid for 20-30ml syringes, part no. ZI-3-BA-006 (Pack of 5, part no. ZI-3-AF-010) ZI-4-TM-001-5
3 of 45
!
A cable for connecting the charger cradle to a PC, part no. ZI-3-EZ-001
Label and Serial Number Description
For explanation of the symbols used on the label, see next section. SKU is Stock Keeping Unit, part number 81003GB-00 (Standard AD), 81003GB-01 (Monoject) SN is Serial Number, 0512 is month 12 of year 2005, representing the time of manufacture and 0296 is a sequential number.
The Charger Base and its Power Supply may have different serial numbers.
Symbol Definitions Please read the general Operational Warnings and Cautions in the Directions for Use carefully prior to using the Syringe Driver.
CF type device (leakage current protection)
Complies with Medical Devices Directive 93/42/EEC
Class II insulation (double insulated)
t U
Made in UK by ZiMed Ltd, Unit 4, Fford Richard Davies, St. Asaph Business Park, St. Asaph, Denbighshire, LL17 0LJ, N. Wales
Not for disposal in domestic or municipal waste: this product is compliant with the WEEE directive.
The symbol to the right of this box appears throughout this document, and refers to important information
ZI-4-TM-001-5
4 of 45
!
Product Description Front view
1
2
3 1.
Syringe cover
2.
Control keypad
3.
Colour display
Rear view
1
2 3 1.
Cover lock
2.
Key
3.
Charging contacts
Cover off
5
4
1
2
ZI-4-TM-001-5
3
1.
Syringe barrel clamp
2.
Syringe fingerplate slot (20-30 ml syringes)
3.
Syringe fingerplate slot (5-10 ml syringes)
4.
Carriage locking lever
5.
Thumbplate clamp 5 of 45
Extended cover (for large syringes, 20-30 ml)
Extended cover
Control panel Up Key – used to move up the menu, or increase a number’s value Left Key – used to move left, or return to the menu Enter Key – used to select a menu option or confirm an entry
Right Key – used to move right, or select the main menu Down Key – used to switch power on, move down the menu, or decrease a number’s value
Charger cradle
2
3 1
ZI-4-TM-001-5
1.
Charger Green/Amber LED window
2.
Charging contacts
3.
Infra-red communication window
6 of 45
Operating Precautions Although the AD Syringe Driver has been designed and manufactured to exact specifications, it is not intended to replace trained personnel in the supervision of IV infusions. DO NOT use the AD Syringe Driver for life support functions or for any treatment where failure to provide such treatment would endanger life. Read document VDEO753-5 when performing parallel infusions.
!
This Syringe Driver can operate at very low infusion rates, as low as 0.1ml/h. The operator is cautioned that long delays could be experienced at the start of an infusion before the patient receives any fluid, due to the taking up of slack between the drive mechanism and the syringe and overcoming syringe sticktion. Accuracy and time to detect occlusion is affected at these low infusion rates. Refer to the Performance Data section. The specified accuracy of the Syringe Driver can only be maintained when the recommended syringes, extension sets and accessories are used. The Syringe Driver cannot distinguish between some types of 5ml syringes, due to differences in diameter. Using a type of syringe other than those programmed could lead to errors of delivery of up to 15%. A Pre-Use Checklist is shown on page 10. Zimed Ltd recommends that it is followed for every infusion.
Infusion Precautions Always read and follow the instructions which accompany the syringe and extension sets. Carefully follow the instructions for priming the set, as well as the recommended set change interval. Administration and extension set use should not exceed the set change interval as stated on the label. Drugs for infusion by use of the Syringe Driver may only be prescribed by a qualified medical practitioner. Caution must be exercised in the selection of drugs and the amount and rate intended to be delivered via any infusion pump. If the drug contained in the syringe will be exposed to extreme environmental conditions for prolonged time periods, IT IS IMPORTANT TO SELECT DRUGS THAT WILL NOT CHANGE PHARMACOLOGICALLY UPON SUCH EXPOSURE. As with all automatic infusion devices, whenever a TOXIC OR DANGEROUS LEVEL of drug is stored in the reservoir, CONSTANT MONITORING of the infusion is required. The syringe should be disposed of in an appropriate manner, considering the nature of the residual fluid that may be contained within, in accordance with the hospital/homecare provider’s disposal practices. Always ensure the extension set clamp is closed before removing the syringe. This Syringe Driver should be used only with ZiMed Ltd specified accessories. There are risks associated with using anything other than the recommended accessories with this Syringe Driver. CAUTION must be employed to assure that the Syringe Driver is in good working order before use. When the Syringe Driver is being operated on battery power alone, ensure that the battery has been charged as described in the Battery Status section. Be sure to PURGE THE SYSTEM OF ALL AIR, WHILE NOT CONNECTED TO THE PATIENT, BEFORE ADMINISTERING ANY MEDICATION. Failure to follow this normal infusion procedure could lead to serious consequences. The Syringe Driver has no means to detect air presence in the extension set. Remember that the volume of fluid contained in the connecting tubing is a residual amount and cannot be infused. Allow for this extra volume of fluid when initially filling the syringe. It is recommended that the number of parameters, types of syringes, drug names and other functions are minimised. This will help to avoid errors in programming and thereby decrease patient’s risk. When using the Syringe Driver with the soft carry case, ensure the lid is locked before sliding the Syringe Driver into the case. The lid may become detached if it is not locked, stopping the infusion and sounding an alarm. It is recommended that the lid is always locked when running an infusion. To avoid cross infection between patients, the Syringe Driver MUST be cleaned in accordance with the instructions given in this Manual. See the section, “Cleaning and Maintenance”, for details.
Configuration of the Syringe Driver in a System Inter-connection of several devices into a single infusion system can have substantial influence on the accuracy of the infusion rate, at least for one of these devices. In such situations, the operation of devices using gravitational forces can be unstable or impossible at all. When infusing through a central line catheter, ZiMed Ltd recommends using sets with a Luer lock adapter. Only use approved and pressure proved syringes with the Luer lock connections and extension sets as recommended herein. Change the extension sets according to hospital and homecare provider protocols.
ZI-4-TM-001-5
7 of 45
Use only accessories complying with the system’s safety requirements; failure to do so may lead to reduced safety levels of the resulting system. Consideration relating to accessory choice shall also include: • Use of the accessory in the patient vicinity • Evidence that the safety certification of the accessory has been performed in accordance with the appropriate EN 60601-1 or UL2601-1 and/or IEC 601-1 harmonised, national or international standard. The power supply for the charger cradle must be connected to a 100-240 VAC 50/60 Hz supply. The assessment for suitability of any software used in the clinical environment to receive data from Syringe Driver lies with the operator of the equipment.
General Precautions
H
The Syringe Driver must be mounted within 1.0m above or below the patient’s heart.
Do not use hard or sharp objects on the keypad. The specified accuracy of the Syringe Driver can only be maintained if the Syringe Driver is used, maintained and serviced in accordance with the instructions given in this manual. If the Syringe Driver has failed to calibrate during the servicing procedure, it must be returned for repair or disposal. Do not push the syringe barrel clamp when fitting a syringe. Disengage it from the open position and allow it to rest on the syringe by the natural action of the return spring. Pushing on the syringe barrel clamp while it is resting on the syringe may cause the syringe to deform and initiate a system alarm. If the Syringe Driver is dropped, subjected to excessive moisture, humidity or high temperature, or otherwise suspected to have been damaged, remove it from service for inspection by qualified personnel. Follow the cleaning schedule and methods defined under the Maintenance and Storage section, to ensure proper maintenance of the Syringe Driver. Wipe off spills immediately. Do not allow fluid or residues to remain on the Syringe Driver as these could cause biological hazards or equipment malfunction. Plastic materials may cause irritation of the skin. Wearing the Syringe Driver without the soft carry case next to exposed skin is not recommended. The Syringe Driver has been designed to be as safe as possible to handle; however, care should be exercised to avoid trapping of fingers or other body parts in the mechanism.
Operating Environment ZiMed Ltd will assume no responsibility for incidents which may occur if the product is not used, stored or transported in accordance with the environmental conditions stipulated in this document and on the package labelling. This Syringe Driver is designed for ambulatory use, and should withstand everyday handling. If the Syringe Driver is dropped onto a hard surface, or is suspected of being dropped, the operation and calibration should be checked by a qualified technician. Do not bathe or shower whilst using the Syringe Driver. The Syringe Driver is resistant to a limited amount of splashing, but its construction does not make it resistant to large amounts of spraying or immersion in liquids. Damage to the internal components may result.
M ZI-4-TM-001-5
As with all medical electronic equipment, care must be exercised to avoid exposing this Syringe Driver to powerful sources of electromagnetic interference. This Syringe Driver design has been tested to current European standards and guidelines for medical devices. Refer to the Testing Standards (Appendix A) for details of the relevant standards.
8 of 45
The Syringe Driver was not found to be affected adversely by these susceptibility tests and will perform safely. The Syringe Driver is CISPR11 group 1 class B, and emits a certain level of electromagnetic radiation, which is within the limits specified by EN 60601-2-24:1998 and EN 60601-1-2:2002. Using the Syringe Driver near operating equipment which radiates high-energy radio frequencies (such as electrosurgical/cauterising equipment, two-way radios, or cellular telephones) may cause false alarm conditions, or failure to operate correctly. If this happens, reposition the Syringe Driver away from the source of interference; or turn off the Syringe Driver or other equipment as appropriate.
ZI-4-TM-001-5
9 of 45
Hazards
B V
An explosion hazard exists if the Syringe Driver is used in the presence of flammable anaesthetics. Exercise care to locate the Syringe Driver away from such hazardous sources.
This Syringe Driver contains static-sensitive components. Observe strict precautions for the protection of static-sensitive components when attempting to repair and service the Syringe Driver.
The RS232 interface is a standard feature on the charging cradle. Connection to a computer while Syringe Driver is connected to the patient is prohibited. Do not touch signal input/output parts (RS232 on charger base) and patient simultaneously. Refer to the Technician Interface Manual (future product) for further information regarding the RS232 interface. The charger base and Syringe Driver may become warm after extended periods of charging the Syringe Driver battery. This is normal, but care should be taken for a few minutes after removing the Syringe Driver from the Charger base. Do not wear the Syringe Driver next to bare skin. Ensure the ambient temperature is below 35°C during charging. During charging, the Syringe Driver may cause a temperature rise in small syringes of 2°C above ambient. Care must be taken to prevent unwanted heating of drugs or compounds if this could change their characteristics in such a way that they become ineffective or toxic. Alternatively, avoid the need to charge the Syringe Driver battery during the use of temperature sensitive drugs or compounds. When the Syringe Driver is running an infusion and is being carried in the soft carry case, the temperature can rise by up to 2°C above ambient. Bearing in mind the warmth generated by the human body, the effect on the drug or compound being infused must be considered. In exceptional cases of certain internal malfunctions, the Syringe Driver can switch itself off with no additional warning, although an audible alarm will be heard in most cases. Refer to Alarms section and Technical Service manual for more information. The operator should be aware that this Syringe Driver contains software. There is no known method for ensuring that software is completely free from systematic errors. The risk of such an error interfering with Syringe Driver operation is extremely small, but if such an error did occur it would most likely result in stopping the infusion and initiating an alarm condition.
Patient Protection Over or under infusion in the event of a fault in the Syringe Driver is limited to the volumes stated in the Specifications section of this manual. The means of limitation is twofold: first, the position of the syringe plunger is constantly monitored and compared to the expected position during the whole of the infusion and during the loading procedure, and second, by comparing the readings from the primary position monitor with those from a secondary position monitor. If the expected position and measured position deviate by more than a set distance, or if the two monitors disagree by more than another set distance, the Syringe Driver will stop the infusion and initiate an alarm.
Preparing the Syringe Driver for Use The following pre-use checks should be carried out every time the syringe driver is being prepared for use: Remove the cover and, if present, the syringe. Examine the outside of the syringe driver for damage, cracks etc. Do not use the syringe driver if it has been damaged to the extent that cracks are evident in the casing or parts of it are missing, including the retaining legs of the lid. Unlock the carriage with the locking lever, and ensure it can slide freely from one end to the other. Ensure the drive bar is clean and free from contaminants. Ensure the trough area is also clean. If the syringe driver needs cleaning, refer to the section on cleaning and maintenance. Set the carriage to the middle of the trough, and close the locking lever. Ensure the carriage does not move forwards or backwards, using no more than finger pressure. Examine the syringe barrel clamp and ensure it can hold the syringe securely in place. ZI-4-TM-001-5
10 of 45
Switch on the syringe driver as described below. The power on screen should indicate the correct model and serial number. After the internal checks are completed, examine the battery indicator and ensure it shows at least three-quarters full, or sufficient for the current treatment (see specifications). Charge the battery if necessary - this can take up to 5 hours.
ZI-4-TM-001-5
11 of 45
Removing and Replacing the Syringe Cover The syringe cover protects the syringe and the operating mechanism from damage or interference, and actuates a switch to enable an infusion to start when the cover is on. To load a syringe, the syringe cover must first be removed. An infusion cannot be run when the cover is removed. When a syringe has been loaded, replace the syringe cover to programme and run the infusion. Use the following procedure to remove the syringe cover: 1.
Use the key supplied to release the lock on the rear of the Syringe Driver. Note that the lock can be set to be “Enabled” or “Disabled”. When set to “Enabled”, it will automatically unlock when the cover is fitted, and needs to be set to “Enabled” to allow the cover to be locked. Because the lock mechanism relies on a sprung catch to remain in the “Enabled” or “Disabled” condition, moving the Syringe Driver may cause the mechanism to unlatch and set itself to “Enabled”. Should this occur, simply unlock the mechanism with the key.
Lock
2.
Slide the cover towards the syringe tube end. It needs to move about 0.5 cm to allow the lugs to clear their location slots.
3. Lift and remove the cover. 4. Take care of the key - the lid cannot be unlocked without the key (once it has been locked) to change the syringe. Should the lid become permanently locked in place, remove the Syringe Driver from service. Use the following procedure to replace the syringe cover: 1.
Position the cover so that the lugs engage with their location slots.
2.
Use only gentle pressure to slide the cover away from the syringe tube end of the Syringe Driver, while pressing it against the body of the Syringe Driver. It needs to move about 0.5 cm to allow the lugs to engage with their location slots.
ZI-4-TM-001-5
12 of 45
3.
If required, use the key to secure the lid to the Syringe Driver. Do not force the key.
Syringe Driver Start-up Sequences The sequence of actions to take in order to begin an infusion will depend on the following circumstances: •
Is there a syringe fitted in the syringe driver (containing a sufficient volume of the drug)?
•
Is this a new infusion, or the continuation of the previous infusion, which was stopped?
•
If a syringe is fitted, has it been purged manually to remove air, or should the syringe driver’s purge procedure be used?
•
If it is a new treatment, is it a 24 hour infusion? (If it is a 24 hour infusion, the infusion rate is calculated automatically from the volume present in the syringe. If not, the infusion time must be set up on the screen before the infusion can be started.)
The main variations of the start-up sequences are shown in the flow chart below.
ZI-4-TM-001-5
13 of 45
YES
YES
NO
NO
PREVIOUS SYRINGE UNDISTURBED
NEW SYRINGE FITTED
NO
SYRINGE NOT FITTED
YES
YES
NO
YES
NO
ZI-4-TM-001-5
14 of 45
Switching On the Syringe Driver Before initially powering on the Syringe Driver, charge the battery for at least 4 hours (see Battery Charging in the Battery Status section).
Press and hold the Down key for three seconds to switch on the Syringe Driver. When the Down key is pressed, the Syringe Driver checks whether it was powered down normally; if not, the screens on the right are displayed, otherwise an alarm test is performed consisting of two beeps from each audio device. If the Syringe Driver is being powered on for the first time after a code download (see Technician Software Manual) the operator will see the screen on the left, warning that all configuration values such as End of Infusion point have been reset to their default values. After further internal checks, the Syringe Driver displays the initial Power On screen.
The Power On screen is shown left, and shows the product code, software version and serial number of the Syringe Driver. If the Syringe Driver requires servicing or detects any internal problem, it displays an appropriate Alert or Alarm screen. If the internal data log detects that a service is required, the Service Overdue warning screen appears after switch on. When the warning is cancelled only the orange “spanner” symbol remains and appears on all subsequent screens. If the previous infusion was stopped before it had completed, and the syringe is still present in the device containing a quantity of the drug, the Resume Previous Infusion screen is displayed, as shown left. A Yes response skips the other screens and goes straight to the Confirm Run screen (see page 19). A No response (or if the previous infusion was not stopped before completion) causes the Reset TVI screen to be displayed, as shown right. If the TVI is not to be reset (a No response), the screen display goes straight to the Load or Confirm Syringe screens (depending on whether a syringe is in place or not). If the TVI is reset (a Yes response), a screen is displayed confirming the reset, as shown right and then the Load or Confirm Syringe screens are shown.
ZI-4-TM-001-5
15 of 45
!
Removing and Loading Syringes Syringe Types Only syringes that have a tick ( ) in one of the Syringe Size columns in the table below can be used in the Syringe Driver. Note that the Monoject syringes require a different model of Syringe Driver, and must not be used in the Standard model. Syringe Manufacturer
Product Name
BD B Braun B Braun Codan/Once Terumo Sherwood
Plastipak Perfusor Omnifix
Monoject
5 (6)
Syringe Size (ml) 10 20 (12)
30/35
Syringe Driver model Standard AD Standard AD Standard AD Standard AD Standard AD AD for Monoject only
Removing a Syringe
!
Use the following procedure to remove a syringe from the Syringe Driver. Always ensure that the extension set clamp is closed before removing the syringe. The Syringe Driver has been designed to be as safe as possible to handle; however, care should be exercised to avoid trapping of fingers or other body parts in the mechanism. 1.
!
Remove the cover, as described previously (see page 12).
Thumbplate clamp Syringe barrel clamp
2.
Locking lever
3.
Raise the syringe barrel clamp away from the syringe body.
4.
Lift the syringe thumbplate out of the clamp and remove the syringe.
ZI-4-TM-001-5
16 of 45
Release the Thumbplate clamp from the syringe plunger by opening the locking lever and turning it 180 degrees.
Loading a Syringe If no syringe is present, the Syringe Driver automatically displays the Load Syringe screen immediately after the Reset TVI screen. The LOAD option can also be selected from the Main Menu. Use the Up key to move the highlight up to the Load option (as shown to the left), if not already highlighted. Press Enter to select the Load option.
If there is already a syringe present, the Syringe Driver displays a message to confirm the syringe it has detected. If there is no syringe present, the Syringe Driver waits for the cover to be removed, and a syringe fitted. If the syringe needs changing before the end of an infusion that is already running, follow the instructions given in “Changing the Infusion” under the heading “Running an Infusion” (see page 24). Remove the cover (see page 12). Raise the syringe barrel clamp and release the locking lever by pulling it straight and rotating it 180 degrees. Move the carriage to the maximum extent of its travel (away from the syringe end).
Locking lever
Thumbplate clamp Syringe barrel clamp
Carriage
Locking lever
Monoject syringe flange slot
Syringe flange slots Pressing No causes the Syringe Driver to cycle through the other possible syringes that could have been fitted. When the correct syringe has been identified, press Yes to confirm it. Note: the Syringe Driver may request that the syringe is re-fitted. This may occur if the correct syringe was not confirmed and no other syringe type falls within the parameters measured by the sensors.
ZI-4-TM-001-5
17 of 45
Insert the syringe, locating the syringe flange in the correct flange holder slot. The two slots are marked with the relevant syringe sizes (Standard model only - Monoject model has only one slot for all syringes). Move the carriage to engage the syringe thumbplate. Release the syringe barrel clamp to hold the syringe barrel securely in place. Locate the plunger against the carriage and secure it with the Thumbplate clamp, by closing the locking lever. Ensure that the thumbplate is correctly secured to avoid free flow when the extension set clamp is opened. When the syringe is correctly positioned and secured, replace the syringe cover. When the cover is closed, the Syringe Driver will ask for confirmation that the syringe is correct for the syringe type and size that the device has detected.
Recommended Extension Sets o o
IVAC G40015, 1.5m Luer Lock (standard PVC) [or similar] IVAC G40615, 1.5m Luer Lock, low sorbing (polyethylene) [or similar]
Preparing the Syringe and Extension Set 1. 2. 3. 4.
Prepare the syringe following the manufacturer’s directions of use. Set the syringe type if necessary (refer to previous section) Attach an appropriate Syringe Driver extension set to the syringe and purge the system as described later. Ensure all air is expelled from the extension set.
Purging the Syringe Ensure the patient is not connected to the extension set during the purging operation. Ensure extension set is re-connected to the patient after the purging operation.
!
When a syringe has been fitted, close the lid and press Yes as described in the previous section. Provided the correct syringe type has been detected, the purge select screen will be displayed. If all air has been manually primed from the set, press the Left key to select the No option. The Syringe Driver moves on to the Infusion Set-up process and the load process is complete. If the air has not been manually primed from the set, first ensure that the patient is not connected to the extension set, and that the administration set clamp is open, then press and hold the Right key to select the Yes option. If purging the syringe is chosen, hold down the Right key (Yes) until the syringe is purged or the purging volume has been delivered. The Syringe Driver pumps a preset maximum quantity of fluid through the system. The display increments to indicate progress of the purging process. When the purging volume has been delivered, the Syringe Driver moves on to the Infusion Set-up process and the load process is complete. Releasing the Right key will stop the purging operation; if the Right key is released before the desired purge volume has been delivered, the purge select screen will ask whether to continue or terminate purging. When purging is continued, the volume of purge displayed accumulates during the current operation. If purging is complete, press the Left key (No) to terminate the purging operation.
Setting up an Infusion An infusion has to have been set up before it can be run. Use the Set Rate options to program details of the infusion (volume to be infused, rate, and time). In some circumstances the infusion rate can be changed while the infusion is in progress (Titration). [Note: The supervisors responsible for administration of the use of the Syringe Drivers can use the Setup options to preset basic infusion parameters. Check with your supervisors if this is the case.] The simplest type of infusion setup is when the syringe has been loaded already containing the appropriate volume of the drug for a 24 hour infusion. As part of the normal start-up sequence, in order to bypass the screens where the infusion rate details are set up, the Syringe Driver displays the screen shown left as soon as the purge process is complete. A Yes response moves straight on to the Confirm Run screen. A No response displays the RATE VALUES screen. Note: This version of the software is permanently set for Timed mode infusion only. In this mode, the VTBI (in ml) for the infusion is measured when the syringe is loaded. The required infusion time is entered, and the Syringe Driver calculates and displays the Rate that this infusion will use.
!
ZI-4-TM-001-5
18 of 45
When programming an infusion, if none of the control keys are pressed within the key timeout period, the programming is aborted and the Syringe Driver returns to the Run Menu. Any values set are not saved.
Programming a TIMED Mode infusion In TIMED Mode, the VTBI is measured when the syringe is loaded, and the Time is entered by the operator. The resulting Rate is calculated and displayed. The VTBI can be any value from 0.1 ml to 5/10/20/30 ml, being the contents of the syringe less any amount allowed for End of Infusion. The Time can be any value from 1m to 299h 59m (subject to the rate limit of 0.1ml/h to 50/100/200ml/h). The cursor (the highlighted digit) waits at the first digit of the Time value. For each digit, use the Up key to increase the value, or the Down key to decrease the value. Press the Right key to move on to the next digit. (If a mistake is made, use the Left key to move back to the previous digit.) Repeat for each digit of the Time value until all the values are as required, and then press Enter. The Confirm Rate screen is displayed. The specified values are shown, with the selected Mode. Press the Right key to select the Yes option. The Confirm to Run screen is shown. Press the Left key to select the No option. The values set will not be saved, and the Syringe Driver returns to the Main Menu screen. Press the Right key to select the Yes option. The infusion starts to run using the specified values, and the Running screen is displayed (see page 19).
Invalid Rate indication When programming an infusion, if a rate is set which is outside the allowable range for the Syringe Driver, the Syringe Driver immediately displays the invalid rate in red. Note that this can happen as a result of the chosen Time setting. Infusion details cannot be saved until the rate is adjusted to a valid value. The Rate can be any value from 0.1 to 50, 100 or 200 ml/h (depending on syringe size, see Specifications). When the rate has been adjusted to a valid value, press Enter to continue to the confirm screen. If Enter is pressed while the Rate value is showing red, no action is taken. The infusion cannot begin until a valid rate value is specified. Note: a valid rate cannot be set if there is insufficient volume of infusate in the syringe due to over-purging.
Running an Infusion When an infusion has been programmed by loading a syringe and setting a mode and rate, use the Confirm to Run confirmation screen to run the infusion. Pressing Yes on the Confirm to Run confirmation screen starts the infusion and displays the Running screen (shown left). This screen shows the syringe type and size, and the infusion details. Rate and VTBI (Volume To Be Infused) show the values used in the current infusion. TVI shows the accumulated Total Volume Infused since it was last reset. Time shows the time the infusion has left to run. The time of day is shown at the bottom centre of every screen.
ZI-4-TM-001-5
19 of 45
The RUNNING heading on the screen alternates with MAIN MENU. Press the Right key to display the Main Menu. To return to the Running screen from the Main Menu, press the Left key. When the infusion has reached the NEOI point, the NEOI Running screen is displayed after the NEOI Warning At the end of the infusion, if KVO mode has been selected, the Rate value changes to show the KVO rate. This is explained further in the section entitled At the end of an infusion.
The battery symbol indicates the charge condition of the battery. There are two other symbols that can appear on the screen. The spanner symbol (bottom left) indicates that the Syringe Driver requires a service. This is described in the Cleaning and Maintenance section (see page 37). The padlock symbol (between the spanner and the time) indicates that the Keylock function has been selected. This is explained further on in this section (see next page).
The Main Menu All the options for programming an infusion or for running a programmed infusion can be selected from the Main Menu. To access the Main Menu, press the Right Key from the RUNNING screen, or select the No option from the Confirm to Run screen. The Main Menu lists the options for programming and running the Syringe Driver. Use the Down Key to move down the menu options, the Up Key to move back up the options, and the Enter Key to select the currently highlighted option from the menu. If an option from the menu is not selected within the key timeout period, the screen automatically reverts to the previous screen. The previous screen can also be accessed by using the Left Key (Back). If an infusion has not been programmed, the Start/Hold option will be disabled, and selecting it will have no effect. Similarly, if a syringe has not been loaded and confirmed, the Load option will be disabled, and selecting it will have no effect. Press Enter to select the Start/Hold option. The Syringe Driver starts the infusion and displays the Running screen. The options that might be required during the course of an infusion are as follows:
ZI-4-TM-001-5
•
Administering a Bolus
•
Changing the infusion Rate settings (Titration)
•
Resetting the Total Volume Infused (TVI)
•
Options at the end of an infusion
•
Stopping the infusion
•
Changing the infusion
•
Changing the syringe 20 of 45