258 Pages
Preview
Page 1
English Français Deutsch Italiano Português Español Nederlands Dansk Suomi Norsk Svenska Polski Ελληνικά Türkçe Русский 简体中文 日本語 한국어
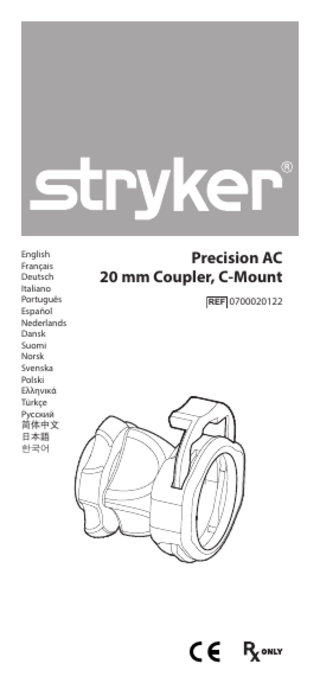
Precision AC 20 mm Coupler, C-Mount REF 0700020122
English Precision AC 20 mm Coupler, C-Mount Product Description and Intended Use The Stryker Precision AC Coupler is used to attach endoscopes to Stryker surgical camera heads that do not have an integrated coupler. The coupler facilitates the easy exchange of different-sized scopes during a surgical procedure and allows users to focus the image captured through the scope. 3 1 2 4
“AUTOCLAVE”
1. Focusing ring 2. Rear adapter (camera end) 3. Endobody clamp 4. Endobody (scope end) - marked “AUTOCLAVE” on the face of the endobody to indicate compatibility with steam sterilization
Indications The coupler is indicated for use in minimally invasive surgical procedures where a Stryker endoscopic camera and endoscope are used.
Contraindications There are no known contraindications.
Warnings and Cautions 1. Read these instructions thoroughly before using the device. 2. Before using this device, read the Precision AC Video Camera user guide (Stryker part P26182 for English, or P26185 for multilingual) for warnings, indications, intended use, and other information about using the camera system. 3. Federal law (USA) restricts this device to use by, or on order of, a physician. 4. Inspect the coupler for any damage that might have occurred during shipment or prior use. 5. The coupler contains optomechanical parts that are precisely aligned. Dropping the coupler may cause mechanical damage and/ or misalignment. 6. Test the coupler for functionality before using it in a surgical procedure. 7. This coupler is shipped non-sterile. Clean and sterilize the coupler prior to the first use and after every subsequent use. Follow the cleaning and sterilization instructions provided in this user guide. 8. No modification of this device is authorized by Stryker. EN-1
Operating the Endobody Clamp To perform setup, disassembly, and cleaning of the coupler, the endobody clamp (or “endoclamp”) must be depressed and/or released.
• To depress the endoclamp, push down as illustrated by the down arrow. • To release the endobody clamp, release pressure on the clamp and allow the spring to push the clamp into its original position, as illustrated by the up arrow.
Setting Up the Coupler When attaching or removing the coupler, grip only the rear adapter, as twisting other parts of the coupler with force may result in mechanical damage. Do not overtighten the coupler, as this may damage the front window of the camera. 1. Gripping the rear adapter, screw the coupler clockwise onto the camera head until it forms a tight seal.
EN-2
2. Depress the endobody clamp 1 and insert a scope into the endobody 2 . Before each use, check the outer surface of the endoscope to ensure there are no rough surfaces, sharp edges, or protrusions. 1
2 4
3
3. Release the endobody clamp to secure the scope. 4. Attach a light cable from the light source to the light post on the endoscope 3 . 5. With the camera console turned on, rotate the coupler’s focusing ring 4 to establish a sharp focus on the display monitor. Note: To remove the coupler, grip the rear adapter and unscrew the coupler counterclockwise from the camera head.
Reprocessing These reprocessing instructions are provided in accordance with ISO 17664, ISO 17665, AAMI TIR12, AAMI ST79, and AAMI ST81. The instructions have been validated by Stryker as being capable of preparing the device for re-use. To achieve the desired result, the processor shall ensure that the following instructions are performed as written in their entirety and as appropriate in the processor’s facility. This normally requires routine monitoring and validation of the facility’s reprocessing procedures. Stryker recommends users observe these standards when reprocessing medical devices.
Overview Reprocessing the coupler involves manual or automated cleaning with two different detergents, optional disinfection, and sterilization. • Step 1 (required): Cleaning with Enzymatic Detergent • Step 2 (required): Cleaning with Non-Enzymatic Detergent • Step 3 (optional): Disinfection • Step 4 (required): Sterilization
EN-3
Warnings • This device must be cleaned and sterilized prior to the first use and after every subsequent use. • Use only the sterilization cycles outlined in this document. Using unspecified sterilization cycles can damage the device or result in incomplete sterilization. • Separate the camera head, coupler, and scope prior to cleaning, disinfection, and sterilization. Failure to follow this instruction will render the devices non-sterile. (Refer to the camera head and scope product manuals for reprocessing instructions for those devices.) • Only couplers marked AUTOCLAVE can withstand steam sterilization. Autoclaving couplers that do not bear this marking will result in non-sterile product and product damage. Refer to the “Product Description and Intended Use” section for the location of the AUTOCLAVE marking on the Precision AC Coupler. • To avoid health risks from aerosol contamination, wipe and brush the device only when it is submerged in liquid. • Wear appropriate protective equipment: gloves, eye protection, etc.
Cautions • Do not use brushes or pads with metal or abrasive tips during manual cleaning, as permanent scoring or damage could result. • To minimize galvanic corrosion, avoid soaking dissimilar metals in close proximity.
Limitations on Reprocessing • Do not cross-sterilize the device. Using multiple sterilization methods can significantly reduce the performance of the device. • Proper processing has a minimal effect on this device. End of life is normally determined by wear and damage due to use. • Do not leave the device in solutions longer than necessary. This can accelerate normal product aging. • If the coupler is cleaned with the automated cleaning method, steam sterilization is recommended. Repeated automated cleaning when sterilizing with Sterrad or V-Pro can degrade the product’s cosmetic appearance. • Repeated sterilization via Sterrad 100NX can degrade the product’s cosmetic appearance. • Damage incurred by improper processing will not be covered by the warranty.
EN-4
Materials and Equipment All materials and equipment required to reprocess the coupler shall be supplied by the user unless otherwise noted. Item
Description
All phases Gloves, eye protection, etc.
Wear protective equipment as required by the medical facility and procedure.
Cleaning Tray
For safe transportation of device within the medical facility. Not to be used for reprocessing the device unless sterilized first.
Water basin
Large enough to accommodate device
Enzymatic detergent
Used in cleaning solution to remove surgical debris
Tap water
To prepare cleaning solutions
1
Syringe
Minimum volume: 50 mL
Soft-bristed brush
To clean exterior of device
Reverse osmosis/ deionized water3
To rinse device
Clean cloth or filtered pressurized air
To assist with drying
Non-enzymatic detergent4
Used in cleaning solution to remove surgical debris
Automated washer
For using the automated cleaning procedure
2
Disinfection Washer disinfector
To perform thermal disinfection
Sterilization Sterilization system
• Steam (Autoclave) • Steris®/Amsco® V-PRO® maX, V-PRO 1 Plus, or V-PRO 1 • Sterrad® 100S, 200, NX®, or 100NX®
Sterilization wrap5, 6
To maintain sterile barrier
Sterilization tray
Optional. Must be compatible with sterilization method.
6
1
Cleaning was validated using Enzol® Enzymatic Detergent at 1 oz/gal. Cleaning was validated using an M16 brush. Cleaning was validated using reverse osmosis/deionized (RO/DI) water. 4 Cleaning was validated using Prolystica® 2x Neutral Detergent at 1/8 oz/gal. 5 Sterilization was validated using Kimberly-Clark® KC600 KIMGUARD sterilization wrap. 6 For United States users: when sterilizing the device, use only sterilization wraps and sterilization trays that have been cleared by the FDA to use with the selected sterilization cycle. 2 3
EN-5
Instructions for Reprocessing Point of Use • Disassemble the coupler from the scope and camera head. To disconnect the scope, depress the endobody clamp on the coupler and remove the scope from the coupler. To disconnect the coupler, grip the rear adapter of the coupler and unscrew it counterclockwise from the camera head. • Wipe excess soil from the device with a clean sterile cloth. Containment and Transportation • Reprocess the device as soon as reasonably practical following use. • Transport the device in a tray to avoid damage. Follow the facility’s internal procedures for the transportation of contaminated surgical instruments and devices.
Cleaning Manual Cleaning 1. Soak • Prepare a solution of enzymatic detergent and tap water at 35°C. Refer to the manufacturer’s instructions for detergent concentration and any other recommendations. • Fully immerse the device and use an appropriately-sized syringe to inject any mated surfaces and crevices with at least 50 mL of the prepared detergent. • Soak the device for a minimum of 15 minutes. 2. Brush • Thoroughly brush the exterior of the device with a softbristled brush for 1 minute, focusing on any crevices and mated surfaces. • Inject any mated surfaces and crevices a minimum of 5 times with 50 mL of the prepared detergent. • While pushing down on the endobody clamp, brush between all gaps and crevices. Continue brushing all gaps and crevices while releasing the clamp to the initial position. (Refer to the “Operating the Endobody Clamp” section for more detail about moving the clamp.) 3. Rinse • Remove the device from the prepared detergent. Rinse the device with reverse osmosis/deionized water at ambient temperature for 1 minute or until all visible detergent residue has been removed. • Flush any mated surfaces and crevices a minimum of 5 times. After all visible detergent residue has been removed, continue to rinse for 30 seconds. • Drain excess water from the device and dry it using a clean cloth or filtered pressurized air. • Visually inspect the device for cleanliness, paying close attention to hard-to-reach areas. If visible soil remains, repeat steps 1 through 3.
EN-6
4. Soak • Prepare a solution of non-enzymatic detergent and tap water at 35°C. Refer to the manufacturer’s instructions for detergent concentration and any other recommendations. • Fully immerse the device and use an appropriately-sized syringe to inject any mated surfaces and crevices with at least 50 mL of the prepared detergent. • Soak the device for a minimum of 15 minutes. 5. Brush • Thoroughly brush the exterior of the device with a softbristled brush for 1 minute, focusing on any crevices and mated surfaces. • Inject any mated surfaces and crevices a minimum of 5 times with 50 mL of the prepared detergent. • While pushing down on the endobody clamp, brush between all gaps and crevices. Continue brushing all gaps and crevices while releasing the clamp to the initial position. (Refer to the “Operating the Endobody Clamp” section for more detail about moving the clamp.) 6. Rinse • Remove the device from the prepared detergent. Rinse the device with reverse osmosis/deionized water at ambient temperature for 1 minute or until all visible detergent residue has been removed. • Flush any mated surfaces and crevices a minimum of 5 times. After all visible detergent residue has been removed, continue to rinse for 30 seconds. • Drain excess water from the device and dry it using a clean cloth or filtered pressurized air. • Visually inspect the device for cleanliness, paying close attention to hard-to-reach areas. If visible soil remains, repeat steps 1 through 6.
EN-7
Automated Cleaning Caution: If the coupler is cleaned with the automated cleaning method, steam sterilization is recommended. 1. Soak • Prepare a solution of enzymatic detergent and tap water at 35°C. Refer to the manufacturer’s instructions for detergent concentration and any other recommendations. • Fully immerse the device and use an appropriately-sized syringe to inject any mated surfaces and crevices with at least 50 mL of the prepared detergent. • Soak the device for a minimum of 15 minutes. 2. Brush • Thoroughly brush the exterior of the device with a softbristled brush for 1 minute, focusing on any crevices and mated surfaces. • Inject any mated surfaces and crevices a minimum of 5 times with 50 mL of the prepared detergent. • While pushing down on the endobody clamp, brush between all gaps and crevices. Continue brushing all gaps and crevices while releasing the clamp to the initial position. (Refer to the “Operating the Endobody Clamp” section for more detail about moving the clamp.) 3. Rinse • Remove the device from the prepared detergent. Rinse the device with reverse osmosis/deionized water at ambient temperature for 1 minute or until all visible detergent residue has been removed. • After all visible detergent residue has been removed, continue to rinse for 30 seconds. 4. Automated Wash • Place the device in the washer on an incline to facilitate drainage. • Program the washer using the following parameters:
EN-8
Pre-Wash Recirculation Time Water Temperature Detergent Type
2 Minutes Cold Tap Water N/A
Enzyme Wash Recirculation Time Water Temperature Detergent Type
2 Minutes Hot Tap Water Enzymatic Detergent
Wash 1 Recirculation Time Water Temperature Detergent Type
2 Minutes 66°C Set Point Non-Enzyamtic Detergent5
Rinse 1 Recirculation Time Water Temperature Detergent Type
2 Minutes Hot Tap Water N/A
Dry Phase Recirculation Time Water Temperature Detergent Type
7 Minutes 115°C N/A
• Filtered pressurized air (≤40 psi) can be used to aid in drying. • Visually inspect the device for cleanliness, paying close attention to hard-to-reach areas. If visible soil remains, repeat steps 1 through 4. Drying • For automated drying, use the drying cycle provided with the washer. • For manual drying, use a clean, lint-free cloth. • Filtered pressurized air (≤40 psi) can be used to aid in drying any crevices, mated surfaces, and hard-to-reach areas.
Disinfection (Optional) Thermal Disinfection The device must be sterilized after disinfection. Failure to sterilize the device before reuse presents an acute infection control risk to the patient. Follow the steps below to disinfect the device using thermal disinfection. 1. Place the device into the washer disinfector. 2. Program the washer using the following parameters: Thermal Disinfection Recirculation Time Water Temperature
1 Minute 90°C
EN-9
Sterilization After performing the cleaning instructions specified above, perform one of the following sterilization cycles: Steam Steam sterilization is intended only for couplers marked AUTOCLAVE. Steam sterilizing couplers that do not bear this marking will result in non-sterile product and product damage. Refer to the “Product Description and Intended Use” section for the location of the AUTOCLAVE marking on the Precision AC Coupler. 1. Clean and prepare the coupler as recommended in this user guide. 2. If using a sterilization tray (optional), follow any additional instructions provided with the tray. Use only trays that are compatible with steam sterilization. 3. Double wrap the coupler (or tray) prior to sterilization. 4. Sterilize the coupler using the parameters below. Note: The water used in the autoclave process must meet standards for clean steam per AAMI ST79 Annex M – Steam Quality. • For routine reprocessing with steam sterilization, use the following Gravity or Pre-Vacuum cycles. Gravity Wrapping Temperature Sterilization Time Dry Time
Double 132°C (270°F) 134°C (274°F) 15 minutes 10 minutes 12 minutes
Pre-Vacuum Wrapping Temperature Sterilization Time Dry Time
Double 132°C (270°F) 134°C (274°F) 4 minutes 3 minutes 25 minutes 30 minutes
• Immediate-use steam sterilization (IUSS, or “Flash”) is intended only for emergency situations. In the event that immediateuse steam sterilization is required, the following instructions should be used. Immediate-use steam sterilization should only be used in carefully selected clinical situations (e.g. an instrument needed for a case falls on the floor and no replacement instrument is available). IUSS should not be used due to inadequate inventory. “Flash” Pre-Vacuum Wrapping Temperature Sterilization Time Dry Time EN-10
132°C (270°F) 4 minutes
None 134°C (274°F) 3 minutes None
Steris/Amsco V-PRO 1. Clean and prepare the coupler as recommended in this user guide. 2. If using a sterilization tray (optional), follow any additional instructions provided with the tray. Use only trays that are approved for sterilization with Steris/Amsco V-PRO. 3. Double wrap the coupler (or tray) prior to sterilization. 4. Sterilize the device using one of the following V-PRO sterilization systems: • V-PRO maX Sterilizer (Non-Lumen or Standard cycle) • V-PRO 1 Plus Sterilizer (Non-Lumen or Standard cycle) • V-PRO 1 Sterilizer (Standard cycle). STERRAD® 1. Clean and prepare the coupler as recommended in this user guide. 2. If using a sterilization tray (optional), follow any additional instructions provided with the tray. Use only trays that are compatible with Sterrad. Not all sterilization trays are compatible with STERRAD® systems. Using an incompatible tray may result in incomplete device sterilization. Consult the instructions that came with your sterilization tray to determine which sterilization method is compatible with your tray and devices. If a compatible tray is not available, the devices can be double-wrapped for use with the STERRAD® system. 3. Double wrap the coupler (or tray) prior to sterilization. 4. Sterilize the coupler following the instructions of the manufacturer, using the Sterrad 100S, 200, NX, or 100NX Sterilization System. Select the standard cycle.
EN-11
Maintenance Maintenance, Inspection, and Testing • Inspect the device on a continual basis. If a problem is observed or suspected, the device should be returned for evaluation and/or repair. • Inspect all components for cleanliness. If fluid or tissue buildup is present, repeat the above cleaning and disinfection procedures.
Storage Store the coupler in a dry, clean, and dust-free environment at room temperatures.
Expected Service Life The Precision AC Coupler has an expected service life of 2 years, except with repeated use of an automated washer the expected service life is 1 year. Note: If the coupler is cleaned with the automated cleaning method, steam sterilization is recommended. Repeated automated cleaning when sterilizing with Sterrad or V-Pro can degrade the product’s cosmetic appearance. When the device has reached the end of its service life, dispose of it according to local laws and hospital practices.
Technical Specifications Transportation and Storage Conditions
Temperature: -18–60°C
Operating Conditions
Temperature: 10–40°C
Relative Humidity: 15–90%
Relative Humidity: 25–75%
EN-12
Symbols Symbols found on the Precision AC Coupler, its packaging, and in this manual have specific meanings that clarify the proper use and storage of the device. The following list defines the symbols associated with this product: Federal law (USA) restricts this device to use by, or on order of, a physician Caution (consult instructions for use)
Consult instructions for use
Date of manufacture
Legal manufacturer
Device is shipped non-sterile and must be sterilized before use
Product catalog number
Serial number
The device meets requirements for safety and effectiveness set forth in MDD 93/42/EEC
Stryker European representative
Product is manufactured in Singapore
Temperature limitation
Relative humidity limitation
EN-13
Produced For: Stryker Endoscopy 5900 Optical Court San Jose, CA 95138 USA 1-408-754-2000, 1-800-624-4422 www.stryker.com Patents: www.stryker.com/patents Stryker Corporation or its divisions or other corporate affiliated entities own, use or have applied for the following trademarks or service marks: the Stryker logo. All other trademarks are trademarks of their respective owners or holders. P26183 D 2015/02